How I Setup ESP32 Cam with Frigate And Home Assistant To Detect Objects — Step-By-Step Guide
Written by
Featured Video
In this article, we will be looking at how we configure Frigate to detect object and then connect it to Home Assistant to receive notification.
Table of Contents
Requirements
- ESP32 Camera working with a Camera server
If you have not got it working you can refer to this guide here to see how you can get your ESP32 camera up and running - HACS — Home Assistant Community Store
If you have not installed it, you can check this video where I show you how you can set it up.
Important Note: If you planning to install Frigate on Raspberry Pi, it would be pretty slow or may not work at all as Frigate takes quite some CPU power.
I would recommend using Frigate as an addon in Home Assistant OS if you are running more powerful hardware compared to a Raspberry Pi.
Another option is to run Frigate on a separate machine using a docker container and connect it to Home Assistant.
Install Frigate Addon In Home Assistant OS
Navigate to the Addon store in the settings section and click “Addons store” in the bottom right-hand corner.
Now, click on the three dots in the right-hand top corner and choose “add repository”
Add the following repository value
https://github.com/blakeblackshear/frigate-hass-addons
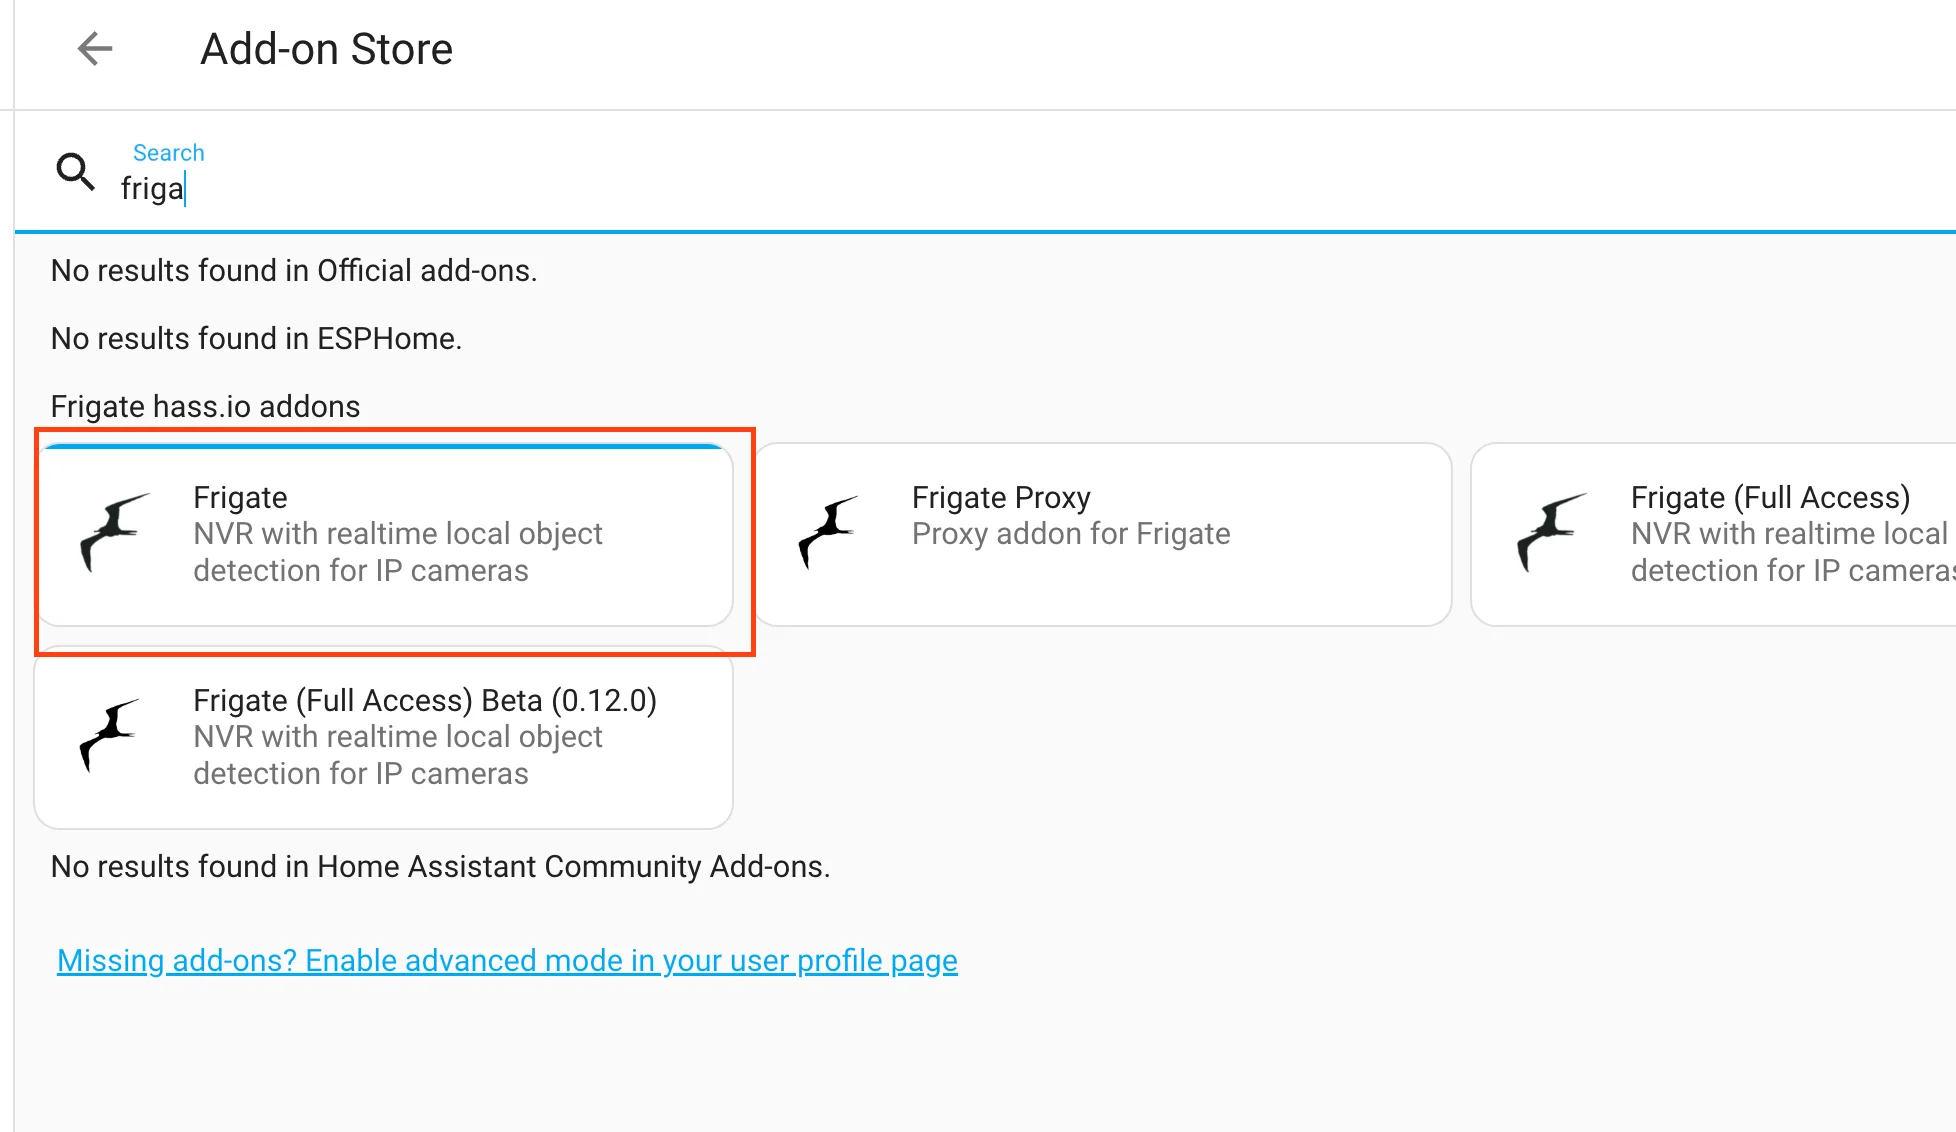
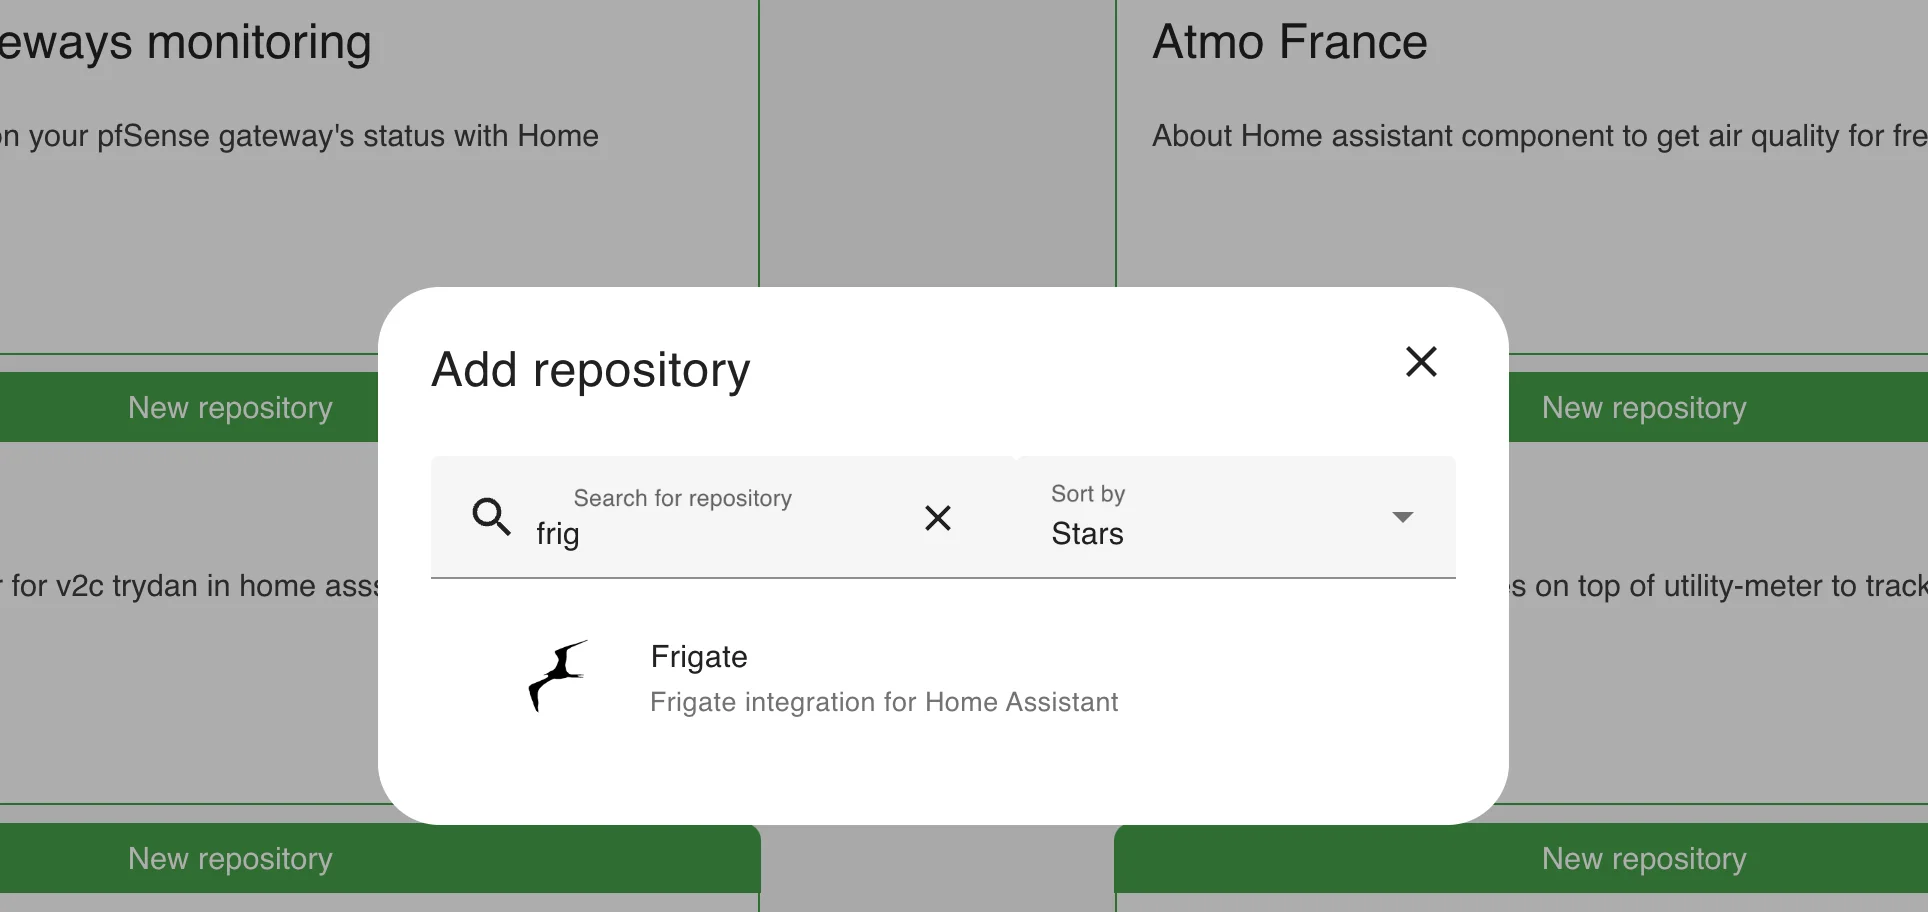
Now refresh the UI, search for “Frigate” and choose the Frigate option
Now, click on “Install” and then after installation click on “Start”.
Finally, turn on the option to “Show in sidebar”. This will make it easy to access it.
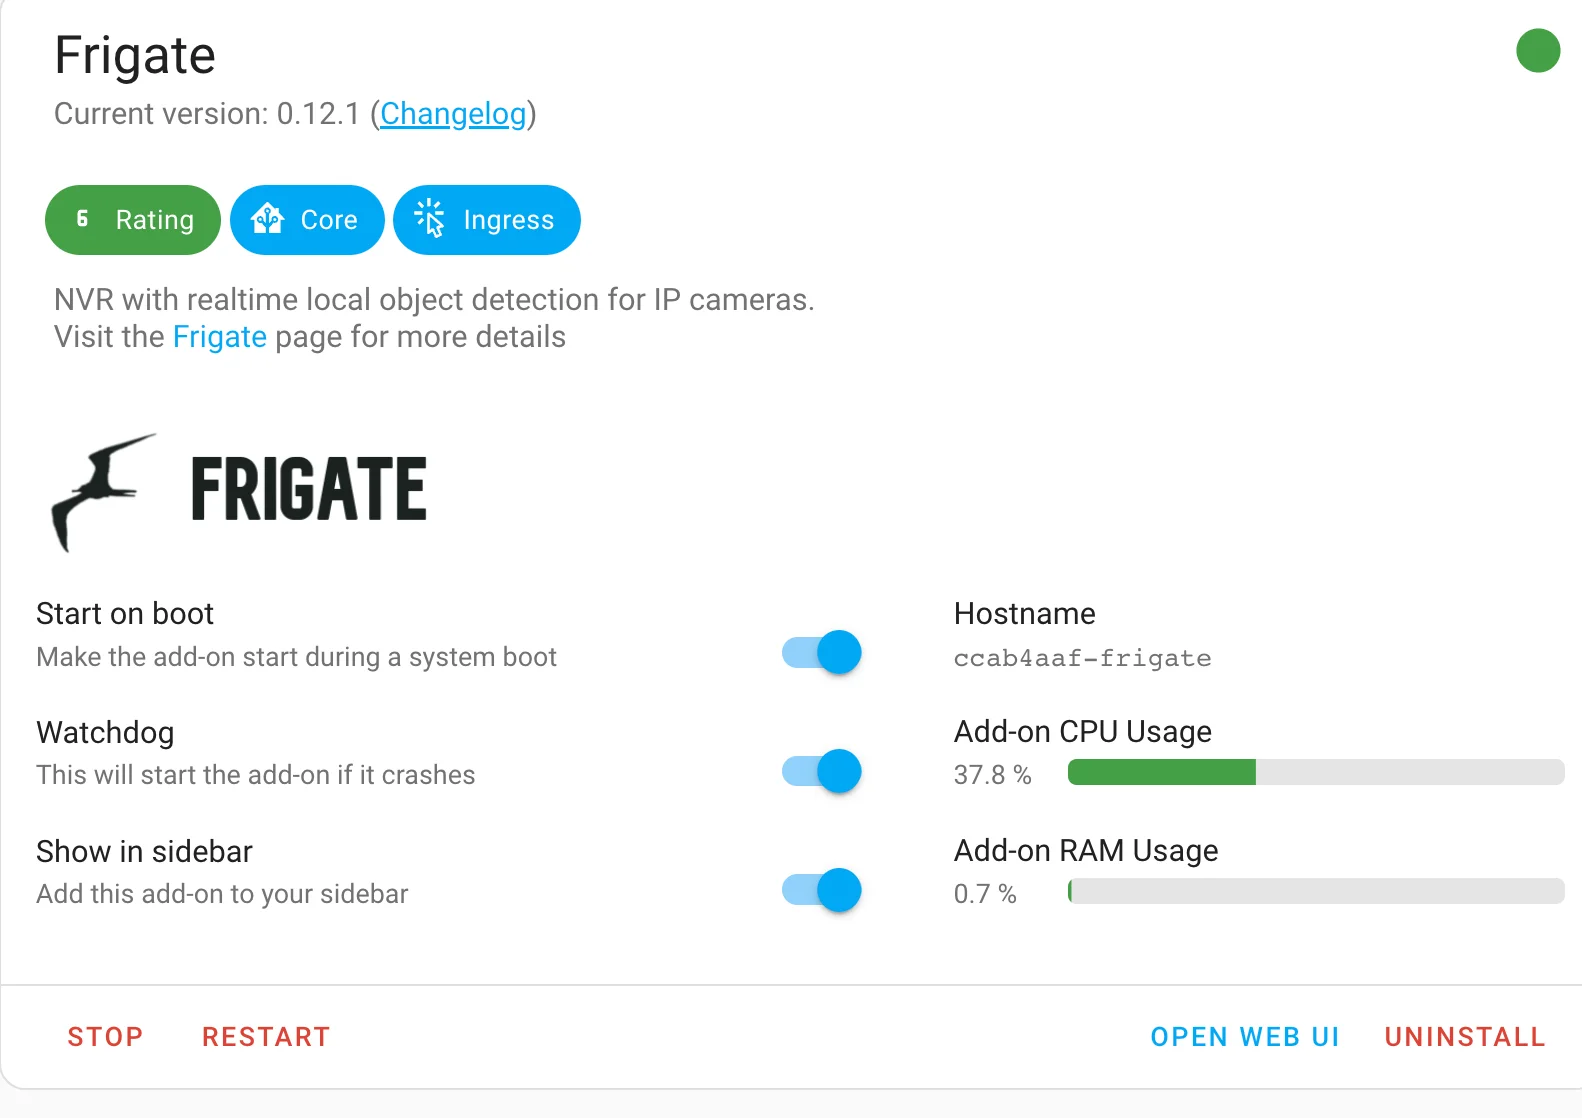
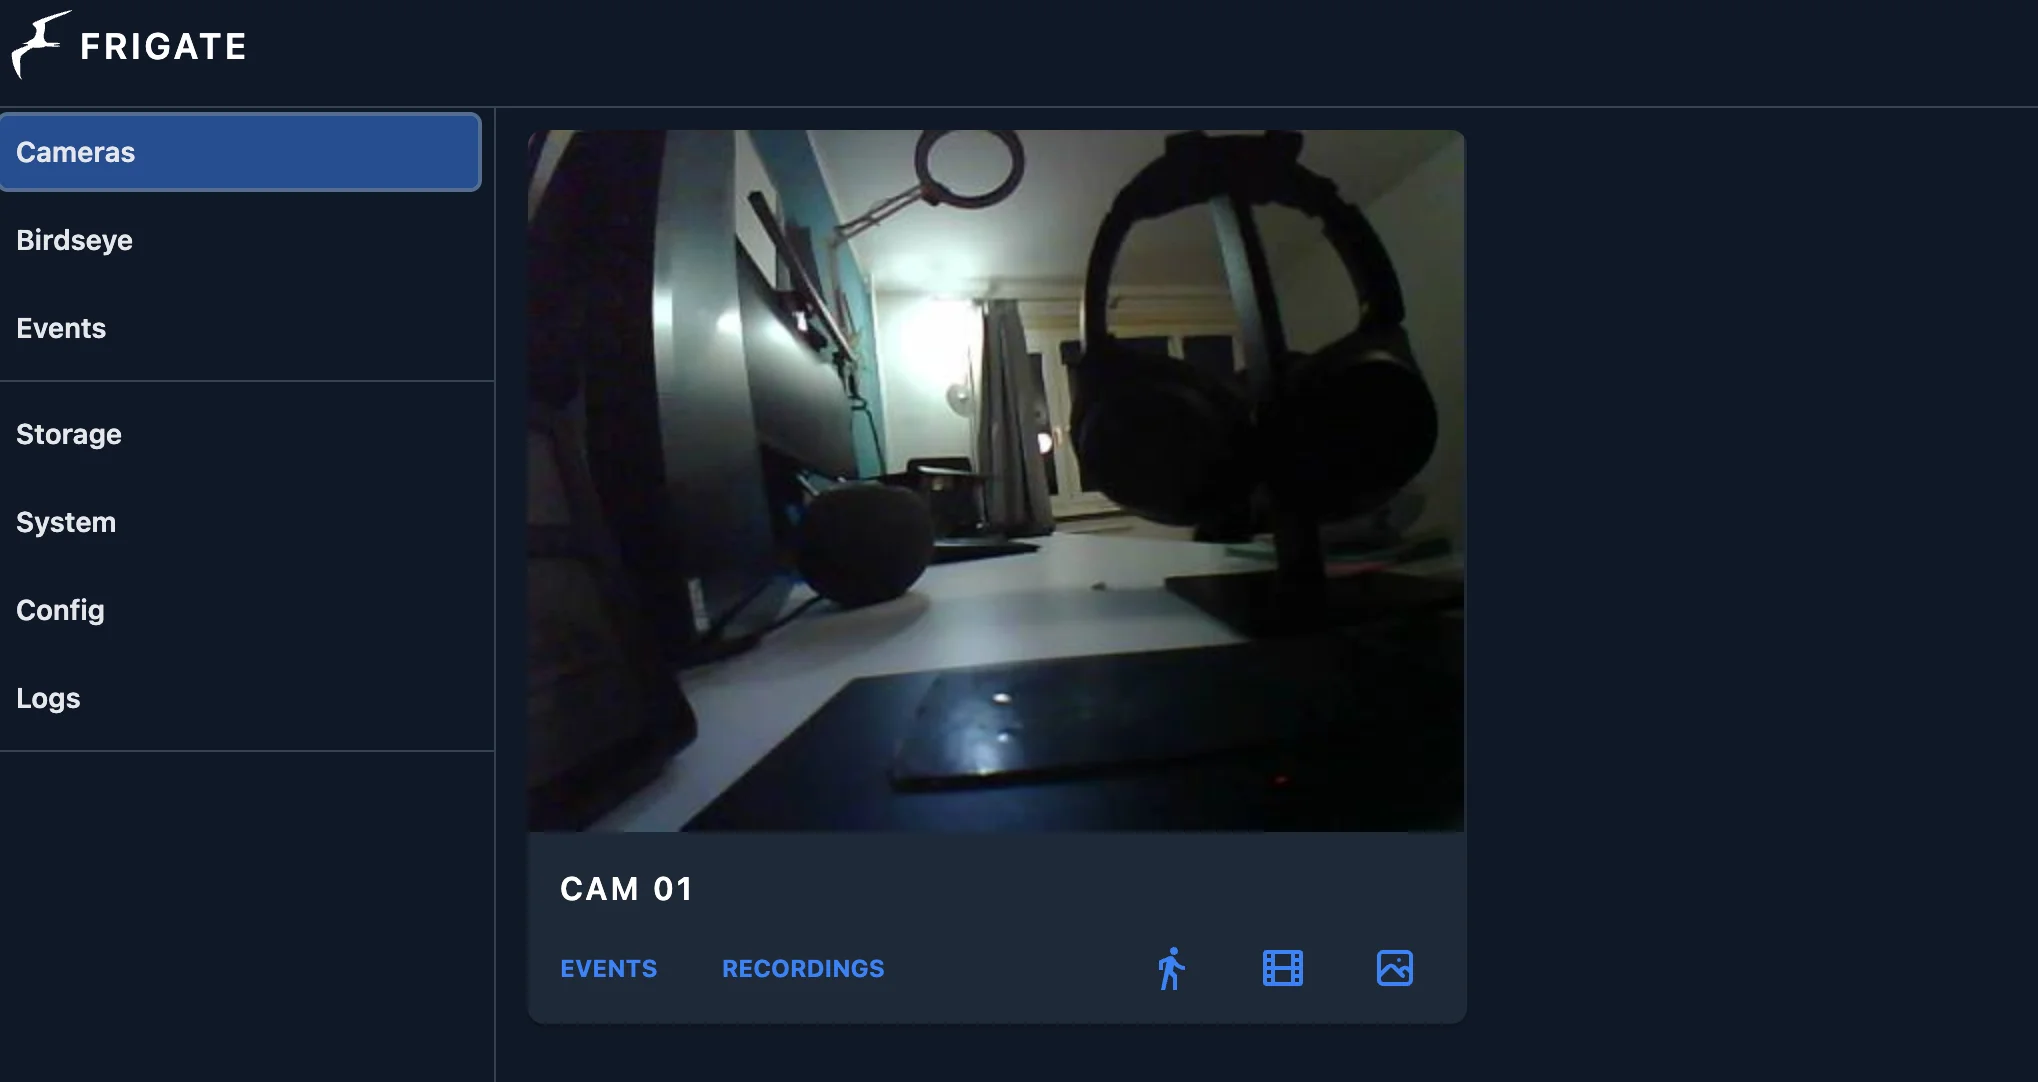
Now you can access the Frigate UI in the left panel.
Next, you will have to run an MQTT broker. You can refer this guide here, to see how you can run it.
Run Frigate As a Docker Container With Docker Compose
To run Frigate as a Docker container, you will need to create a file named docker-compose.yaml and add the following content.
version: "3.9"
services:
  frigate:
    container_name: frigate
    privileged: true # this may not be necessary for all setups
    restart: unless-stopped
    image: ghcr.io/blakeblackshear/frigate:stable
    shm_size: "64mb"
    devices:
      - /dev/dri/renderD128 # for intel hwaccel, needs to be updated for your hardware
    volumes:
      - /etc/localtime:/etc/localtime:ro
      - ./config.yml:/config/config.yml
      - ./storage:/media/frigate
      - type: tmpfs # Optional: 1GB of memory, reduces SSD/SD Card wear
        target: /tmp/cache
        tmpfs:
          size: 1000000000
    ports:
      - "5000:5000"
      - "8554:8554" # RTSP feeds
      - "8555:8555/tcp" # WebRTC over tcp
      - "8555:8555/udp" # WebRTC over udp
    environment:
      FRIGATE_RTSP_PASSWORD: "password"
Note: Since I am running this on an Intel-based system, I have added /dev/dri/renderD128 to add Hardware acceleration.
You can check out this documentation to select the appropriate option for your machine.
You can also decide not to add the “devices” option in the file and use Frigate without hardware acceleration.
Now you can run it with docker compose up command to start Frigate.
Along with this, you will need an MQTT message broker.
You can check out this link here, wherein I explain how you can install it in Home Assistant OS as well as a Docker container.
With this, you have just started running Frigate.
Now let’s configure a camera in Frigate.
Adding ESP32 Camera to Frigate
For this, open the figate UI and click on the config option in the left panel.
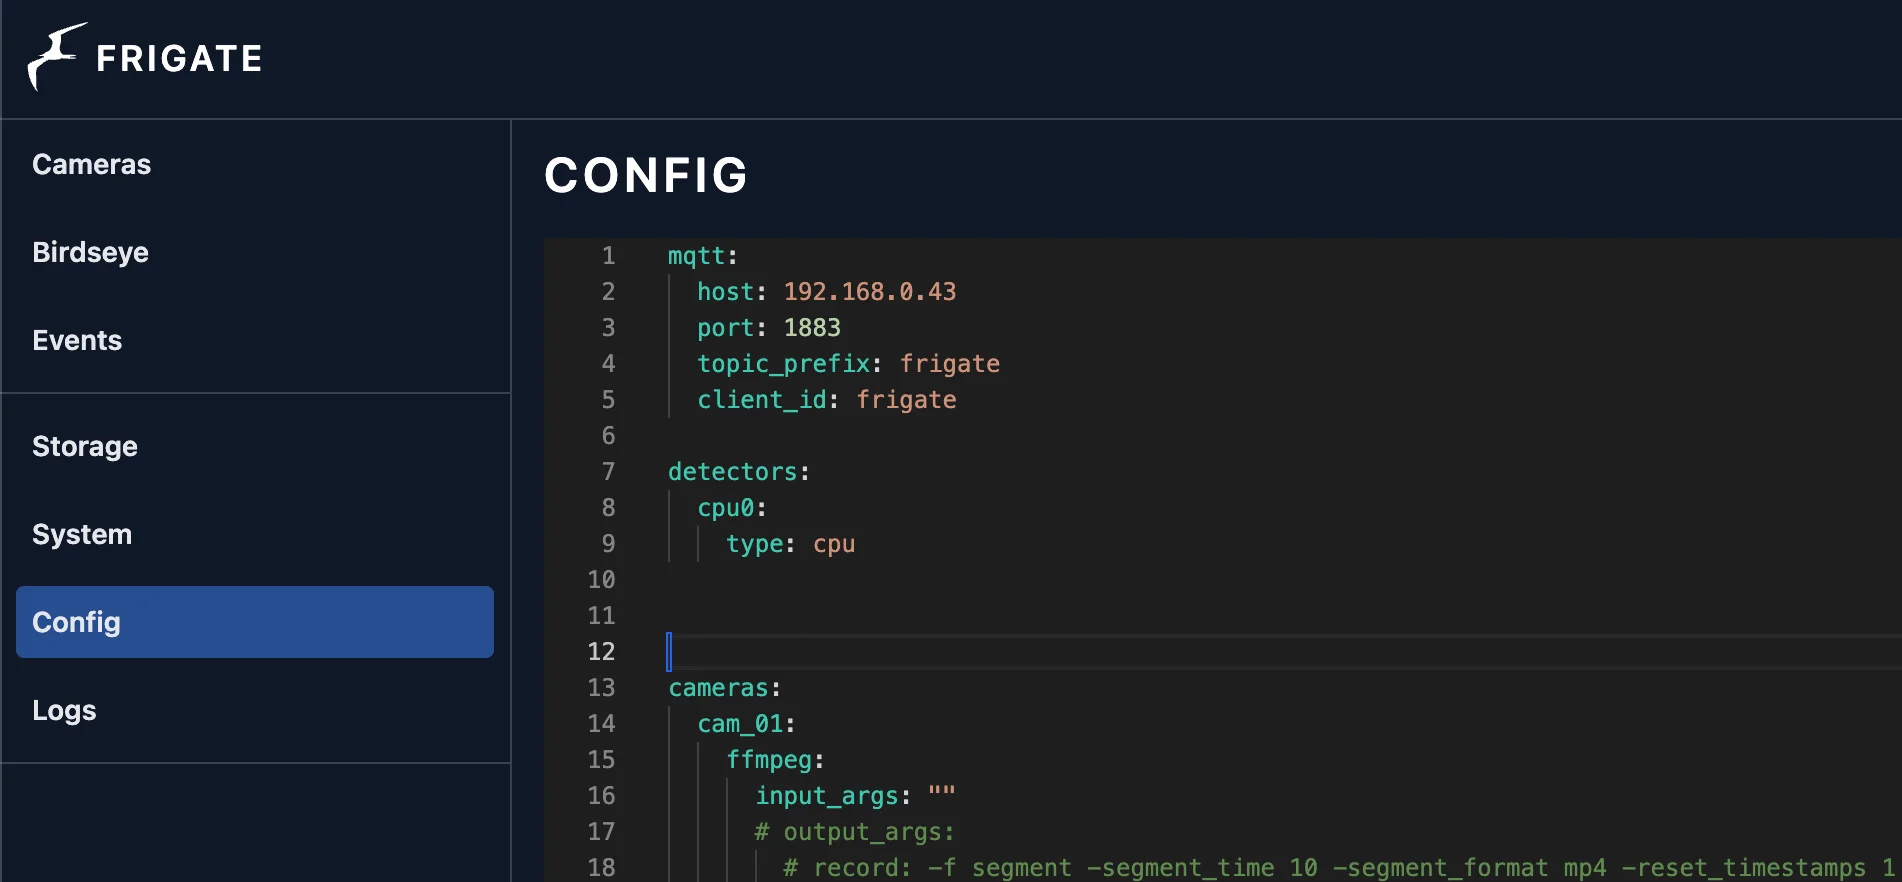
Now add the following configuration
mqtt:
  host: 192.168.0.43  # ip address of your mqtt broker
  port: 1883
  topic_prefix: frigate
  client_id: frigate

detectors:
  cpu0:
    type: cpu

cameras:
  cam_01:
    ffmpeg:
      input_args: ""
      inputs:
        - path: http://192.168.0.98:8080  #ESp32 camera location
          roles:
            - detect
            - record

      output_args:
       record: -f segment -pix_fmt yuv420p -segment_time 10 -segment_format mp4 -reset_timestamps 1 -strftime 1 -c:v libx264 -preset ultrafast -an
    rtmp:
      enabled: False
    snapshots:
      enabled: true
      bounding_box: true
    record:
      enabled: True
      retain:
        days: 0 # To not retain any recording if there is no detection of any events

      events:
        retain:
          default: 3 # To retain recording for 3 days of only the events that happened
          mode: active_objects

    detect:
      enabled: True
      width: 800
      height: 600
      fps: 20      #Adjust the fps based on what suits your hardware.
    objects:
      track:
        - person
Now the above configuration is setting the following.
- Setting the connection to an MQTT broker.
- Setting the detectors to use CPU.
- Specifying the IP address of the ESP32 Camera
- Record role to record clips and detect role to detect events.
- Capture snapshots and show the bounding box.
- Enabling Recording and setting retention time.
- Object tracking is set to track people.
With this, click on save and restart.
Once it restarts you should be able to see your ESP32 Camera output in the camera section
Now let’s connect it to Home Assistant
Connecting Frigate to Home Assistant
For this you will have to open HACS, click on “Integrations” and click on “Explore & Download Repository” from the bottom right-hand corner.
Now search for Frigate and you should find the Frigate Integration
Click on it and then click “Download” from the bottom right-hand corner.
Once it's downloaded, make sure you restart Home Assistant.
Once Home Assistant starts up, navigate to “Settings”, then “Devices & Services”.
Then click on “Add Integration” in the bottom right-hand corner, search for “Frigate” and install it.
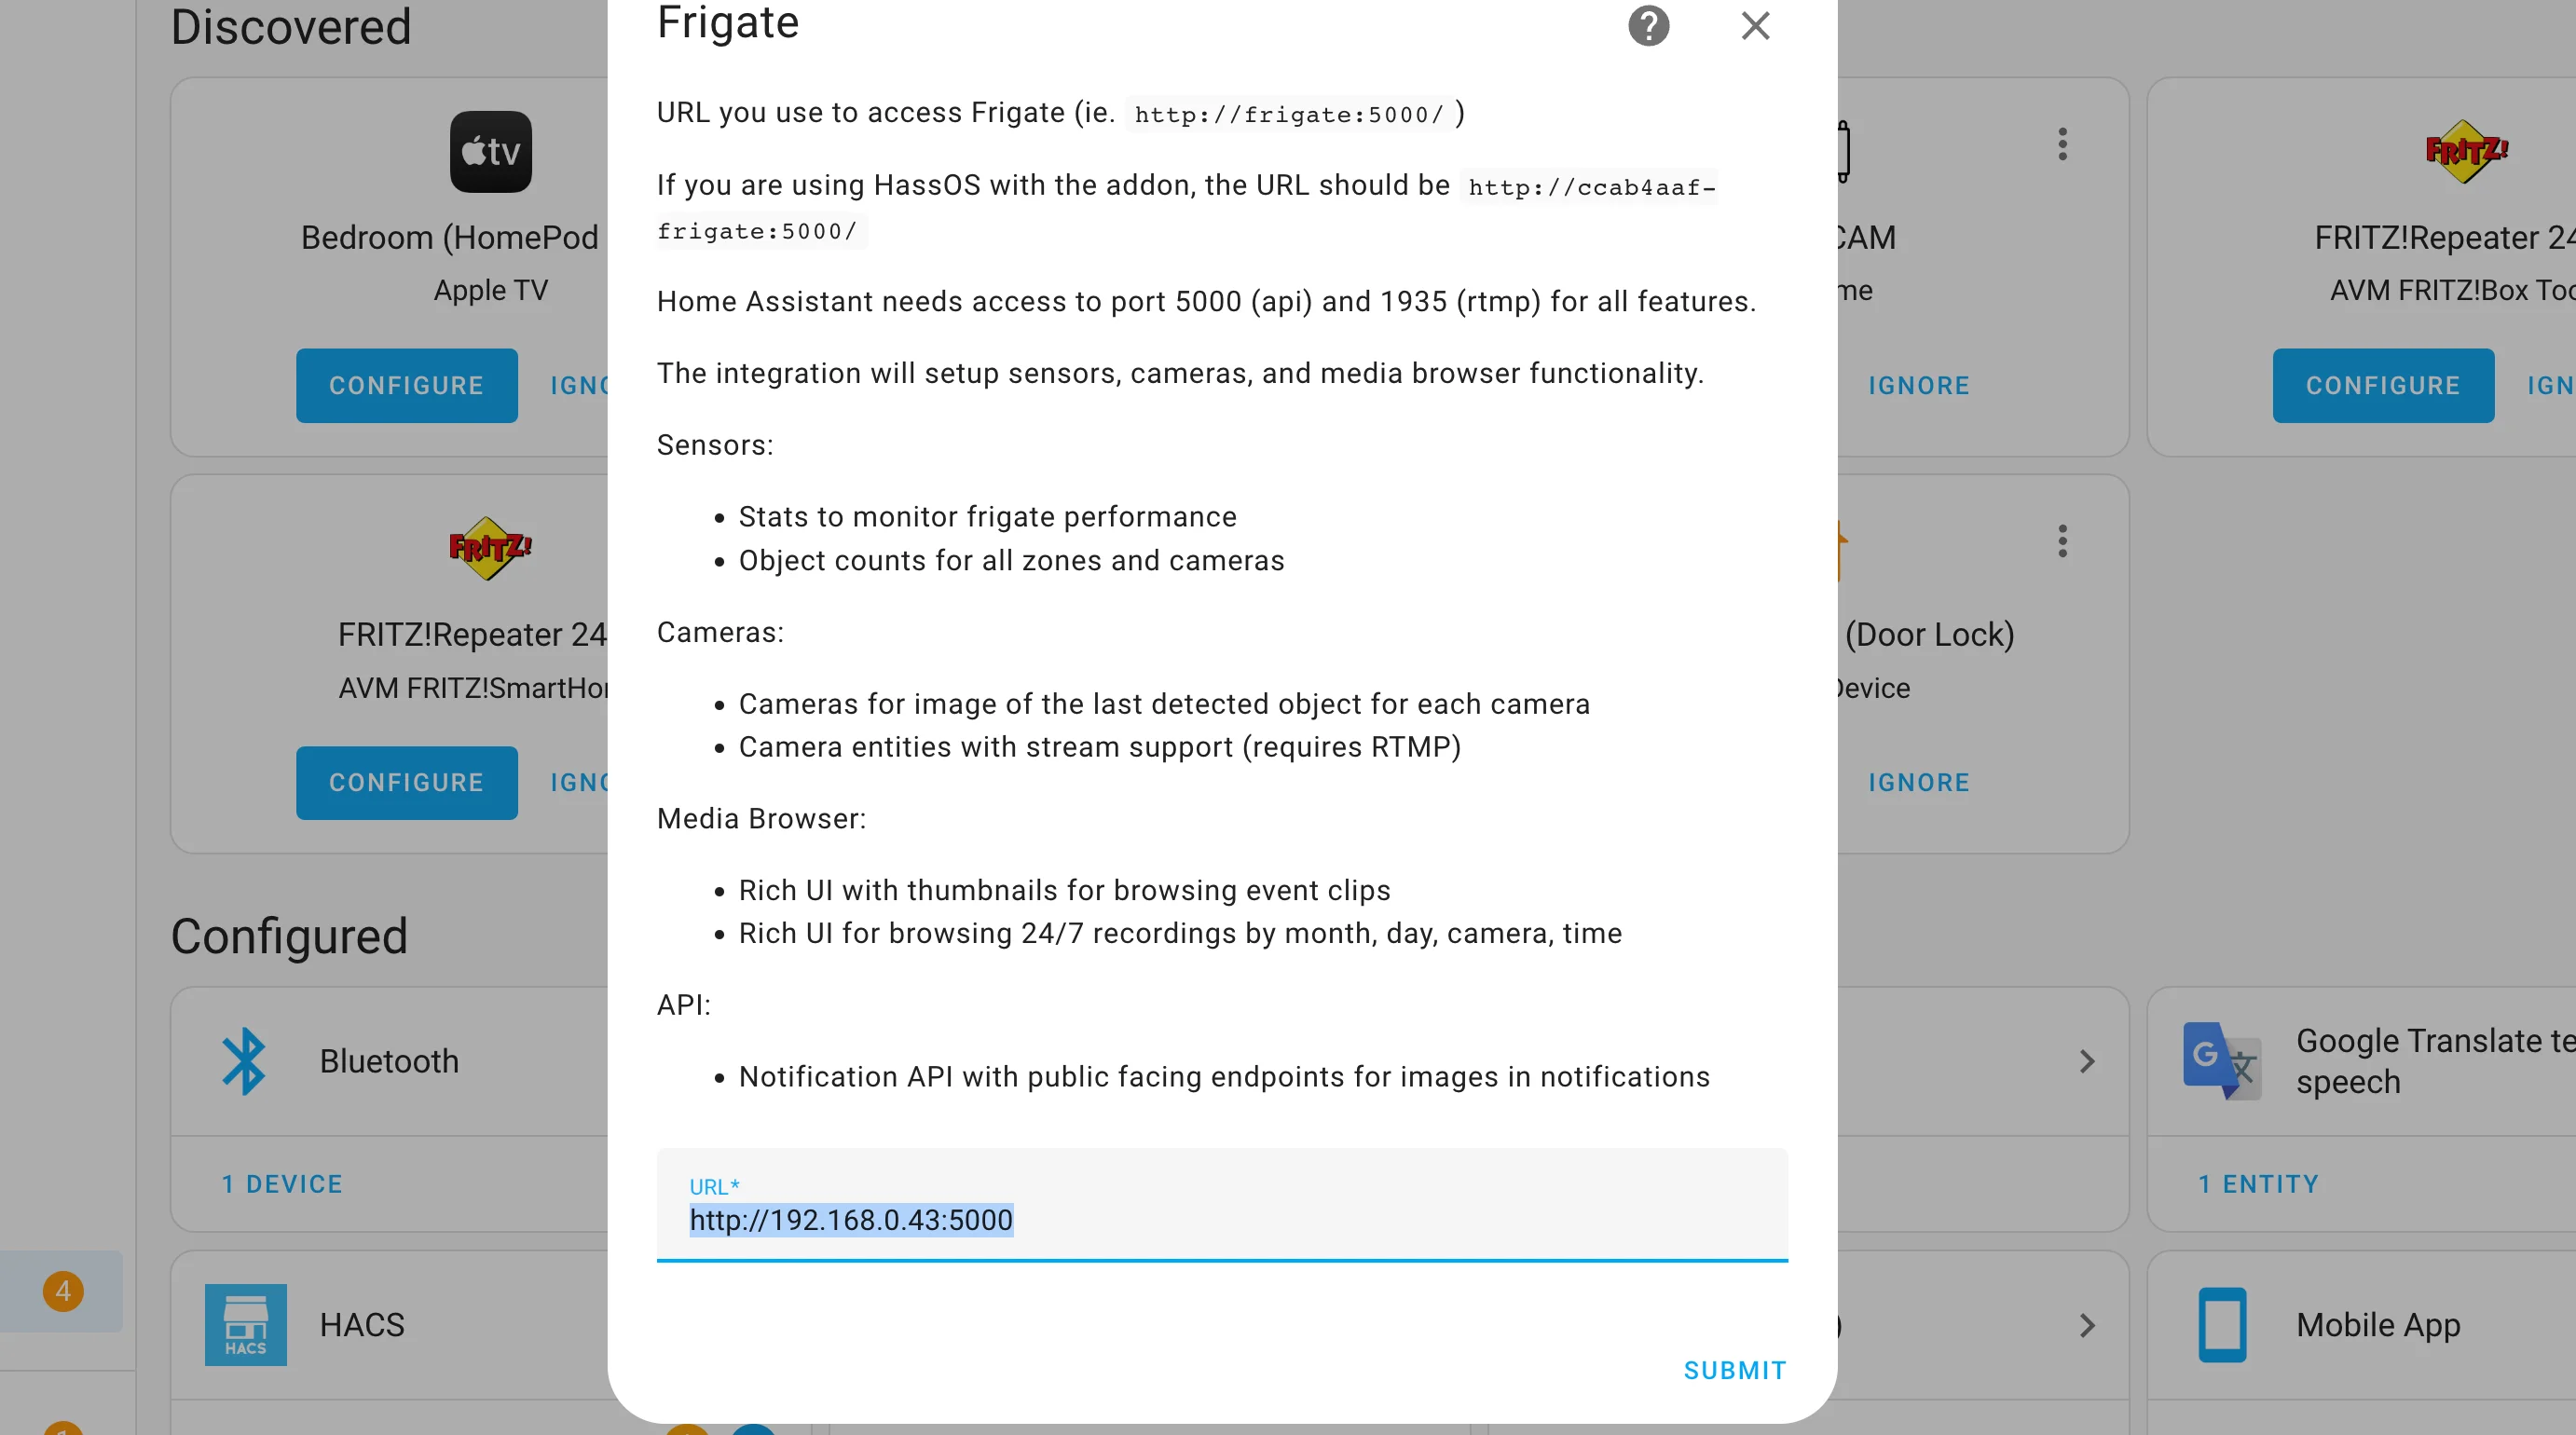
If you are running Frigate as a Home Assistant OS addon, you can leave the default value that appears and click submit.
If you are running Frigate as a Docker container then you will have to provide the IP address of the machine running Frigate and keep the default port of 5000 as shown in the picture above.
On clicking submit you should be able to view your ESP32 Camera as one of the devices in Frigate
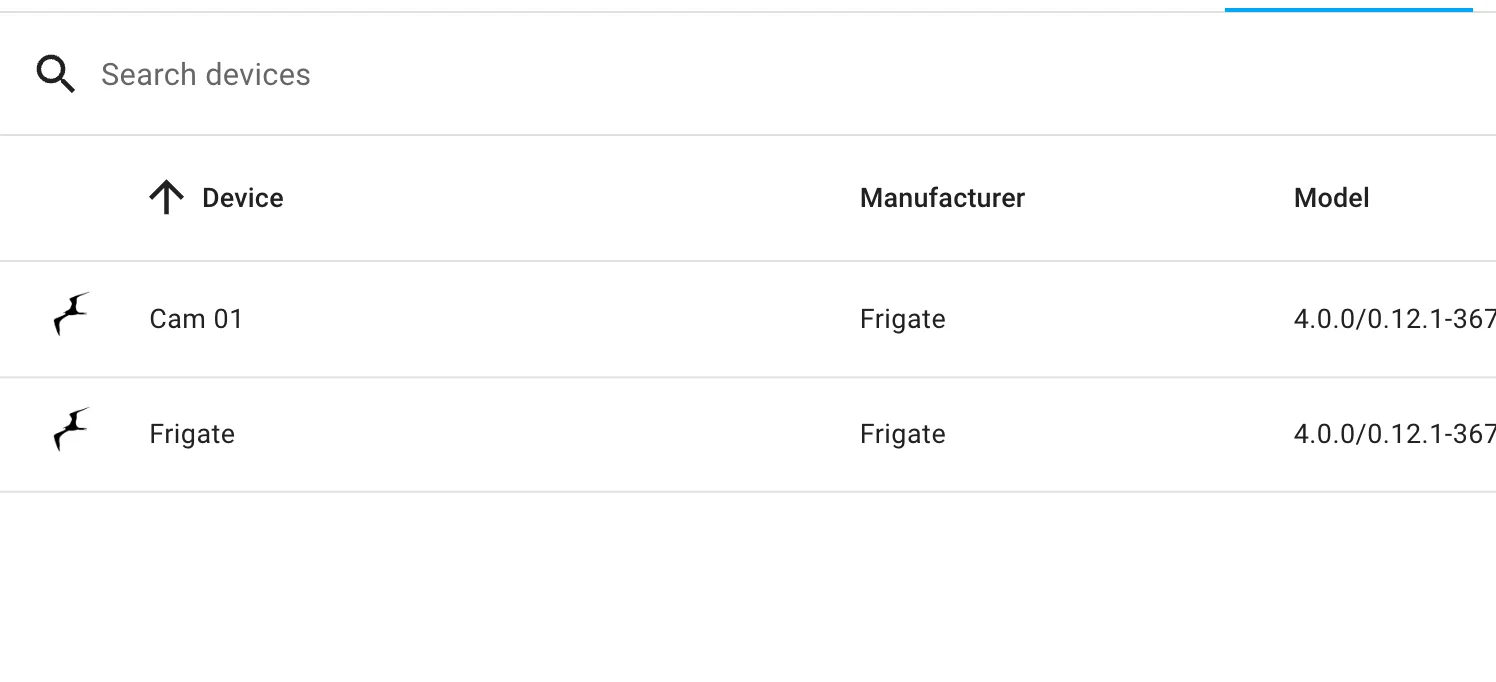
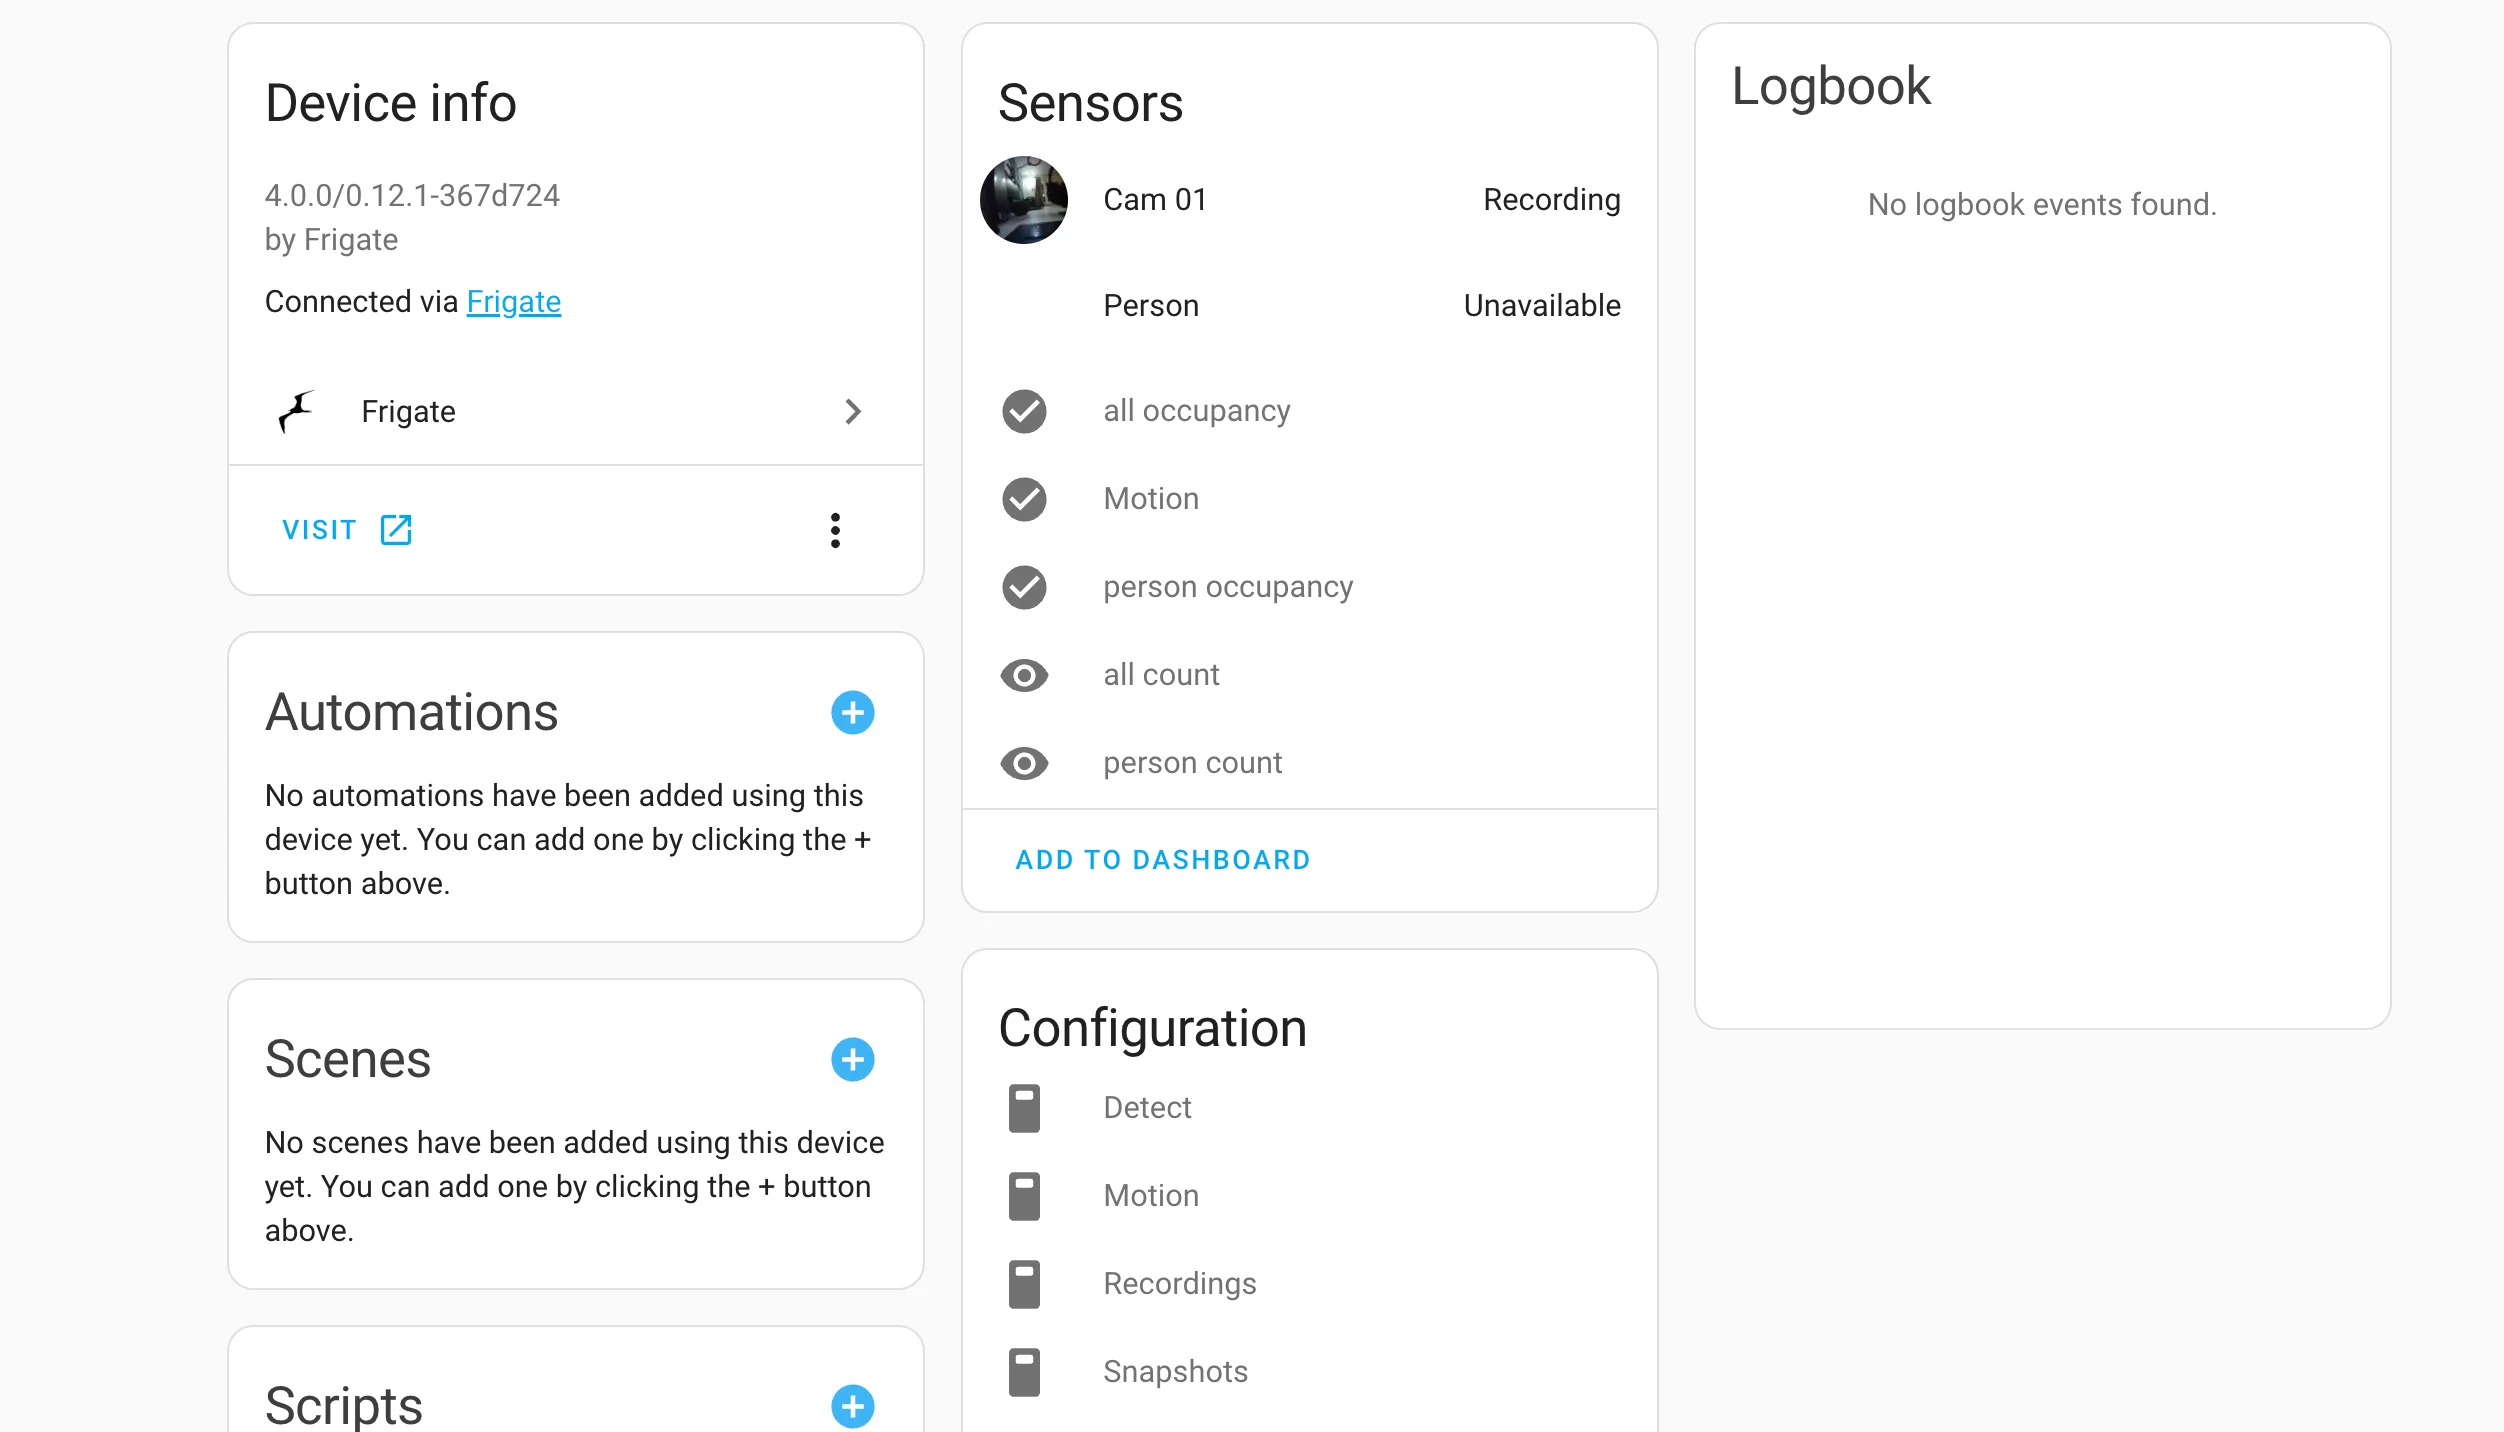
Sometimes it can take a while for the sensors to show as “unavailable” but they will eventually show up.
With this, you have just added an ESP32 Camera to Frigate and connected Frigate to Home Assistant.
Next, Look at how you can be notified of any detection in Frigate in your Home Assistant App.
Frigate Notification in Home Assistant App
The simplest method is to import this blueprint to Home Assistant which will help you configure the notifications.
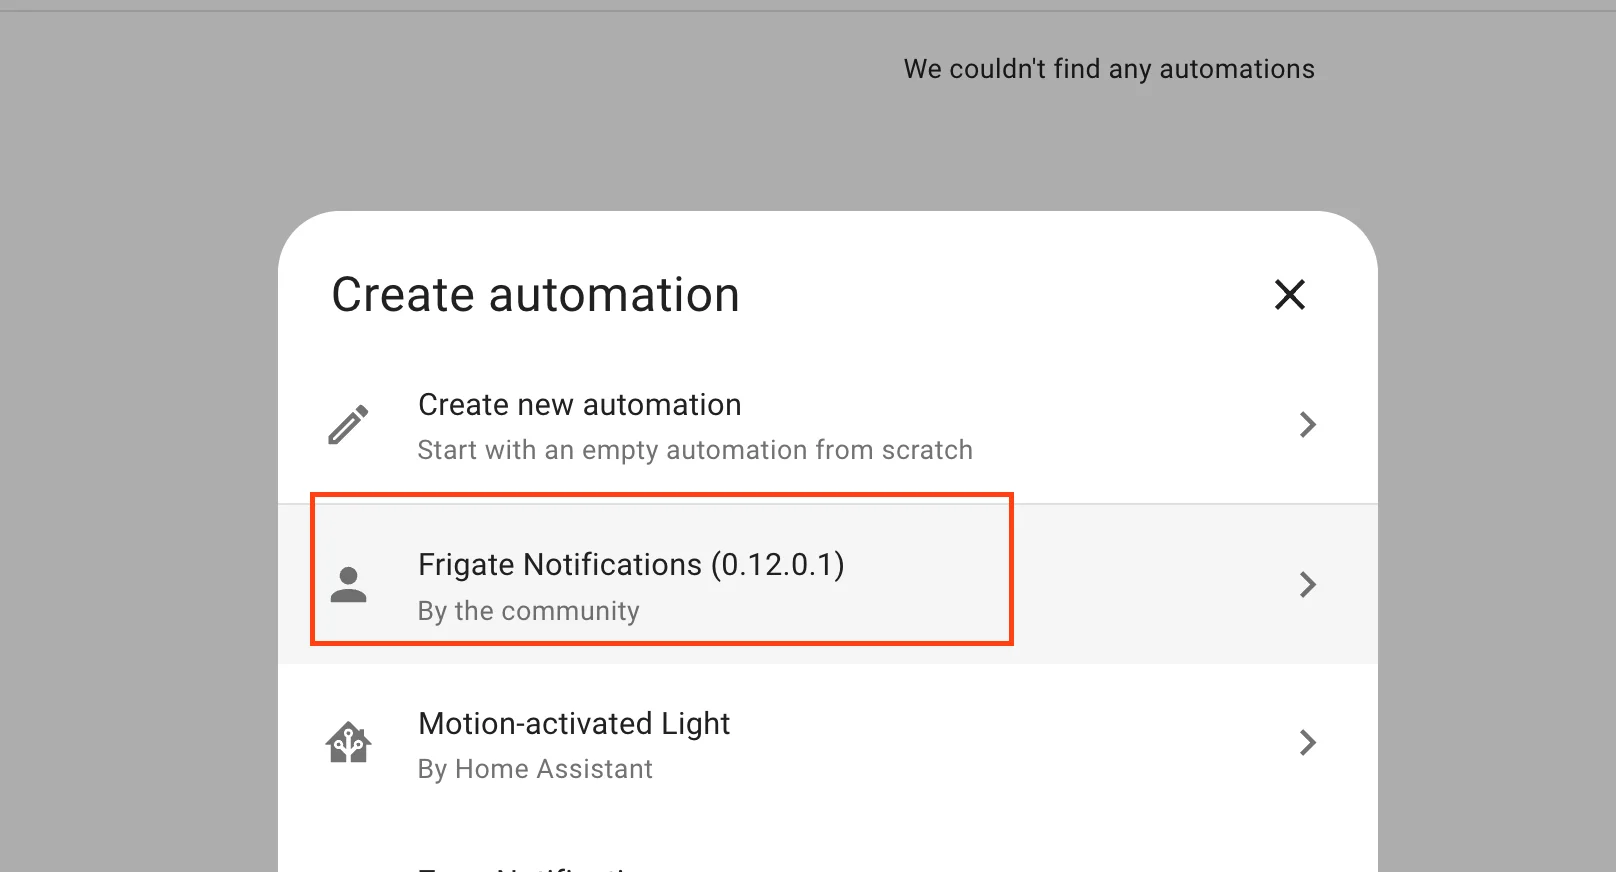
Once you import the above blueprint, head over to “Automations & Scenes” in the settings and click on “Create Automation”
Now select the blueprint that we just imported
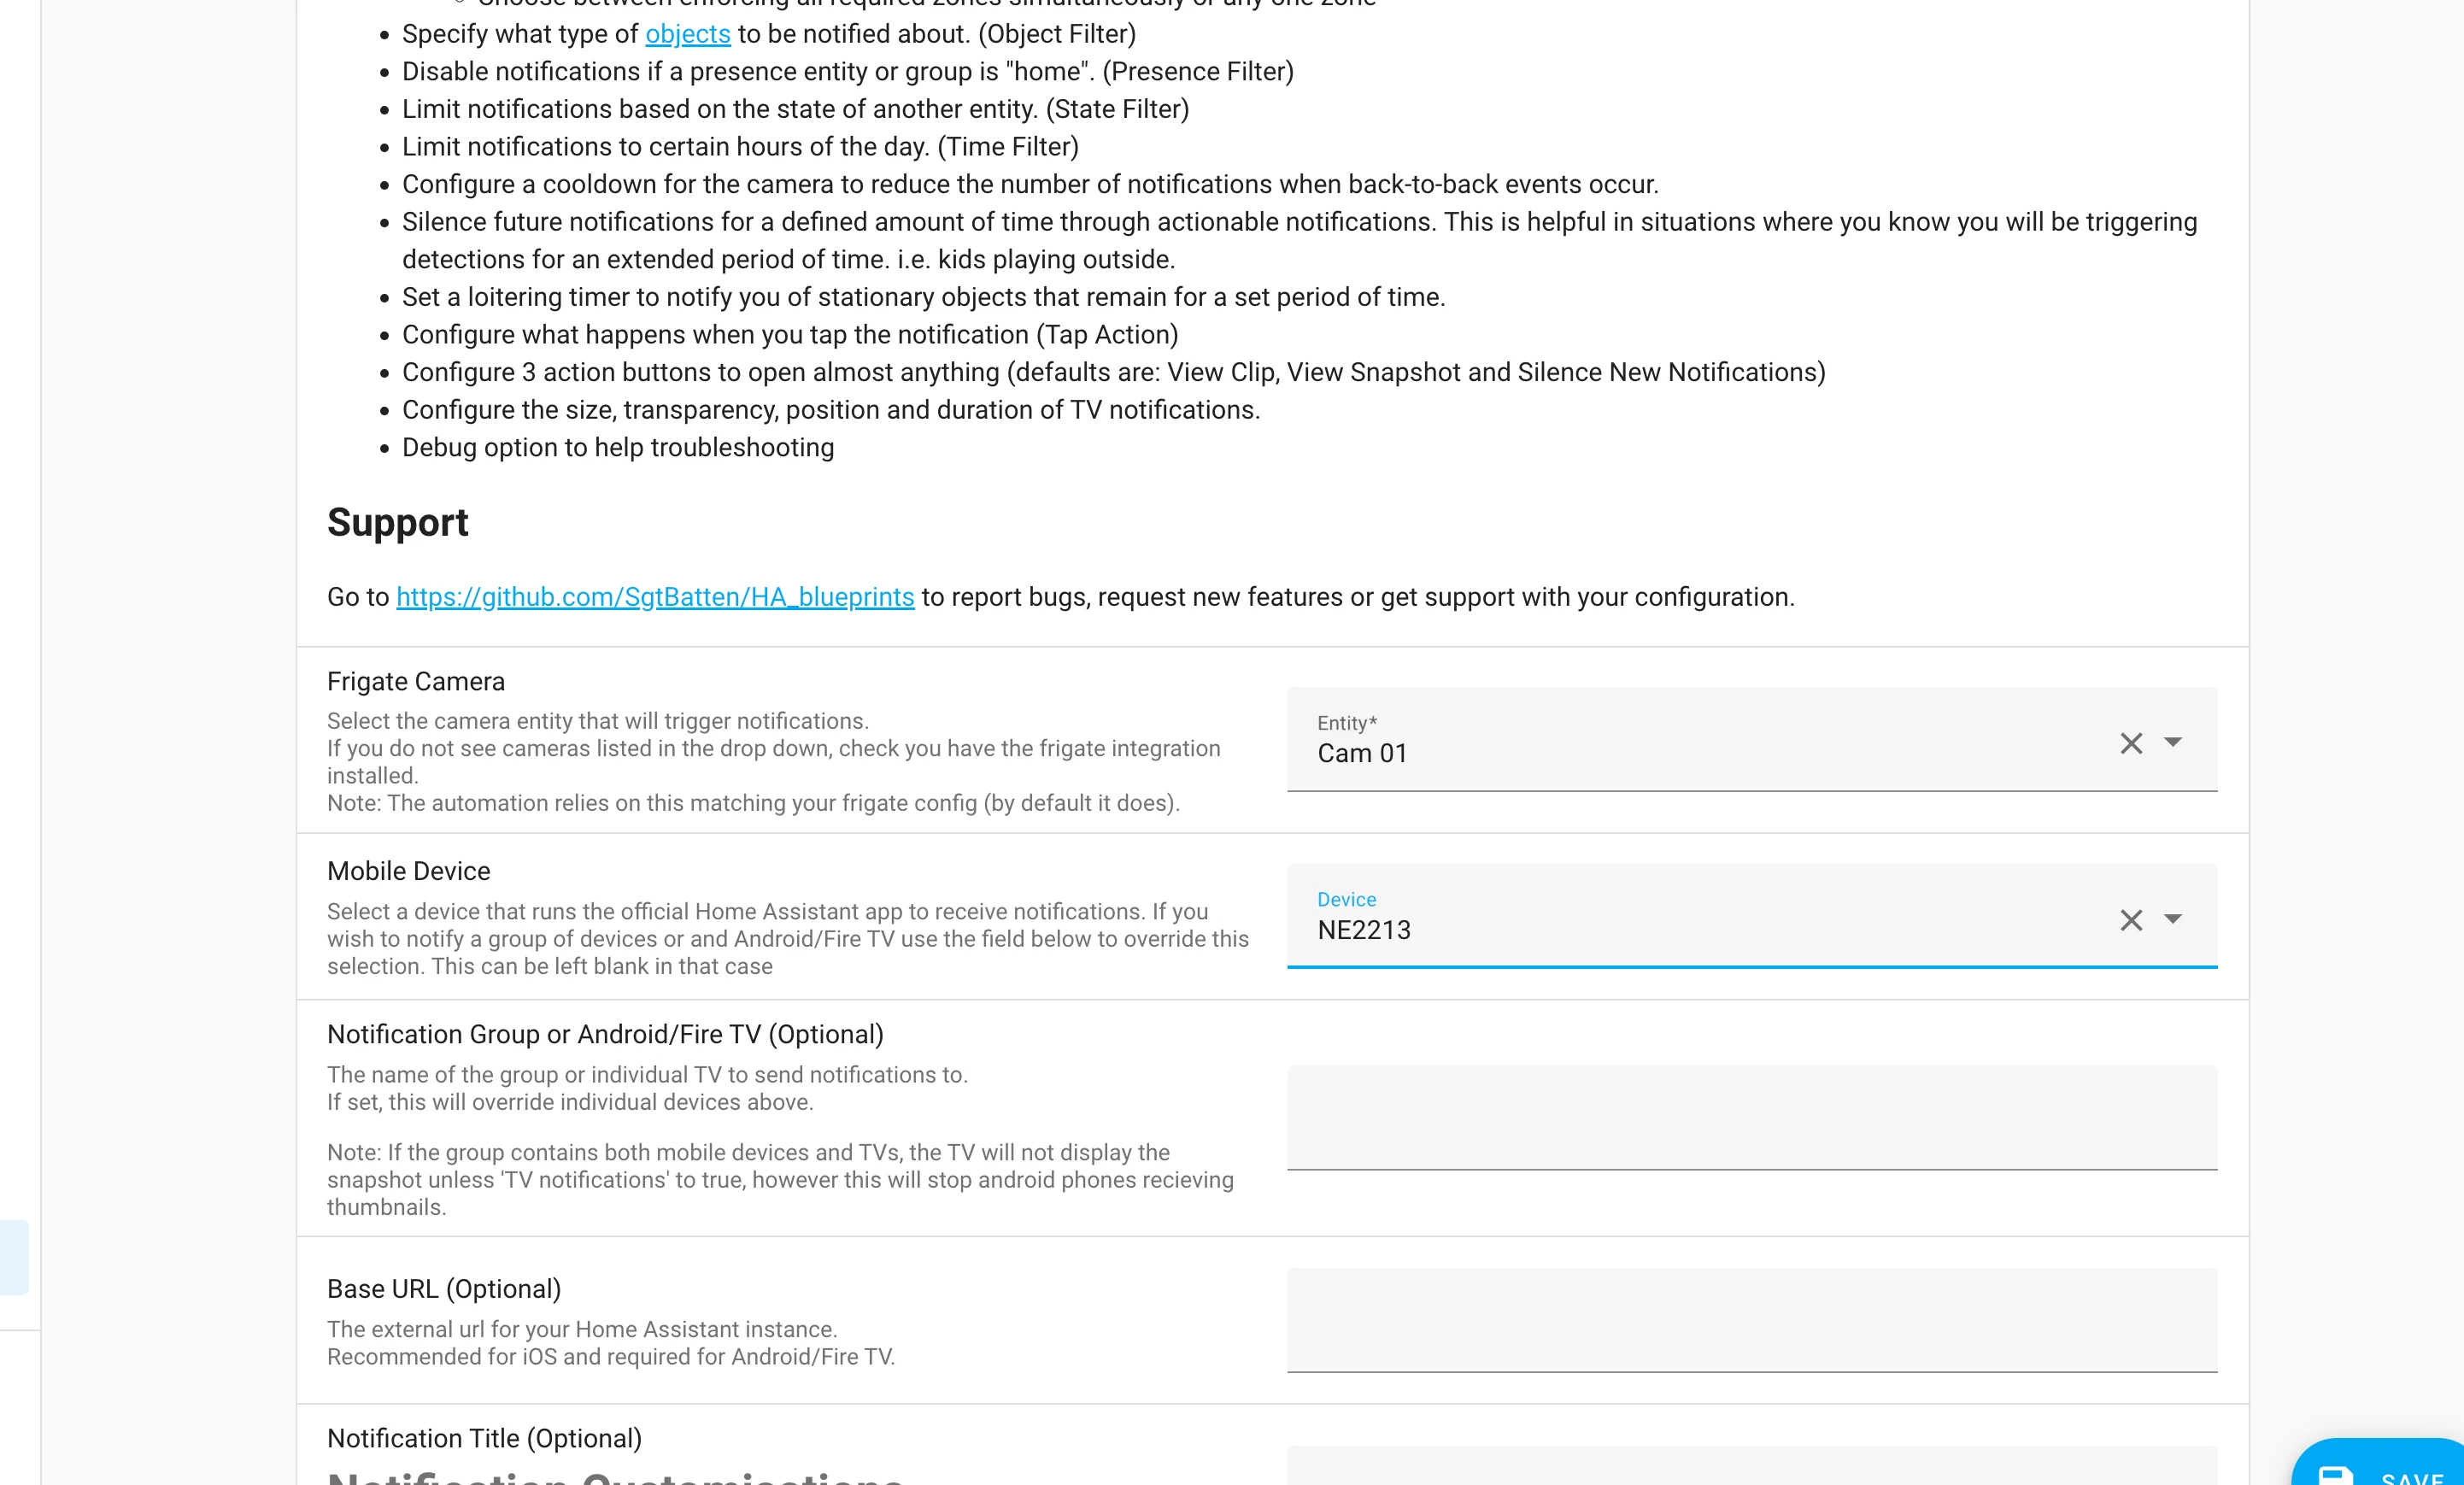
Next, you will have to specify the camera entity that was added as part of Frigate, the device on which you want to be notified, and select the other options to customize the notification that you want to be sent to the Home Assistant App.
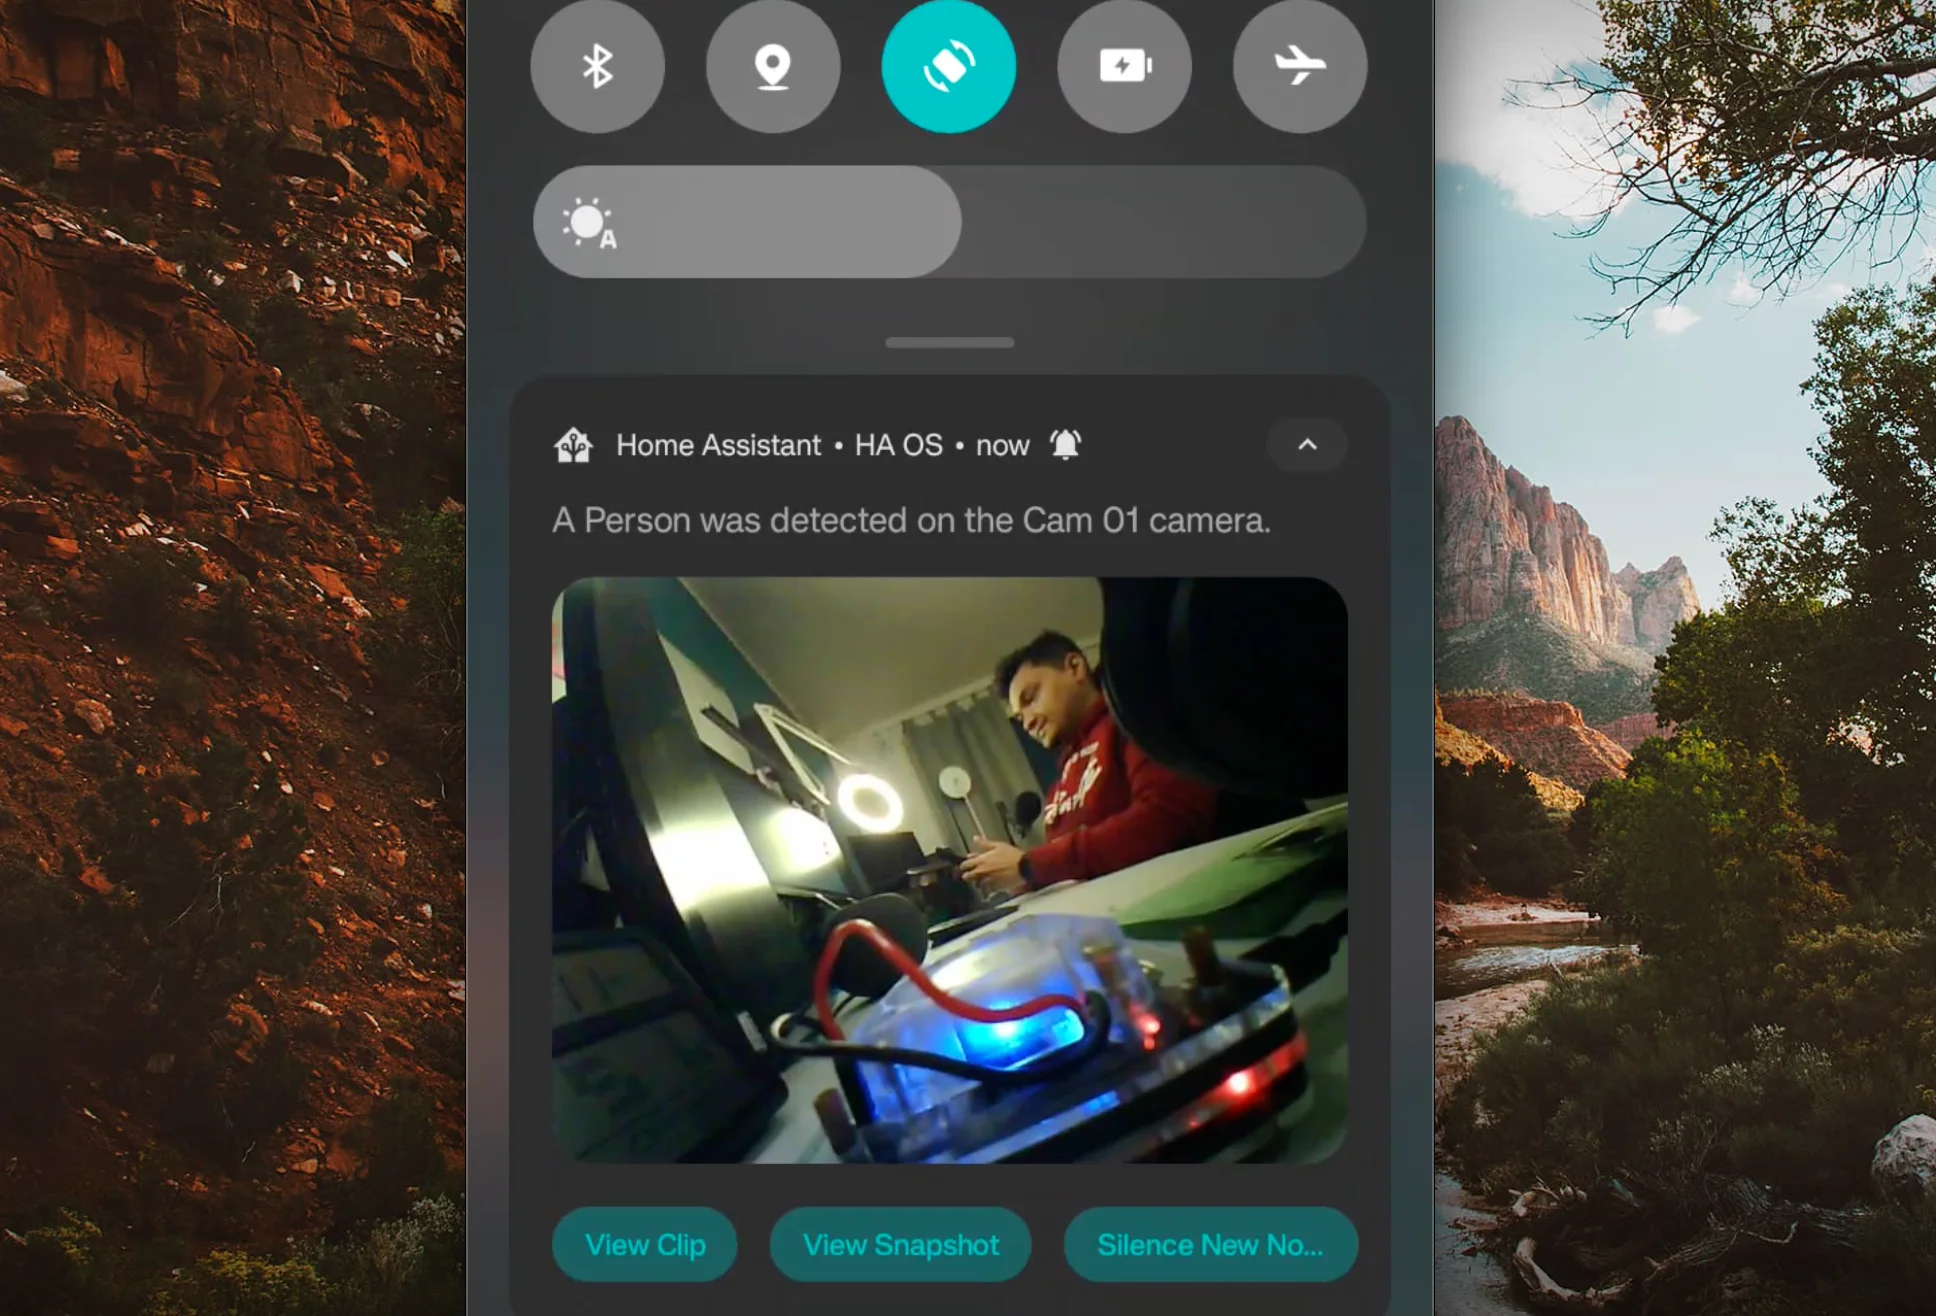
With this we have set up Frigate, connected it to Home Assistant, and also receive notifications on the Home Assistant App.
Now if you are interested in exploring more of such easy to follow step by step guides about Home Assistant, then here are a few suggestions
- Connect Zigbee Plug Using Sonoff Zigbee 3.0 USB Dongle Plus
- How I Built My Own Air Quality Monitor With Light Sensor For Home Assistant
- How I Added a Matter Device to Home Assistant