How I Setup MQTT Broker Docker Container Or Addon In Home Assistant — Step-By-Step Guide

Written by
In this article, we will be looking at how we configure MQTT Broker as a Home Assistant Addon or run at as a Docker Container.
Table of Contents
Running MQTT broker as a Home Assistant Addon
Running an MQTT broker as an add-on in Home Assistant is possible only in Home Assistant OS.
For this, go to the Addons store in settings, and search for “Mosquitto Broker” or “MQTT”
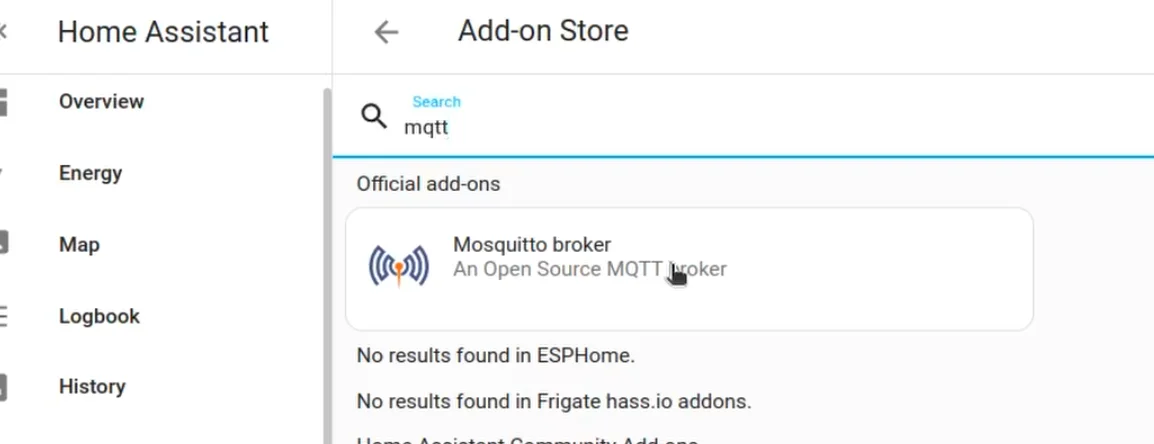
Once you see this, click on it and then click on Install.

Next, head to the “Devices & Services” section in Home Assistant “Settings”.
Here, click on the “Add Integration” button in the bottom right-hand corner.
Now search for “MQTT” and click it.
Home Assistant will automatically find the Addon you started before and will show you the below message to confirm the connection.
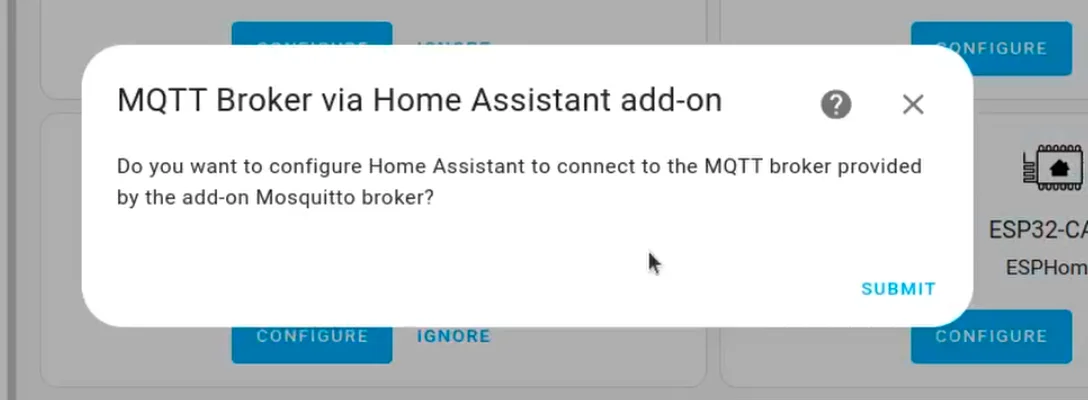
Once you click submit, the MQTT broker will be configured.
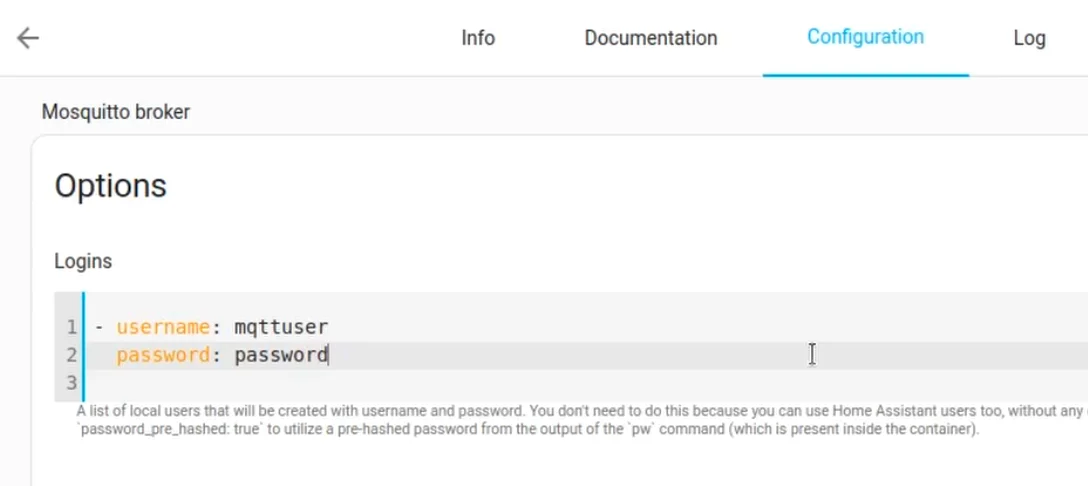
Protect MQTT broker with Username and Password
To set a username and password for your MQTT broker, you need to go to the MQTT add-on and then in the configuration tab, you will have to provide the username and password as shown below
Running MQTT Broker as a Docker Container Using Docker Compose
To run the MQTT broker as a Docker Container, create a file with the name docker-compose.yaml and fill it with the content from below.
version: "3.1"
services:
  mosquitto:
    image: eclipse-mosquitto
    container_name: mosquitto
    restart: unless-stopped
    volumes:
      - ./mosquitto:/mosquitto
      - ./mosquitto/data:/mosquitto/data
      - ./mosquitto/log:/mosquitto/log
    ports:
      - 1883:1883
      - 9001:9001
Next, let's create the configuration for the MQTT broker.
For this, in the directory where you have the docker-compose.yaml file, create the mosquitto directory and then create a config directory inside it.
Now create a configuration file in the config directory called mosquitto.conf and then add the following content
persistence true
persistence_location /mosquitto/data/
log_dest file /mosquitto/log/mosquitto.log
listener 1883

## Authentication ##
allow_anonymous true
In this configuration, we are setting the option to persist the messages from the broker and also specifying the location where the messages will be stored.
Lastly, we are allowing anonymous connections to the broker.
Once you save the file and come back to the directory with the docker-compose.yam file, you can start the Docker container using docker compose up
You can add the option -d to run in the background.
docker compose up -d
Now to connect it to Home Assistant, go to the Home Assistant settings page, then click on “Devices & Services” and search of the MQTT integration.
Now here you will have to specify the IP address of the machine that is running the MQTT docker image and keep the port as 1883.
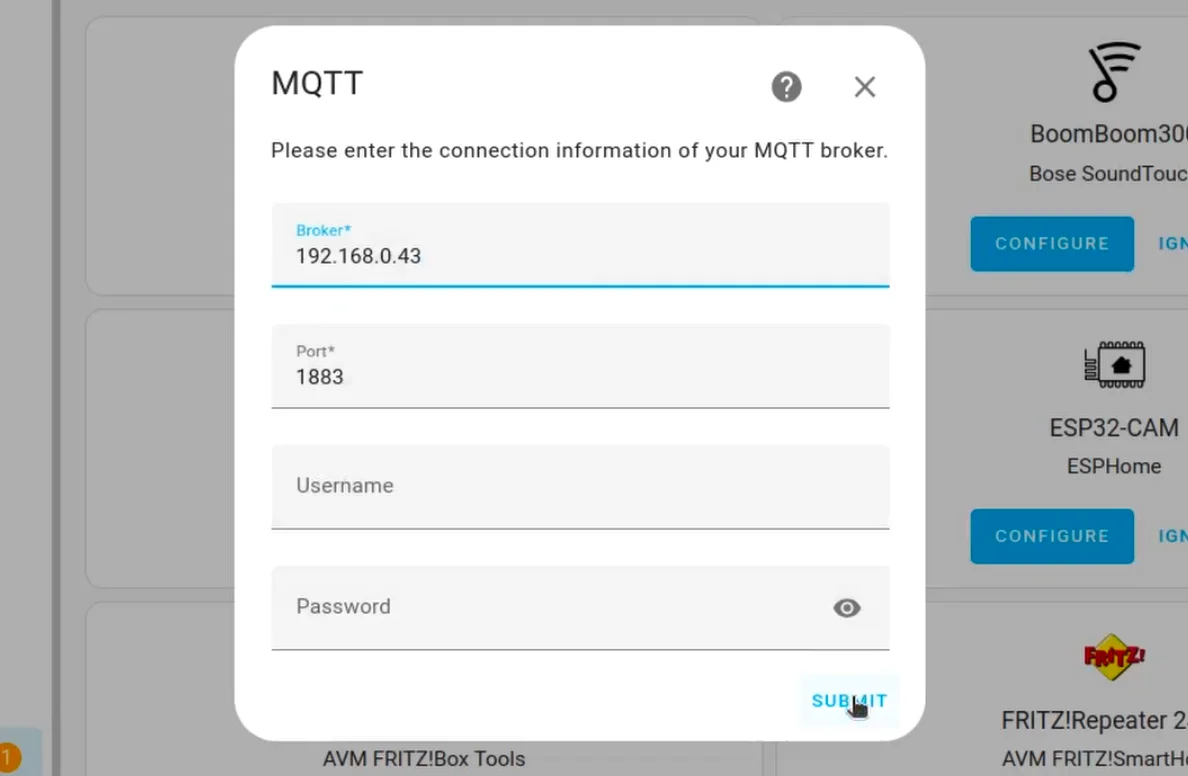
You don’t need to provide any username and password as we have allowed anonymous connections to the broker.
With this, you will be able to run MQTT Broker in a Docker container and connect it to Home Assistant.
Protecting MQTT Broker Running In a Docker Container with a Username And Password
Now you can protect your broker with a username and password so no one else can connect to it and read or write data.
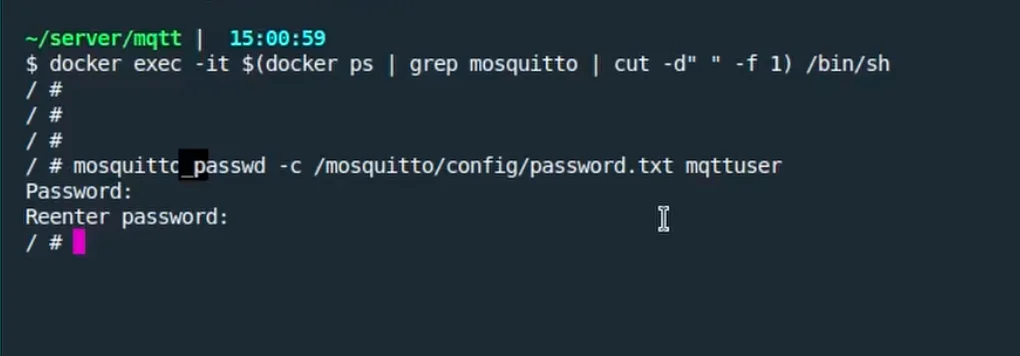
For this, you will have to SSH into the docker container using the following command.
docker exec -it $(docker ps | grep mosquitto | cut -d" " -f 1) /bin/sh
Once you are inside the docker container, you can now run the following command wherein mqttuser is the username you are creating
mosquitto_passwd -c /mosquitto/config/password.txt mqttuser
Once you hit enter, it will ask you to set a password.
Now you can exit the container by typing the exit command.
With this, you just created a username and password for your MQTT broker.
Now, we need to update the MQTT broker configuration to start using the username and password.
For this, we will now stop the docker container using the command docker compose down
Next, we will go and update the configuration at the location
mosquitto/config/mosquitto.conf
We will now specify the password file that we created previously.
persistence true
persistence_location /mosquitto/data/
log_dest file /mosquitto/log/mosquitto.log
listener 1883

## Authentication ##
allow_anonymous true
password_file /mosquitto/config/password.txt
With this, we are ready with the configuration.
Now you can start the MQTT broker again using docker compose up command.
If you are interested in learning more about automating your home with Home Assistant, here are some interesting articles for you.
- Connect Zigbee Plug Using Sonoff Zigbee 3.0 USB Dongle Plus
- How I Built My Own Air Quality Monitor With Light Sensor For Home Assistant
- How I Added a Matter Device to Home Assistant