How I Built My Own Air Quality Monitor With Light Sensor For Home Assistant - Step By Step Guide

Written by
Featured Video
In this article, we will be looking at how we can monitor CO2 (Carbon Dioxide) with SGP30 sensor and add a light sensor BH17450 to Home Assistant.
Table of Contents
- Pre-Requisites
- Wiring Diagram for SGP30 and BH1750 With ESP32
- SGP30 and BH1750 Sensor Configuration In ESPHome For ESP32
- Flashing the Binary to ESP32
- Viewing SGP30 and BH1750 Sensor Data From ESP32 Device
- Connecting SGP30 and BH1750 Sensor Data to Home Assistant
- Wiring Diagram for SGP30 and BH1750 With D1 Mini (ESP8266)
- SGP30 and BH1750 Sensor Configuration In ESPHome For D1-Mini (ESP8266)
Pre-Requisites
- You have Home Assistant OS or Home Assistant Container setup.
You can check this article if you want to set up Home Assistant OS or this article if you want to set up Home Assistant Container.
- ESPHome setup
If you have not setup it up, you can refer to this article to see how you can set this up.
- An SGP30 sensor and BH1750 sensor
You can buy these from these links:
Wiring Diagram for SGP30 and BH1750 With ESP32
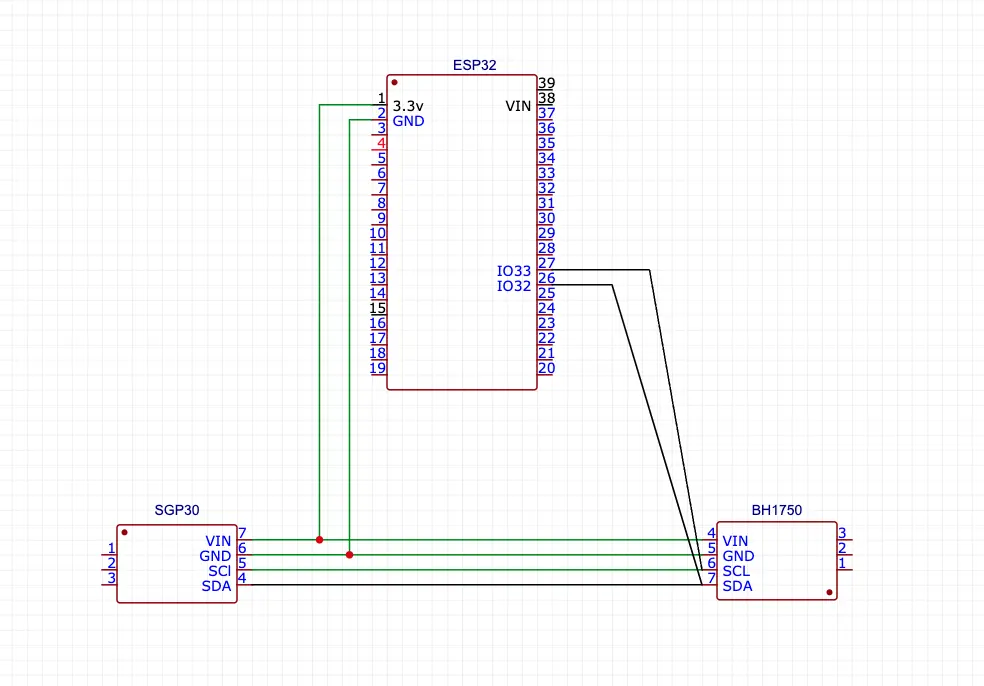
The connection for SCL and SDA is a Daisy Chain connection and not parallel. While the 3.3v and GND is a parallel connections.
SGP30 and BH1750 Sensor Configuration In ESPHome For ESP32
In ESPHome, click on “New Device” in the right-hand bottom corner. Give it a name and select “ESP32” if your board is ESP32.
Now open the configuration and add the following config at the end of the file.
i2c:
  - id: co2_lux_bus
    sda: 32
    scl: 33
    scan: True

sensor:
  - platform: sgp30
    i2c_id: co2_lux_bus
    eco2:
      name: "CO2 sensor"
      accuracy_decimals: 1
    tvoc:
      name: "TVOC Sensor"
      accuracy_decimals: 1
    address: 0x58
    update_interval: 1s

  - platform: bh1750
    i2c_id: co2_lux_bus
    name: "BH1750 Illuminance"
    address: 0x23
    update_interval: 1s
Save the config and click “Install” then click “Manual download”, then “Modern Format”
This will now build the config for you.
Once it's built, download the “.bin” file.
Flashing the Binary to ESP32
Open https://web.esphome.io and connect your ESP32 to the computer with a USB cable.
Now click on “Connect” and select the USB port from the list.
Once connected, click on “Install” and select the downloaded binary that you downloaded in the previous step.
Since this is an ESP32 device when you see the “Connecting” message, press and hold the “Boot” button until you see the “Erasing” message.
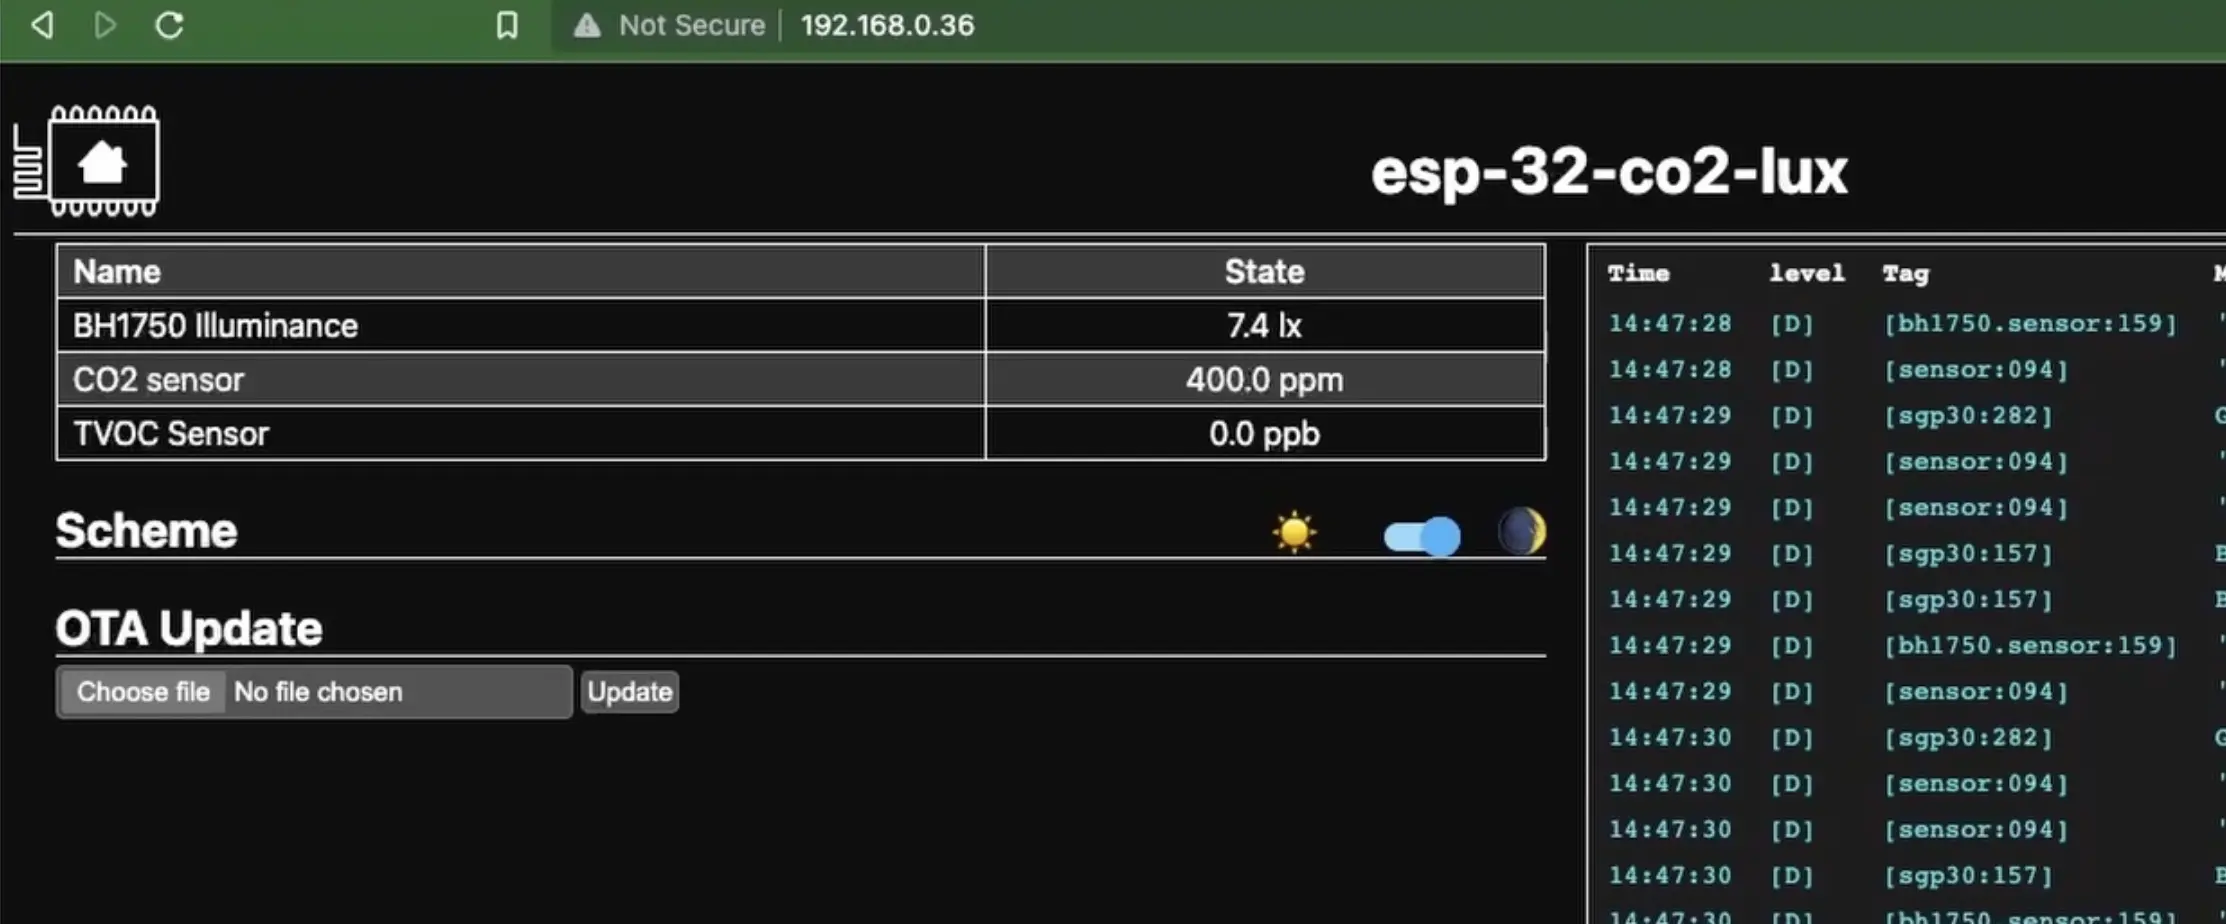
Viewing SGP30 and BH1750 Sensor Data From ESP32 Device
Once you connect the sensors to the ESP32 and you power up the ESP32, it will connect to your Wifi in a few minutes.
Once it's connected, you will have to search for the IP address of the connected device.
You can paste the IP address in the browser and you will be able to see the Sensor data in the WebPage.
Connecting SGP30 and BH1750 Sensor Data to Home Assistant
Once you know the IP address of the device connected to your WiFi, go to Home Assistant Ui, click on “Settings” in the left panel, then click on “Devices & Services” and then click on “Add Integration” in the bottom right-hand corner.
Now select ESPHome

Now, enter the IP address of the device and keep the same port i.e. 6053 and click Submit.
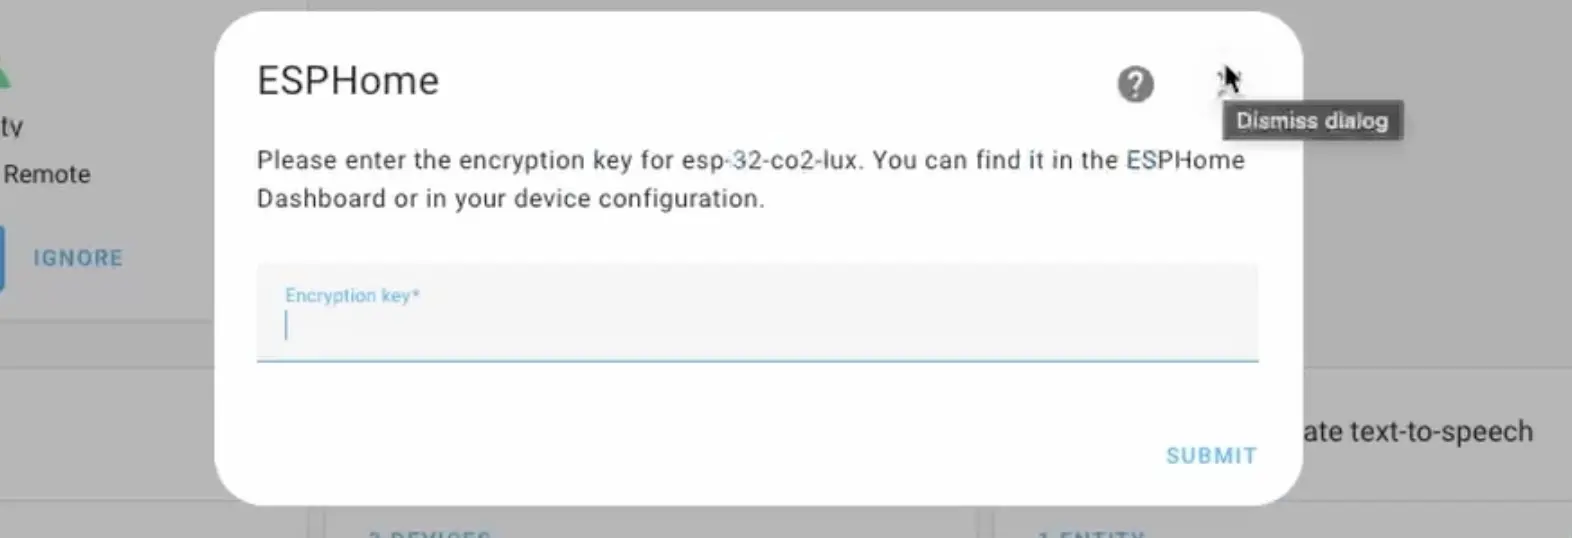
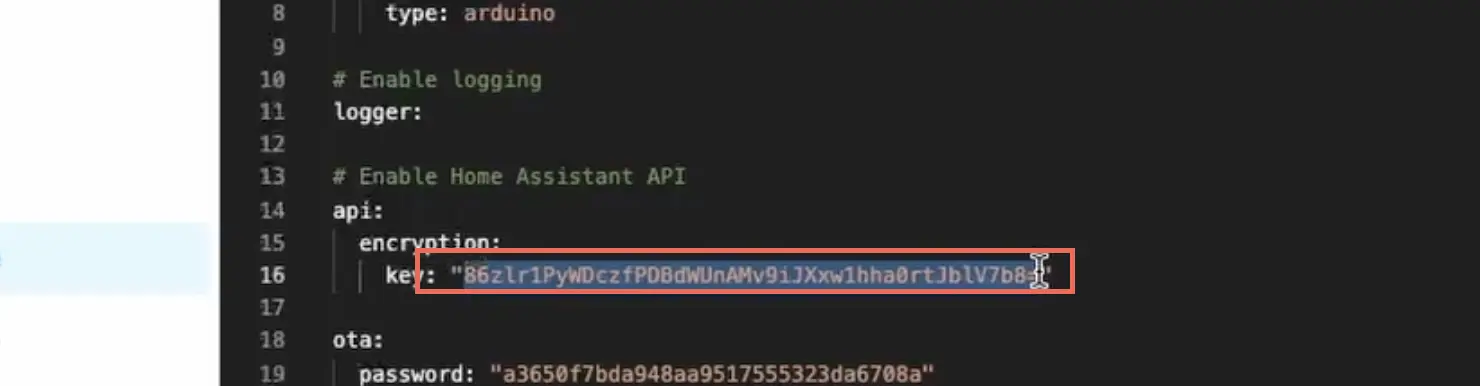
When you are asked about the encryption key, you can find the key ESPHome, inside the configuration you created as shown below
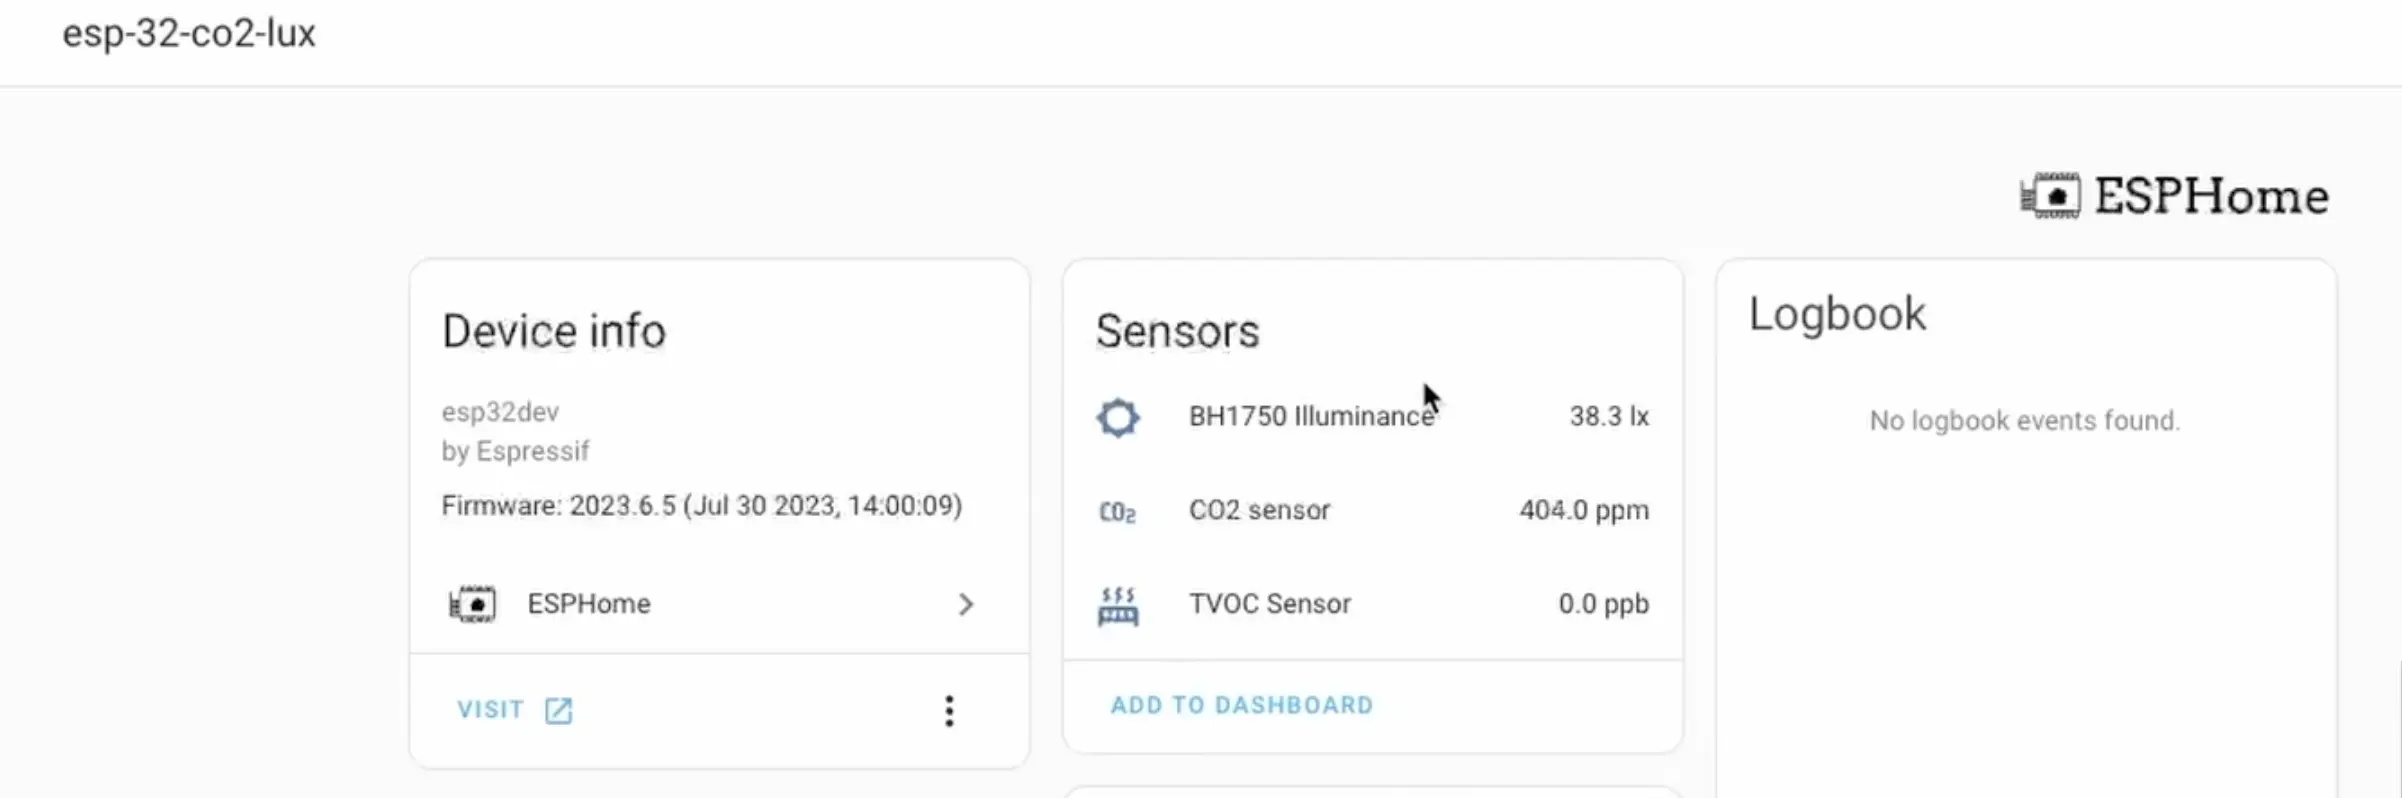
That’s it, you have now set up SGP30 Sensor and BH1750 sensor data in Home Assistant.
You can now view the sensor data in the Home Assistant
Wiring Diagram for SGP30 and BH1750 With D1 Mini (ESP8266)
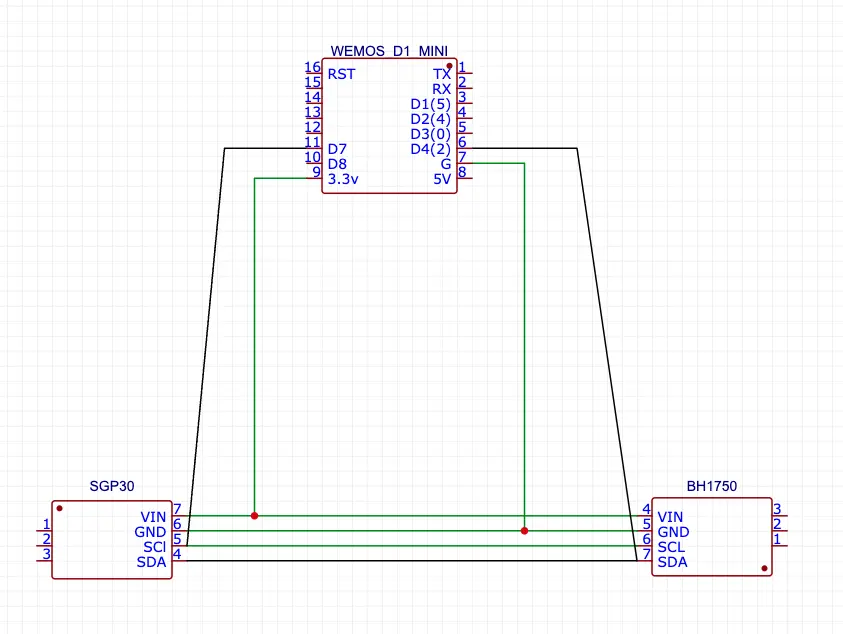
SGP30 and BH1750 Sensor Configuration In ESPHome For D1-Mini (ESP8266)
Append this configuration to the end of the D1-Mini configuration.
i2c:
  - id: co2_lux_bus
    sda: D4
    scl: D7
    scan: True

sensor:
  - platform: bh1750
    i2c_id: co2_lux_bus
    name: "BH1750 Illuminance"
    address: 0x23
    update_interval: 1s

  - platform: sgp30
    i2c_id: co2_lux_bus
    eco2:
      name: "CO2 sensor"
      accuracy_decimals: 1
    tvoc:
      name: "TVOC Sensor"
      accuracy_decimals: 1
    address: 0x58
    update_interval: 1s