
Written by
Featured Video
In this article, we will explore how we can share files with Home Assistant OS.
We will make use of Samba Share to allow Home Assistant folders to be accessed as network volumes from another computer.
Table of Contents
Requirements
- Home Assistant OS setup and running.
You can check this link to see how you can install it for the first time
Note: Samba Share only works with Home Assistant OS. For Home Assistant docker containers, you can directly access the folders using mounted volumes.
Install and Setup Samba Share
To install Samba Share, we need to install the Samba Share addon in Home Assistant OS.
Step 1: Go to Home Assistant Settings in the left panel
Step 2: Click on Addons
Step 3: Click on Addon Store in the bottom right-hand corner.
Step 4: Search for Samba Share and select it
Step 5: Click on the Configuration tab
Step 6: set the username and password ( this will be used to access the shared volumes from another computer)
Step 7: Set the allowed hosts depending on the IP address range of your home network.
For example, if your Home Assistant is connected to your Wifi with the IP address 192.168.0.130, you can set the allowed host as 192.168.0.0/16.
This will allow all devices from your Wifi network to access the shared drive.
You can always check your IP address range in your home network using https://cidr.xyz.
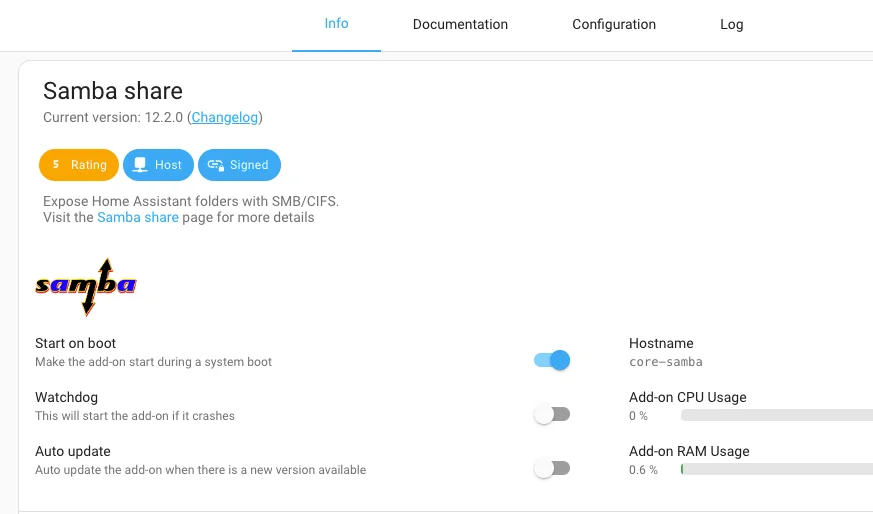
Step 8: Save the settings and start the addon from the info tab.
How to Access Samba Share Drive on MacOS
To access the Samba Share on Mac OS, follow these steps.
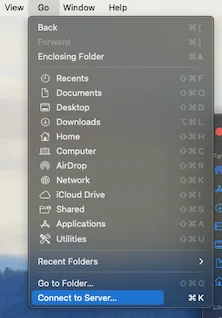
Step 1: Open the Finder app
Step 2: Click on the Go menu > Connect To Server
Step 3: Add the Home Assistant IP address using the smb:\\ protocol.
e.g
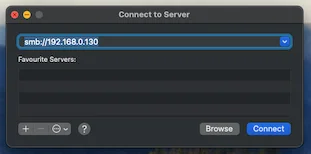
Step 4: Click Connect and select the drive you want to mount.
How to Access Samba Share Drive on Windows
To access the Samba Share on Windows, follow these steps.
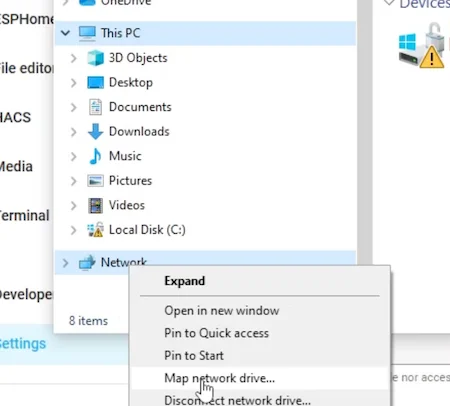
Step 1: Open This PC from the Start menu.
Step 2: On the left panel, on the Network icon, right-click and select Map network drive.
Step 3: In the folder option, add the IP address of Home Assistant using two backward slashes.
E.g
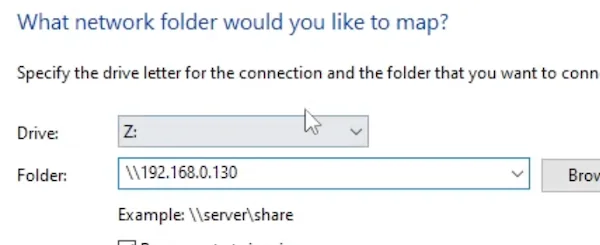
Step 4: Select Browse and now select the folder you want to mount to your Windows PC.
With this, we just saw how we can share the internal folders for Home Assistant OS using Samba Share and then access the folder as network drives in MacOS and Windows PCs.
If you are interested in exploring more of such easy to follow step by step guides about Home Assistant, then here are a few suggestions
- Setup Zigbee2Mqtt with Home Assistant
- Control LED Strip with Home Assistant Using WLED
- How I Added a Matter Device to Home Assistant