
Written by
Featured Video
In this article, we will look at how I created my voice assistant device to send commands to Home Assistant using Wake Word.
Table of Contents
Requirements
- Home Assistant up and running.
You can check this link to see how you can install it for the first time - ESPHome is setup and running
In case you have not set it up, you can look at it here.
- ESP32 Dev Board
Links to buy this: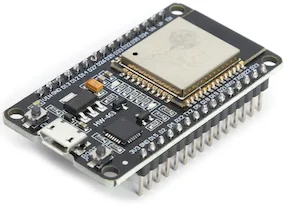
- WS2812B LED Strip
Links to buy this:
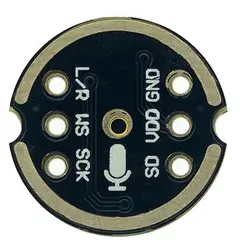
- INMP441 Microphone
Links to buy this:
- MAX98357A Audio Amplifier
Links to buy this: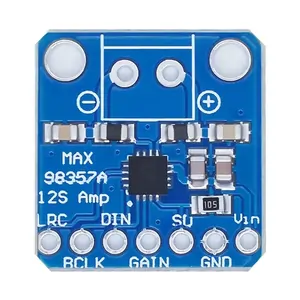
- 3-watt Speakers (Optional: Only required to listen to the pipeline output)
Links to buy these.

To set up voice assistant, we would need three components to create the voice assist pipeline in Home Assistant.
- Whisper: For speech-to-text
- Piper: For text-to-speech
- OpenWakeWord: For invoking the Assist Pipeline
Now, I have set up these components using Home Assistant Addons in the video below.
You will get to see how to set up the following components that are required
- Whisper Addon
- Piper Addon
- OpenWakeWord Addon
- And finally the entire Voice Assist pipeline.
So make sure to watch it and set up the Voice Assist pipeline
Voice Assistant Device 3D Model
The 3D model is uploaded here. You can download the STL file from there.
Now we will look at how we can prepare our ESP32 with a microphone and 3-watt speakers.
Circuit Diagram for Creating Voice Assistant Device With ESP32
Here is the circuit diagram for connecting the ESP32 with INMP441 Microphone, MAX98357A Audio Amplifier, and WS2812B LED Strip.
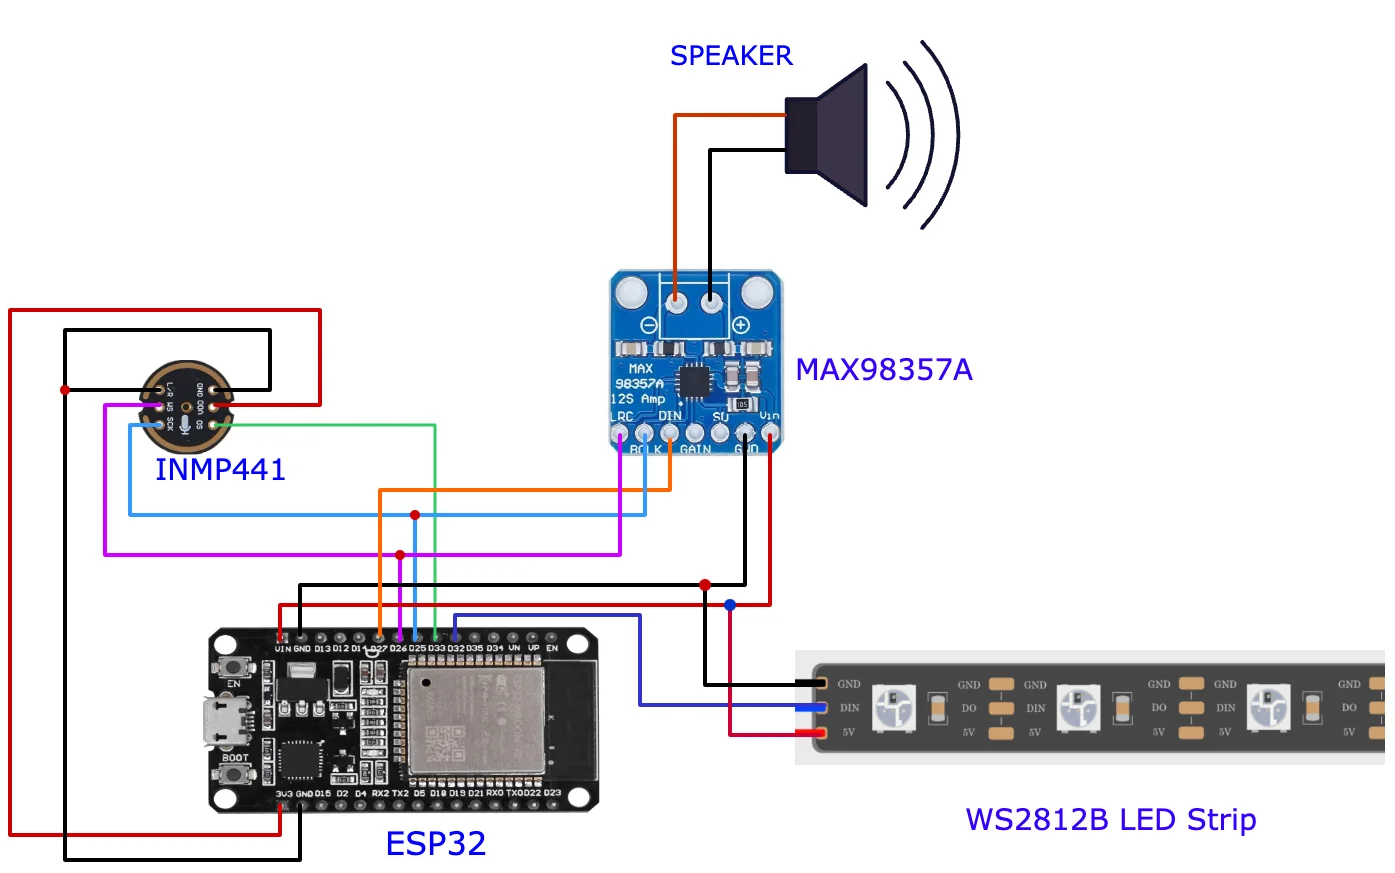
Here is the pin mapping table
| ESP32 | INMP441 Microphone | Speaker | W2812B LED Strip |
|---|---|---|---|
| Vin (5v) | Vin | 5v pin | |
| GND | Gnd | GND | |
| GPIO 27 | DIN | ||
| GPIO 26 | WS | LRC | |
| GPIO 25 | SCK | BCLK | |
| GPIO 33 | SD | ||
| 3v3 | VDD | ||
| GND | GND & L/R | ||
| GPIO 32 | DIN |
Let's look at the code we need to install in the ESP32
ESPHome YAML Code For Voice Assistant
If you are new to how to install YAML code on an ESP32 using ESPhome then you can follow this guide, wherein I have explained how you can install code on an ESP32. Now here is the code that you will have to add after creating a device in ESPHome
Update 22-March-2024:I found some INMP441 Microphone may have the left and right channel reversed. In my case, the microphone was set to right channel on setting the L/R pin to ground. So you might have to change the channel: config below to left.
i2s_audio:
  - id: i2s_in
    i2s_lrclk_pin: GPIO26 #WS
    i2s_bclk_pin: GPIO25 #SCK

microphone:
  - platform: i2s_audio
    adc_type: external
    pdm: false
    id: mic_i2s
    channel: right
    bits_per_sample: 32bit
    i2s_audio_id: i2s_in
    i2s_din_pin: GPIO33  #SD Pin from the INMP441 Microphone


media_player:
  - platform: i2s_audio
    name: "esp_speaker"
    id: media_player_speaker
    i2s_audio_id: i2s_in
    dac_type: external
    i2s_dout_pin: GPIO27   #  DIN Pin of the MAX98357A Audio Amplifier
    mode: mono


voice_assistant:
  microphone: mic_i2s
  id: va
  noise_suppression_level: 2
  auto_gain: 31dBFS
  volume_multiplier: 4.0
  use_wake_word: false
  media_player: media_player_speaker

  on_wake_word_detected:
    - light.turn_on:
        id: led_light
  on_listening:
    - light.turn_on:
        id: led_light
        effect: "Scan Effect With Custom Values"
        red: 63%
        green: 13%
        blue: 93%

  on_stt_end:
    - light.turn_on:
        id: led_light
        effect: "None"
        red: 0%
        green: 100%
        blue: 0%

  on_error:
    - light.turn_on:
        id: led_light
        effect: "None"
    - if:
        condition:
          switch.is_on: use_wake_word
        then:

          - switch.turn_off: use_wake_word
          - delay: 1sec
          - switch.turn_on: use_wake_word


  on_client_connected:
    - if:
        condition:
          switch.is_on: use_wake_word
        then:
          - voice_assistant.start_continuous:

  on_client_disconnected:
    - if:
        condition:
          switch.is_on: use_wake_word
        then:
          - voice_assistant.stop:

  on_end:
    - light.turn_off:
        id: led_light


binary_sensor:
  - platform: status
    name: API Connection
    id: api_connection
    filters:
      - delayed_on: 1s
    on_press:
      - if:
          condition:
            switch.is_on: use_wake_word
          then:
            - voice_assistant.start_continuous:
    on_release:
      - if:
          condition:
            switch.is_on: use_wake_word
          then:
            - voice_assistant.stop:

button:
  - platform: restart
    name: "Restart"
    id: but_rest

switch:
  - platform: template
    name: Use wake word
    id: use_wake_word
    optimistic: true
    restore_mode: RESTORE_DEFAULT_ON
    entity_category: config
    on_turn_on:
      - lambda: id(va).set_use_wake_word(true);
      - if:
          condition:
            not:
              - voice_assistant.is_running
          then:
            - voice_assistant.start_continuous

    on_turn_off:
      - voice_assistant.stop
      - lambda: id(va).set_use_wake_word(false);

light:
  - platform: neopixelbus
    id: led_light
    type: grb
    pin: GPIO32      # DIN pin of the LED Strip
    num_leds: 9      # change the Number of LEDS accordign to your LED Strip.
    name: "Light"
    variant: ws2812x
    default_transition_length: 0.5s

    effects:
      - addressable_scan:
          name: Scan Effect With Custom Values
          move_interval: 50ms
          scan_width: 2
Here is how finally the device looks like after assembling it.

Playing Voice Assistant Output On An External Speaker
Now, in case you want the output of the voice command to be played on an external speaker, then this is possible via the media player entity in Home Assistant.
For this, you will have to make sure you have connected your speaker as a media player and that you are able to play media files with Home Assistant using the external speaker.
Once you do that, you can use the following config to get the ESP32 device to send the voice assistant output to the external speaker.
i2s_audio:
  - id: i2s_in
    i2s_lrclk_pin: GPIO26 #WS
    i2s_bclk_pin: GPIO25 #SCK

microphone:
  - platform: i2s_audio
    adc_type: external
    pdm: false
    id: mic_i2s
    channel: right
    bits_per_sample: 32bit
    i2s_audio_id: i2s_in
    i2s_din_pin: GPIO33  #SD Pin from the INMP441 Microphone


voice_assistant:
  microphone: mic_i2s
  id: va
  noise_suppression_level: 2
  auto_gain: 31dBFS
  volume_multiplier: 4.0
  use_wake_word: false


  on_wake_word_detected:
    - light.turn_on:
        id: led_light
  on_listening:
    - light.turn_on:
        id: led_light
        effect: "Scan Effect With Custom Values"
        red: 63%
        green: 13%
        blue: 93%

  on_stt_end:
    - light.turn_on:
        id: led_light
        effect: "None"
        red: 0%
        green: 100%
        blue: 0%

  on_error:
    - light.turn_on:
        id: led_light
        effect: "None"
    - if:
        condition:
          switch.is_on: use_wake_word
        then:

          - switch.turn_off: use_wake_word
          - delay: 1sec
          - switch.turn_on: use_wake_word

  on_tts_start:                                    # this is required to play the output on a media player
    - homeassistant.service:
        service: tts.speak
        data:
          media_player_entity_id: media_player.bedroom_speaker    #replace this with your media player entity id
          message: !lambda 'return x;'
          entity_id: tts.piper                 #replace this with your piper tts id.


  on_client_connected:
    - if:
        condition:
          switch.is_on: use_wake_word
        then:
          - voice_assistant.start_continuous:

  on_client_disconnected:
    - if:
        condition:
          switch.is_on: use_wake_word
        then:
          - voice_assistant.stop:

  on_end:
    - light.turn_off:
        id: led_light


binary_sensor:
  - platform: status
    name: API Connection
    id: api_connection
    filters:
      - delayed_on: 1s
    on_press:
      - if:
          condition:
            switch.is_on: use_wake_word
          then:
            - voice_assistant.start_continuous:
    on_release:
      - if:
          condition:
            switch.is_on: use_wake_word
          then:
            - voice_assistant.stop:


switch:
  - platform: template
    name: Use wake word
    id: use_wake_word
    optimistic: true
    restore_mode: RESTORE_DEFAULT_ON
    entity_category: config
    on_turn_on:
      - lambda: id(va).set_use_wake_word(true);
      - if:
          condition:
            not:
              - voice_assistant.is_running
          then:
            - voice_assistant.start_continuous

    on_turn_off:
      - voice_assistant.stop
      - lambda: id(va).set_use_wake_word(false);

light:
  - platform: neopixelbus
    id: led_light
    type: grb
    pin: GPIO32      # DIN pin of the LED Strip
    num_leds: 9      # change the Number of LEDS according to your LED Strip.
    name: "Light"
    variant: ws2812x
    default_transition_length: 0.5s

    effects:
      - addressable_scan:
          name: Scan Effect With Custom Values
          move_interval: 50ms
          scan_width: 2
Once you use the above config, you will have to enable the option for allowing your ESP32 device to make service calls to Home Assistant.
You can enable this option by the following steps
Step 1: Go to Home Assistant Settings in the left panel
Step 2: Click on "Devices & Services"
Step 3: Click on ESP Home and then click on the “Configure” button next to your connected device.
Step 4: Now select the option “Allow the device to make Home Assistant service calls”
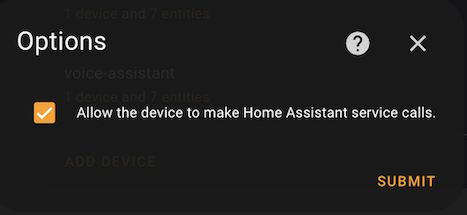
This is very very important or else you will not get an output on your external speakers.
With this, you would be able to get the voice assistant output playing on the media player.
If you are interested in exploring more of such easy to follow step by step guides about Home Assistant, then here are a few suggestions
- Setup ESP32/ESP8266 With ESP Home
- Control LED Strip with Home Assistant Using WLED
- How I Added a Matter Device to Home Assistant