Written by
Featured Video
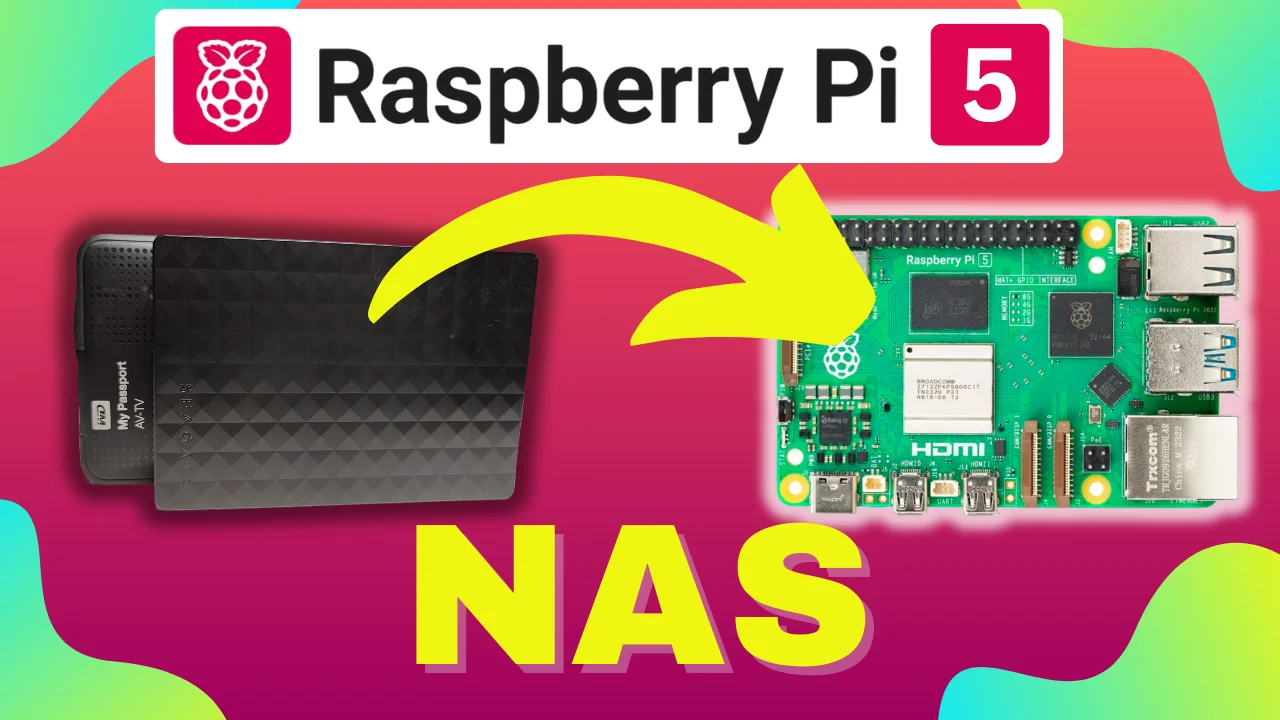
In this article, we will look at how you can create NAS (Network Attached Storage) with a Raspberry Pi also known as Pi NAS.
We will be creating the NAS using a Raspberry Pi 5 but you can also use this guide to create it on a Raspberry Pi 4 or 3B.
We will be making use of OpenMediaVault to manage and serve our shared storage using the SMB protocol.
Table of Contents
- Requirements
- Preparing Your SD Card
- Installing OpenMediaVault On the Raspberry Pi
- Accessing OpenMediaVault Using the default admin password
- Change OpenMediaVault Default Password
- Setting Up External Drive Storage
- Creating Shared Folder
- Creating a New User
- Setting User Permissions To The Shared Folder
- Enabling SMB Service For Windows & MacOS
- Linking Shared Folder To SMB Service
- Accessing NAS Drive On MacOS
- Accessing NAS Drive On Windows
Requirements
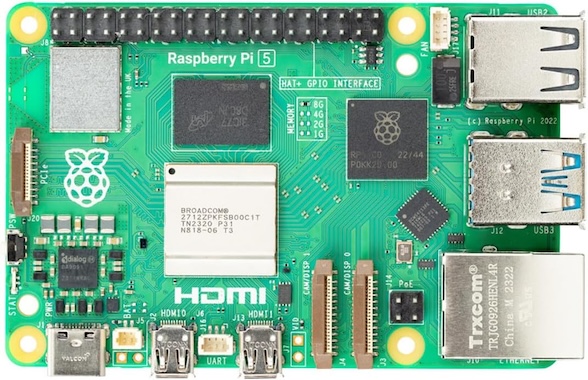
- Raspberry Pi 5 or 4 or 3B
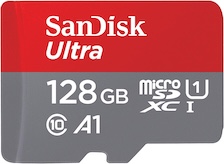
- Micro SD Card
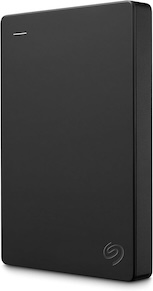
- External Hard Drive
Preparing Your SD Card
We need to first prepare an SD card with an OS.
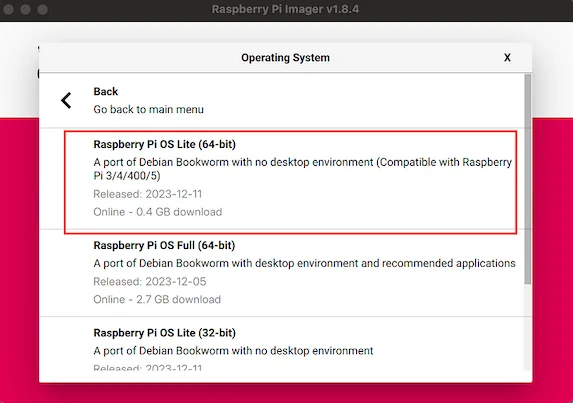
Note: OpenMediaVault is not supported to be installed on the Raspberry Pi OS Desktop. Hence we will be making use of the Raspberry Pi OS Lite
Step 1: Download and install the Raspberry Pi Imager from here.
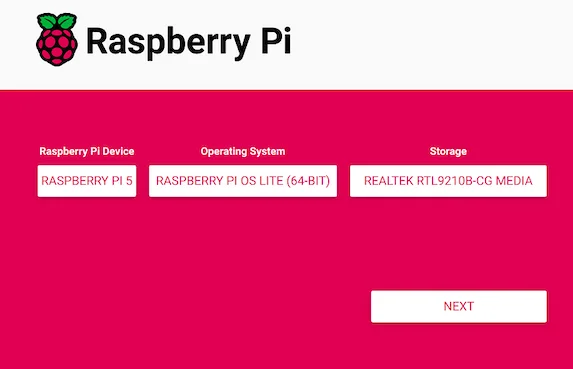
Step 2: Open Raspberry Pi Imager and select your device type.
Step 3: Now click on “Choose OS” select “Raspberry Pi OS (other)” and select “Raspberry Pi OS Lite”.
Step 4: Now click on Choose Storage and select the micro SD card you inserted into your Computer.
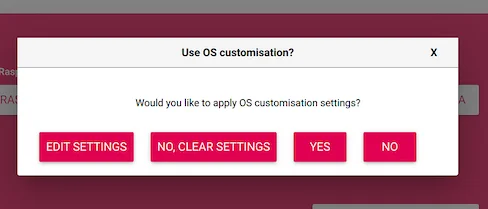
Step 5: After clicking next, it will ask you to apply OS Customisation Settings. Click on Edit Settings.
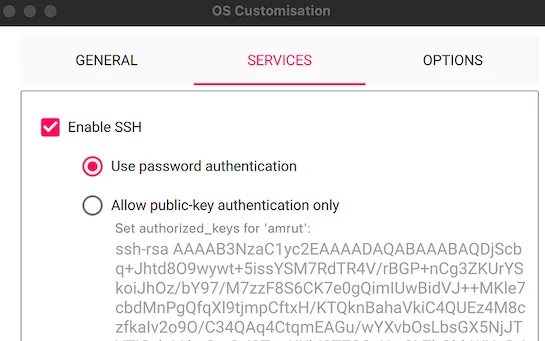
Step 6: Here you can set the hostname for the Raspberry Pi and the username and password to access the Raspberry Pi.
Also, set the Wifi SSID and Password for the Raspberry Pi to connect to your Wifi network.
Step 7: Click on the Services tab and click on Enable SSH with the Use password authentication option selected.
Step 8: Click on Save and apply the changes to your SD card.
With this, we have prepared our SD card with the Raspberry Pi OS Lite
Next, we will insert the card into the Raspberry Pi and boot it up.
Installing OpenMediaVault On the Raspberry Pi
To install OpenMediaVault, you will have to access your Raspberry Pi using SSH.
To do so, you can open your terminal on a MacOS or Command Line on a Windows Machine
Step 1: End the following command
ssh <your user name>@<ip address of your Raspberry Pi>
e.g for the configuration we did above
You can also use the hostname as we set before instead of the IP address.
Step 2: Now install OpenMediaVault by copying and pasting this command.
wget https://github.com/OpenMediaVault-Plugin-Developers/installScript/raw/master/install
chmod +x install
sudo ./install -n
This will install OpenMediaVault and will not affect any of your existing network configurations.
After installation, do not restart your Raspberry Pi.
Accessing OpenMediaVault Using the default admin password
After installing OpenMediaVault, you can access the login page as follows
Step 1: Open your browser and enter http://pi5.local. You should be displayed with the OpenMediaVault login page.
If you cannot access the above URL, you can specify the IP address of Raspberry Pi that is connected to your wifi network. You can find the IP address in your router next to the hostname of Raspberry Pi.
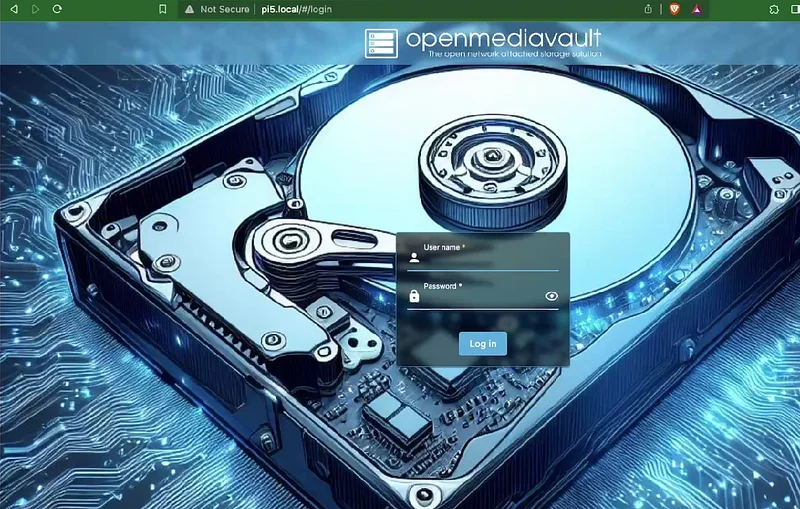
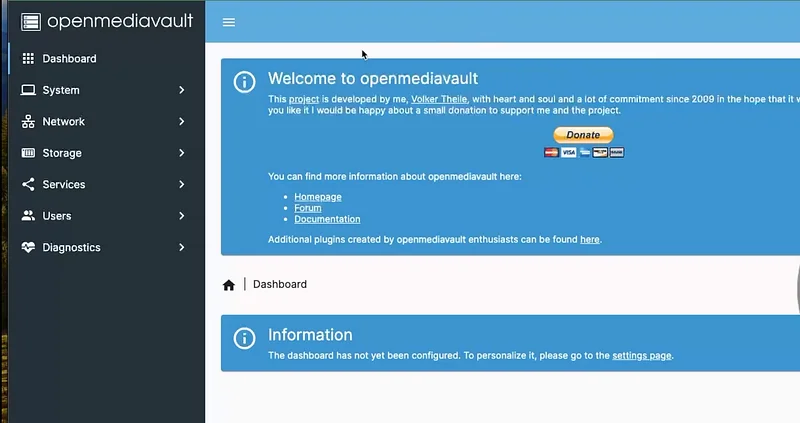
Step 2: Login as Admin, entering Username: “admin” and Password: “openmediavault”. When you successfully log into OpenMediaVault, you should be able to see the dashboard as shown below.
Change OpenMediaVault Default Password
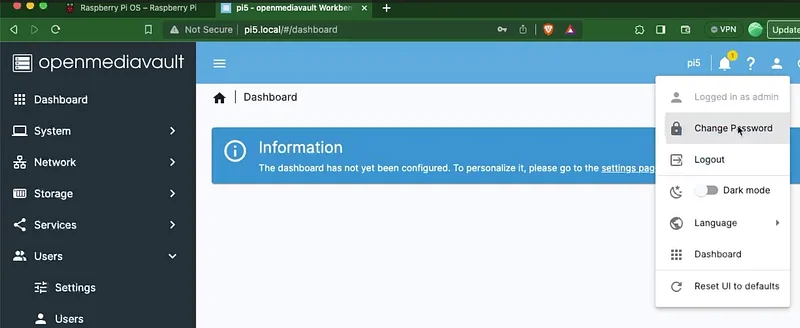
One of the first things you should do is change the password for your OpenMediaVault admin account. Leaving it as the default will allow anyone to gain access quickly.
Step 1: To change your password, you need to click “Profile” Icon > click on “Change Password”.
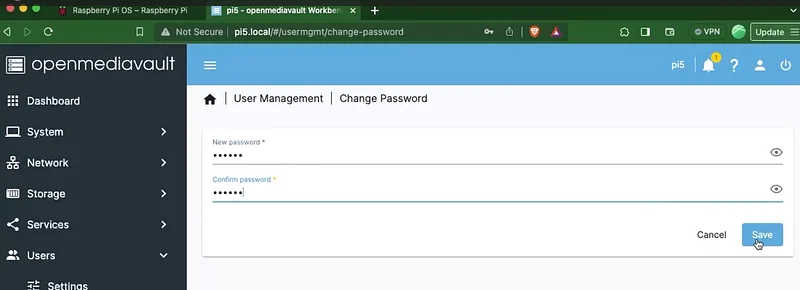
Step 2: Enter a New Password and click on Save. With this, your new password is set.
Setting Up External Drive Storage
Now let's look at how we can set the storage configuration.
Under the “Storage”> “Disk” section, it shows you the disk i.e. the micro SD card that is inserted into your Raspberry Pi.
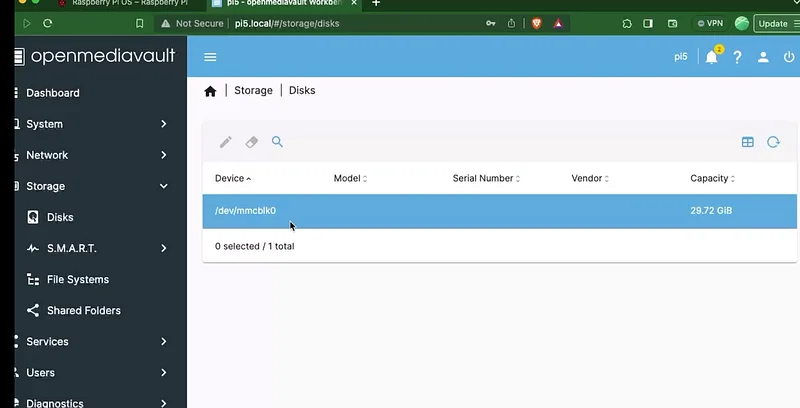
To begin, we need to add a file system on which our shared folder will exist.
For this, you must connect an external portable hard drive to the Raspberry Pi.
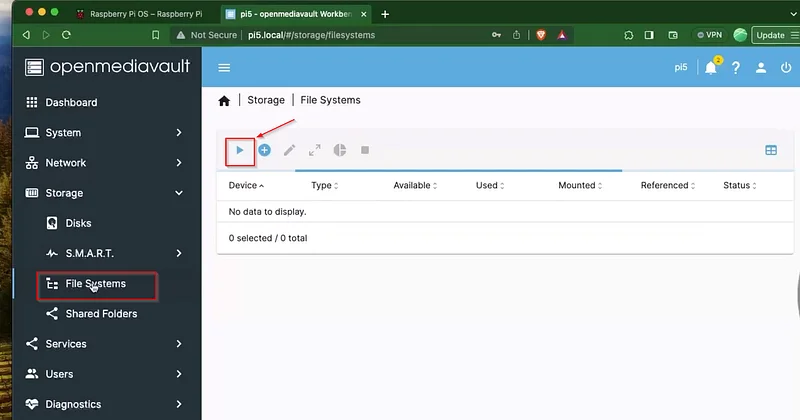
Step 1: Once you have connected your external drive to Raspberry Pi, in the sidebar, click the File Systems option > then click on the Mount button.
Step 2: Under the File System dropdown, Select the Drive connected to the Raspberry Pi and click on the Save Button.
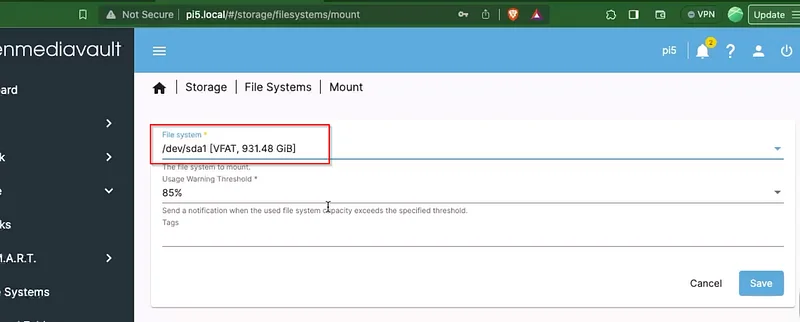
Step 3: When you click the Save button, the system will ask for confirmation to apply the changes. Make sure to click on the Apply button to accept configuration changes.
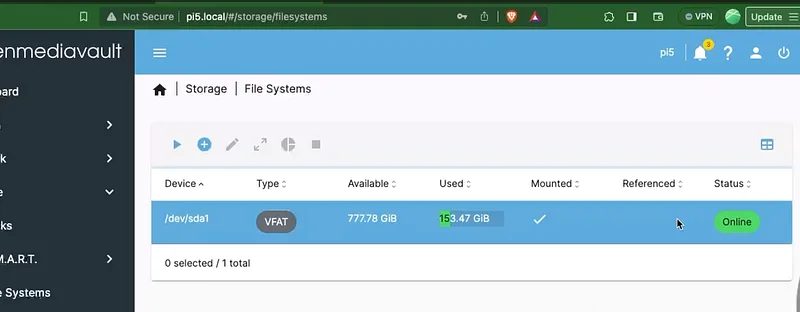
Step 4: Your screen should appear as shown in the image below with the status “Online” which indicates the drive is up and running. With this now you have set up the file system.
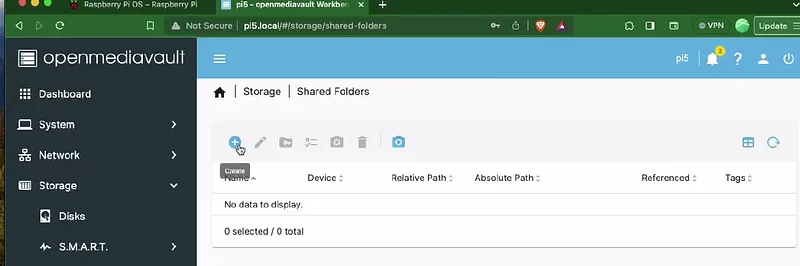
Creating Shared Folder
Now with the file system setup, let’s create a shared folder.
Step 1: Go to Shared Folder > Click on the “Create” Button.
Step 2: Then set the name of the share that you want to set.
Step 3: Under File System select the file system that was created before.
Step 4: Specify the path to the shared folder under Relative Path. This will automatically be the name of your shared folder.
Step 5: Set the permissions you want to be applied to the folder as shown below.
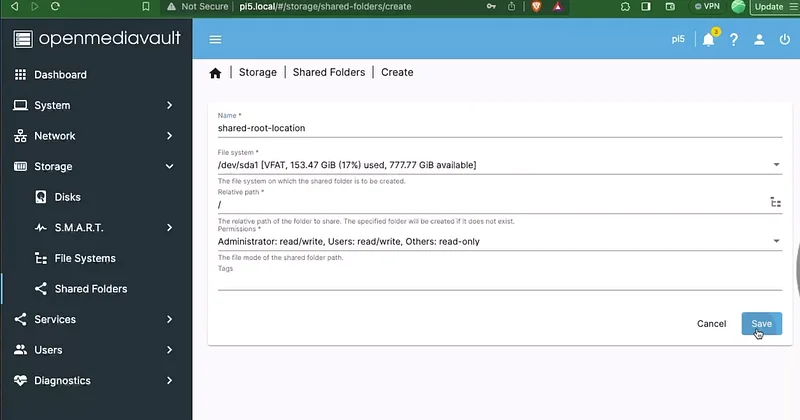
Step 6: Once all the fields are filled, click on Save.
With this, you have successfully created a shared folder.
Next, we will see how to create a user to access the shared folder
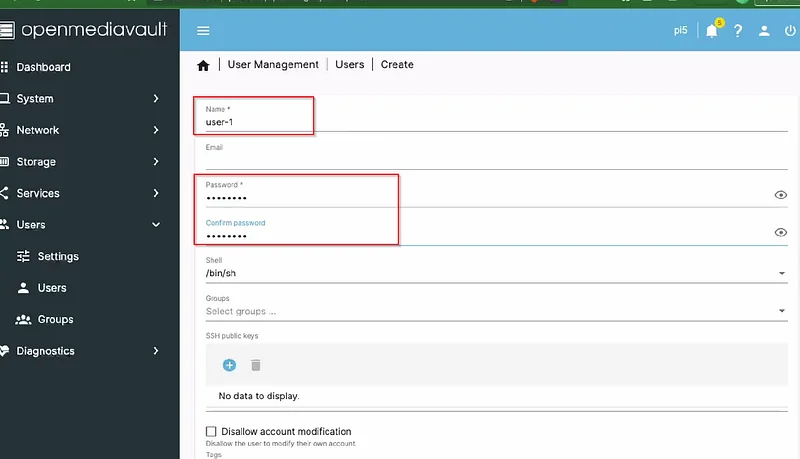
Creating a New User
In the previous section, we created a shared folder and to access this folder we will need a user.
To create a new user, follow these steps
Step 1: Click on Users in the left-hand panel > Users.
Step 2: Click on Create (blue plus icon).
Step 3: Add a Name and Password and click on Save.
Setting User Permissions To The Shared Folder
In the above section, we created a shared folder and also created a new user.
However, this new user should have permission to access the shared folder.
To provide permission you will need to follow the following steps:
Step 1: Under Storage, click on Shared Folder
Step 2: Select the entry of the folder you want to give permissions and click on the Permission Button.
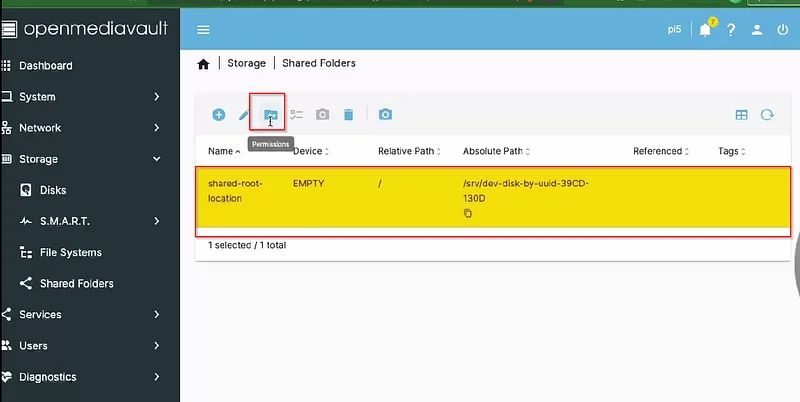
Step 3: You will see all the various users present. Select the user that you created and provide Read/Write access to the user and click on Save.
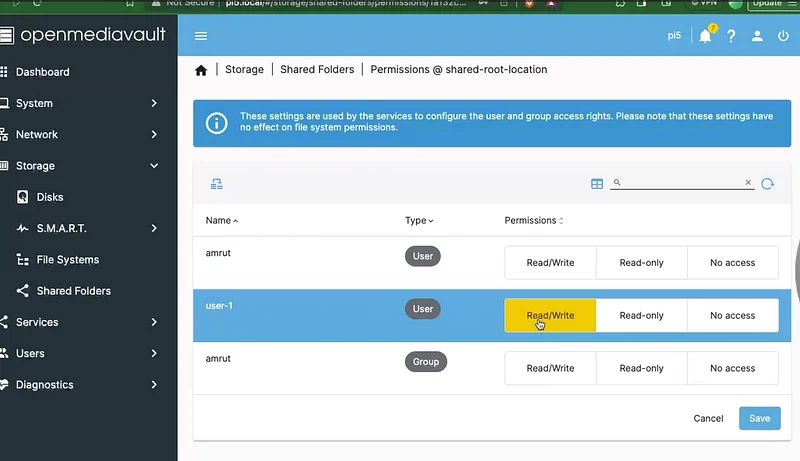
With this, we have given the user permissions to the shared folder
Next, we will check how to access this shared folder over the network in the next section.
Enabling SMB Service For Windows & MacOS
To enable SMB services, follow these steps
Step 1: Go to Services on the left panel >SMB/CIFS > Settings.
Step 2: In the Setting page, click on the Enabled checkbox and click on Save.
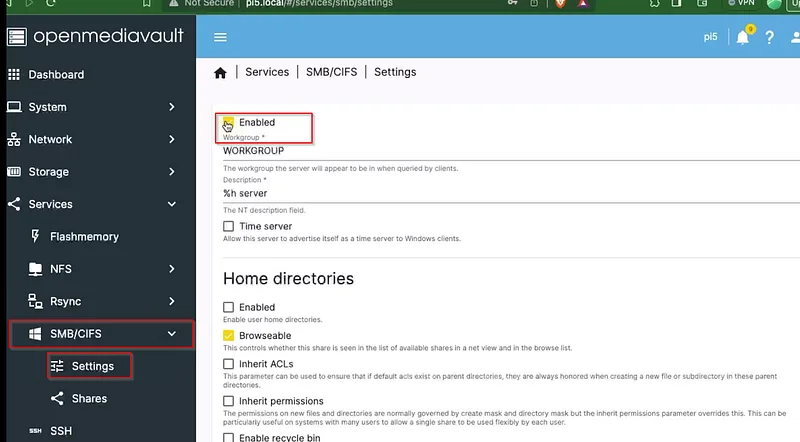
With this SMB/CIFS is now enabled on our OpenMediaVault.
Now we need to add the shared folders to the SMB service.
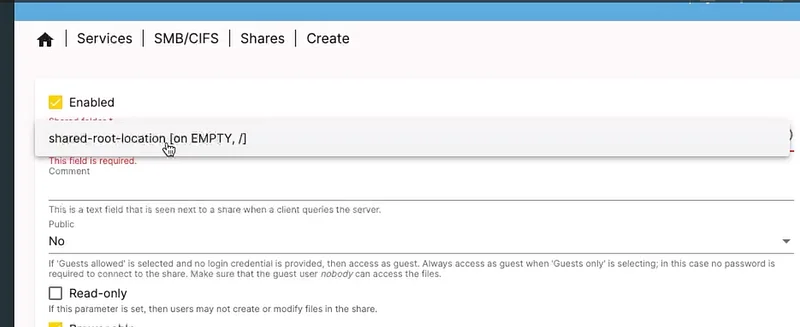
Linking Shared Folder To SMB Service
To add an SMB share follow these steps.
Step 1: Under SMB/CIFS, click on Shares
Step 2: Now click on the Create and select the Share Folder.
This option will show you a list of the shared folders you have created.
Next, there are a couple of other things you will need to take into consideration, like the Public option. Using this option, you can decide whether non-authenticated users can access the share (Guests).
Step 4: Once you have configured everything to fit your needs, click on Save.
Accessing NAS Drive On MacOS
Step 1: Launch Finder on your Mac computer.
Step 2: Click the Go menu and select Connect to Server.
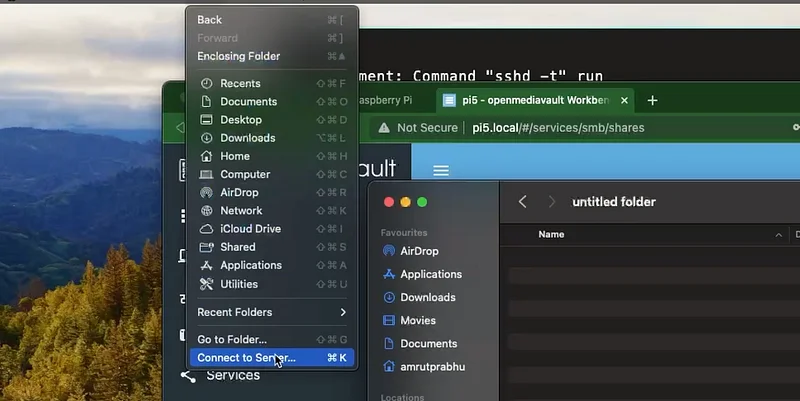
Step 3: Enter smb:// and the IP address of the Rasberry Pi. Click Connect to continue.
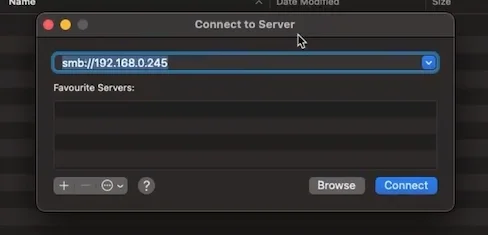
Step 4: When you see a confirmation message, click Connect.
Step 5: Enter the Username and Password of the user that was created before and click Connect.
With this, you should see the shared drive on the left panel of your Finder window.
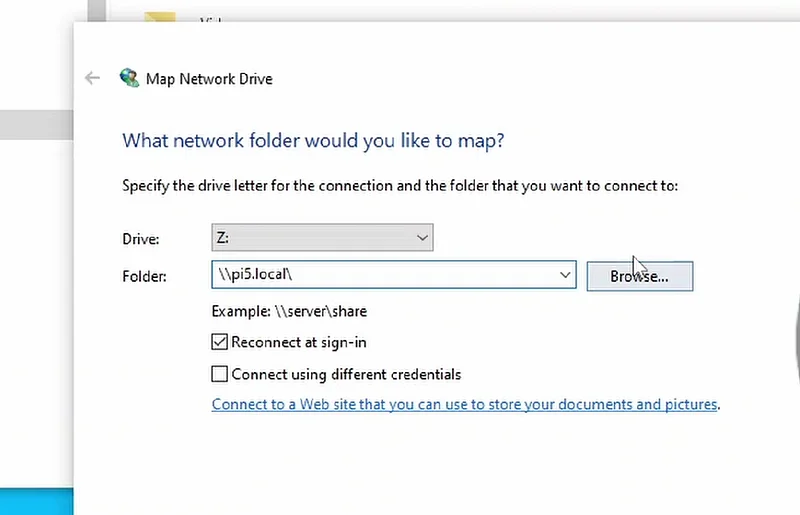
Accessing NAS Drive On Windows
To connect your NAS drive on a Windows machine follow these steps.
Step 1: Click on the Windows menu> My PC
Step 2: Now Right-click on Network in the left panel and select Map Network Drive.
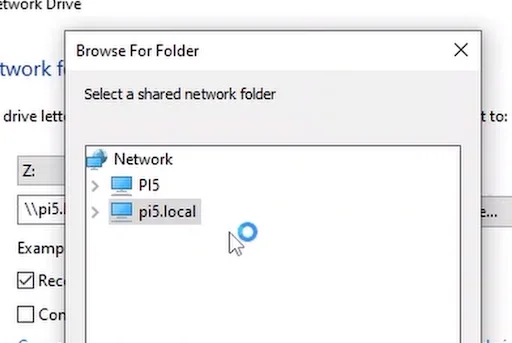
Step 3: Type \\ followed by the hostname or the IP address of the Raspberry Pi and click on Browse.
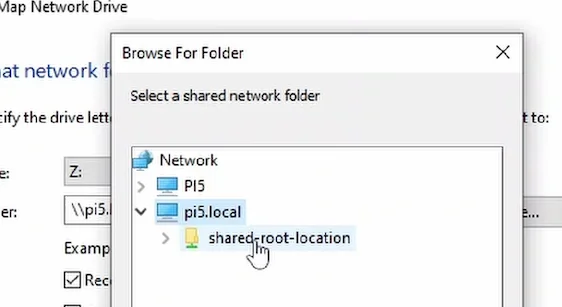
Step 3: Select the shared network folder and open it. You should be asked to enter the credentials of the user that is created and its password.
Step 4: Once the credentials are provided, you should be displayed with the drive location path. Select the drive location and click on OK.
Step 5: Now select the Reconnect at sign-in and click ok.
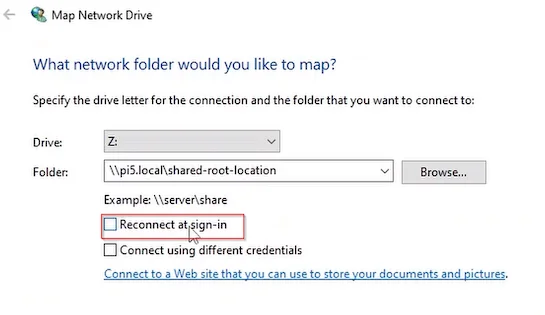
With this, you can now access the NAS shared folders.
If you are interested in exploring more of such easy to follow step by step guides about Home Assistant, then here are a few suggestions
- Create Custom Wake Word For Your Voice Assistant
- Create Your Voice Assistant Device With Wake Word
- Share Files With Home Assistant OS with Samba Share