Connect Xiaomi Temperature and Humidity (LYWSD03MMC) Bluetooth Sensor to Home Assistant

Written by
Featured Video
In this article, we will explore how we can connect the Xiaomi Temperature and Humidity (LYWSD03MMC) Bluetooth Sensor to Home Assistant
Table of Contents
Requirements
- Home Assistant OS setup and running.
You can check this link to see how you can install it for the first time. - Bluetooth Proxy setup and running
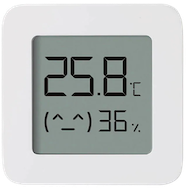
You can check this page, to see how you can set it up. - Xiaomi Temperature and Humidity (LYWSD03MMC) Bluetooth Sensor
To connect the sensor to Home Assistant, we must first Factory Reset the device and then flash it with custom firmware.
Let’s look at how we can do that.
Factory Reset Xiaomi Temperature and Humidity Bluetooth Sensor
Follow these steps to factory reset the Xiaomi Temperature and Humidity Bluetooth Sensor.
Step 1: Open the back panel of the device.
Step 2: Connect the Reset and GND pins with a wire and hold it for 5–6 secs.
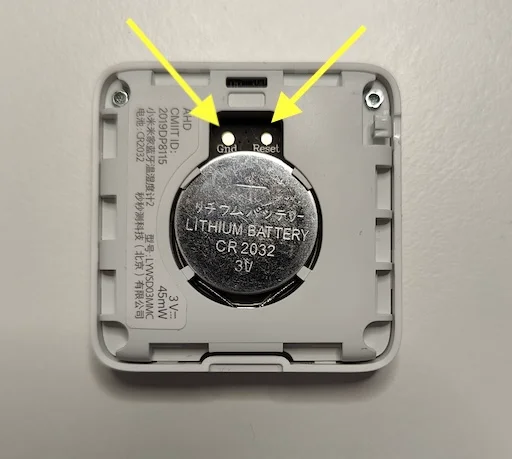
Once the screen refreshes, this means the device is factory reset.
Flashing Xiaomi Temperature and Humidity Sensor with Custom Firmware
To use the Xiaomi Temperature and Humidity Bluetooth sensor with Home Assistant, you must flash it with custom firmware.
Warning: Flashing custom firmware is always at your own risk. Flashing custom firmware can brick your device and make it unusable. So proceed with your own risk.
To flash the custom firmware follow these steps.
Step 1: Open this URL in your Chrome or Edge browser.
Step 2: Click on the Get Advertising MAC option and then click on Connect and select the device with LYWSD03MMC as the name

Setting up a connection can take about 4–5 minutes.
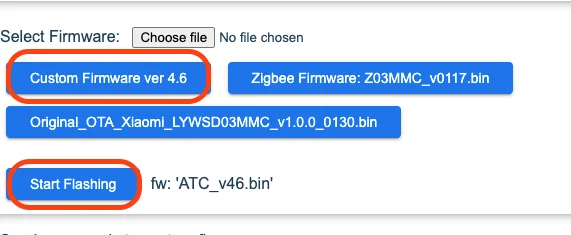
Step 3: Now click on Custom Firmware ver 4.6 and click on Start Flashing.
Step 4: After flashing completes, click on Reconnect to re-connect the device.
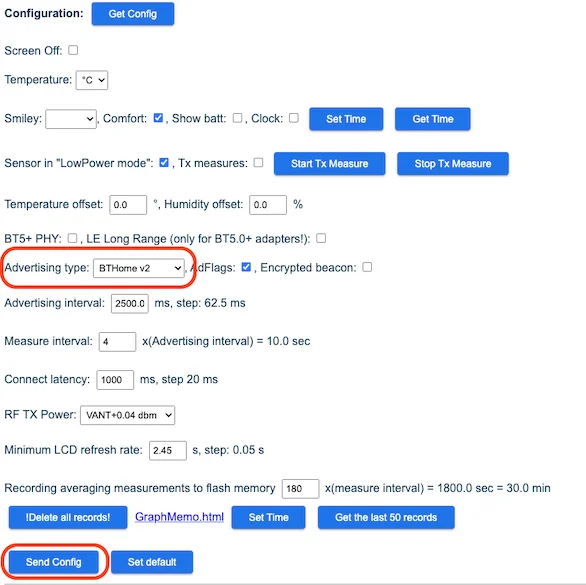
Step 5: Scroll down to the Configuration section and change the Advertising type to BTHome v2.
Step 6: Click on Send Config.
With this, the custom firmware is flashed and configured.
You can now connect the Xiaomi Temperature and Humidity Bluetooth sensor to Home Assistant.
Connecting Xiaomi Temperature and Humidity Bluetooth Sensor to Home Assistant
With the custom firmware installed in the sensor, we can now connect it to Home Assistant.
To connect the sensor to Home Assistant, follow these steps.
Step 1: Go to Home Assistant Settings in the left panel.
Step 2: Click on Devices & Services.
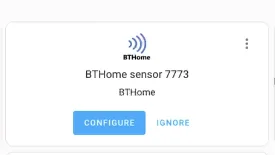
Mostly you should see it being auto-discovered like this.
If not, then
Step 3: Click on Add Integration from the bottom right-hand corner.
Step 4: Search for BTHome and click on it.
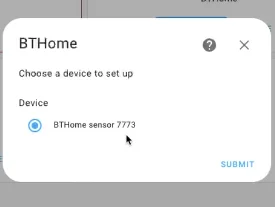
You should be able to see the device there.
In case it does not still show up, wait for some time and retry the BThome Integration again.
If you are interested in exploring more of such easy to follow step by step guides about Home Assistant, then here are a few suggestions
- Setup Zigbee2Mqtt with Home Assistant
- Using Sonoff Zigbee 3.0 USB Dongle Plus With Home Assistant
- Voice Assistant In Home Assistant Using USB Microphone