Setup Local Voice Assistant In Home Assistant Using USB Microphone - Docker Containers Setup Guide

Written by
Featured Video
This article will look at how you can set up voice assistance with Home Assistant and invoke Home Assistant devices using a USB microphone.
Table of Contents
Requirements
- Home Assistant up and running.
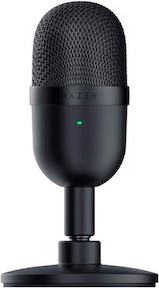
You can check this link to see how you can install it for the first time - USB Microphone
For Example
To set up voice assistant, we would need three components to create the voice assist pipeline in Home Assistant.
- Whisper: For speech-to-text
- Piper: For text-to-speech
- OpenWakeWord: For invoking the Assist Pipeline
Important Note
If you are new to docker, this setup can be overwhelming. I would recommend to use Home Assistant OS and install addons instead. Here is the video for the entire setup.
In case you want to set it up using Docker, then continue with the next steps.
Run Whisper, Piper, and OpenWakeWord with Docker
Create a docker-compose.yaml file with the following content
services:
  openwakeword:
    image: homeassistant/amd64-addon-openwakeword:latest
    container_name: openwakeword

    entrypoint: python3
    command: >
      -m wyoming_openwakeword
      --uri 'tcp://0.0.0.0:10400'
      --preload-model 'ok_nabu'
      --custom-model-dir /share/openwakeword
    ports:
      - 10400:10400
    environment:
      - TZ=Europe/Berlin
    volumes:
      - ./openwakeword-data:/data
      - ./openwakeword-custom-model-dir:/share/openwakeword
    restart: unless-stopped

#-------------------------------------
  piper:
      image: homeassistant/amd64-addon-piper:latest
      container_name: piper

      entrypoint: python3
      command: >
        -m wyoming_piper
        --piper '/usr/share/piper/piper'
        --uri 'tcp://0.0.0.0:10200'
        --length-scale "1"
        --noise-scale "0.667"
        --speaker "0"
        --voice "en_US-lessac-medium"
        --max-piper-procs "1"
        --data-dir /data
        --data-dir /share/piper
        --download-dir /data
      ports:
        - "10200:10200"
      volumes:
        - ./piper-data:/data
      restart: unless-stopped

#----------------------------------------
  whisper:
    image: homeassistant/amd64-addon-whisper:latest
    container_name: whisper

    entrypoint: python3
    command: >
      -m wyoming_faster_whisper
      --uri tcp://0.0.0.0:10300
      --model small-int8
      --beam-size 1
      --language en
      --data-dir /data
      --download-dir /data
    ports:
      - "10300:10300"
    environment:
      - TZ=Europe/Berlin
    volumes:
      - ./whisper-data:/data
    restart: unless-stopped
This docker compose file, contains all three docker containers.
You can now start all the containers using docker compose up.
Setup Piper, Whisper, and OpenWakeWord with Home Assistant
After starting the containers, you need to connect them to Home Assistant
Step 1: Click on Home Assistant settings on the Left panel
Step 2: Click on “Devices & Services”
Step 3: Click on “Add Integration” from the bottom right-hand corner.
Step 4: Search “Wyoming Protocol”
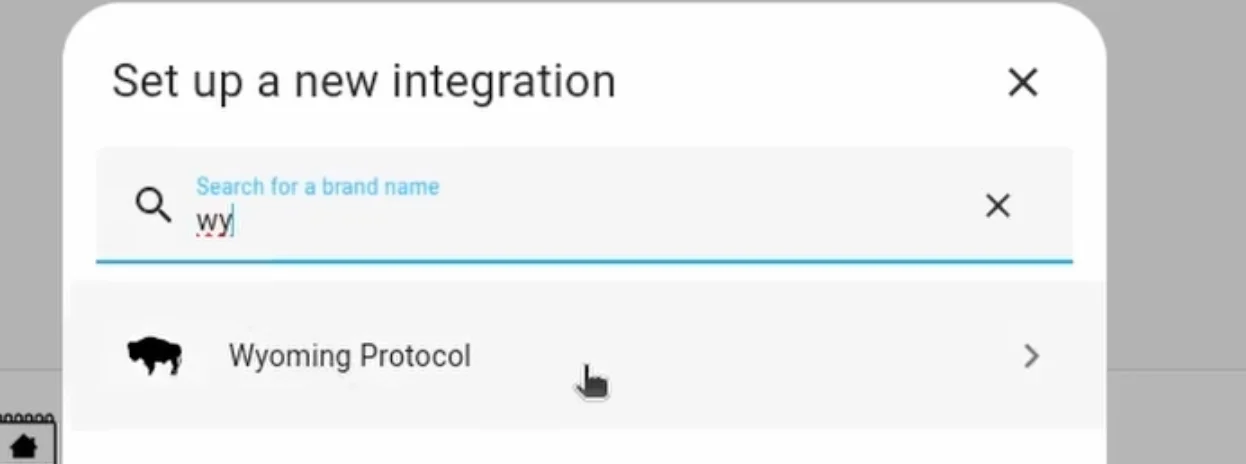
Step 5: Specify the IP address of your machine where you are running your docker-compose file.
Step 6: Add the port number “10400" to set up OpenWakeWord and click submit.

Step 7: Repeat steps 4 to 6 for Piper setup with port “10200” and Whisper with port “10300”.
With this, you have now set up the connection with Home Assistant.
Now, let’s set up the Assist Pipeline.
Setup Assist Pipeline for Voice Assistance
Let’s set up the Assist Pipeline
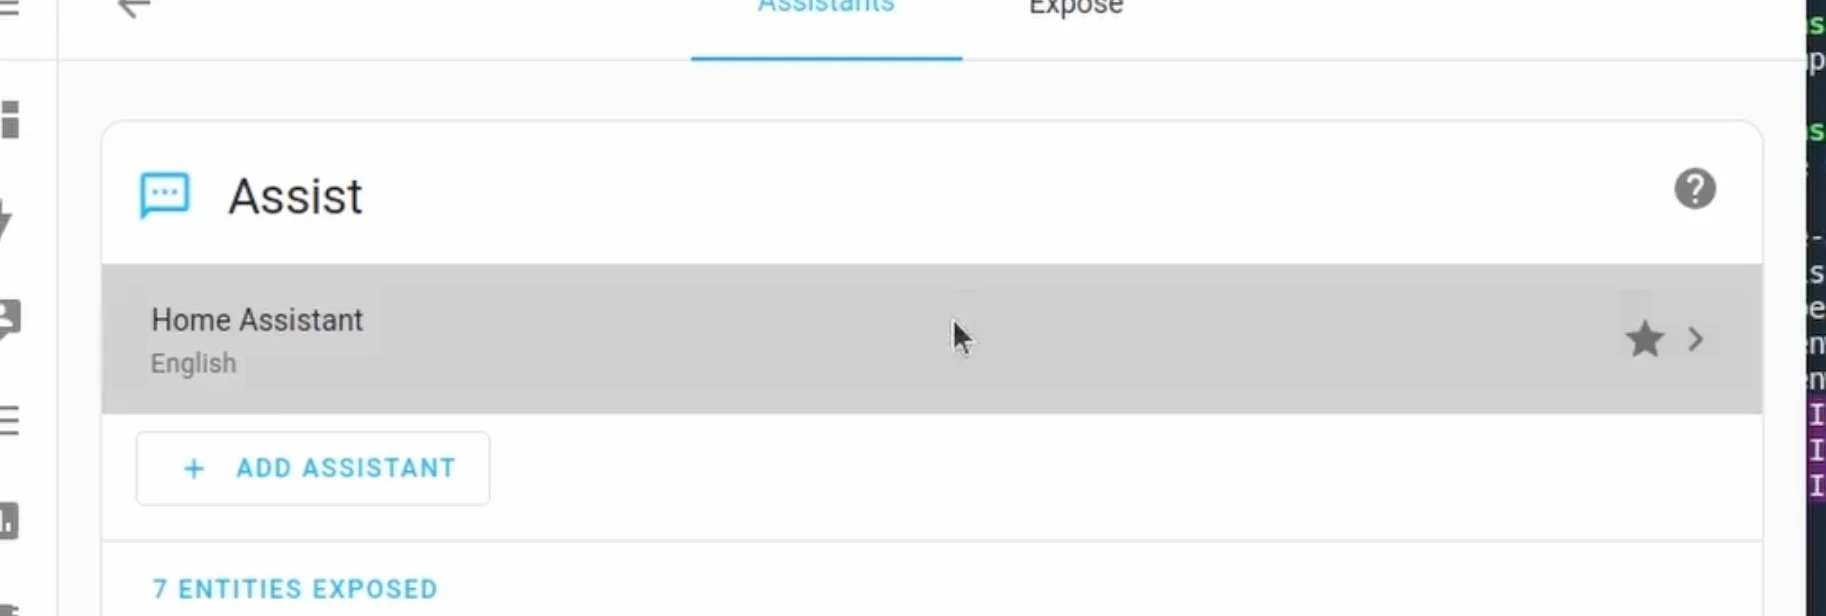
Step 1: Click on Home Assistant settings on the Left panel
Step 2: Click on “Voice Assistants”
Step 3: Click on the default pipeline
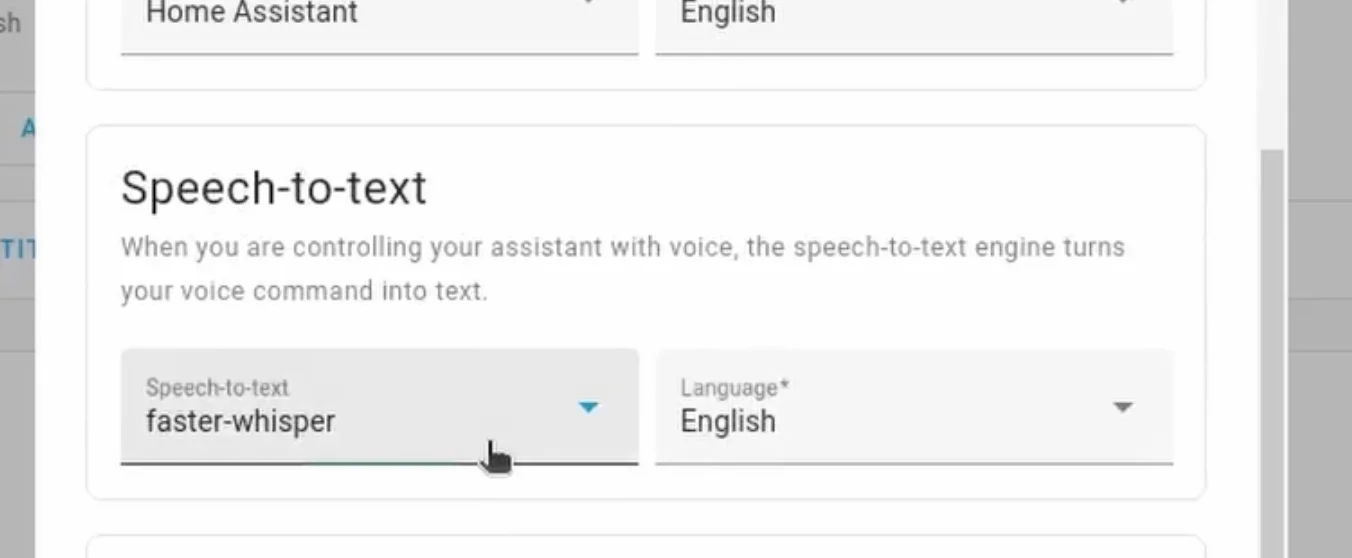
Step 4: Setup “Speech to text”
Step 5: Setup “Text to Speech”
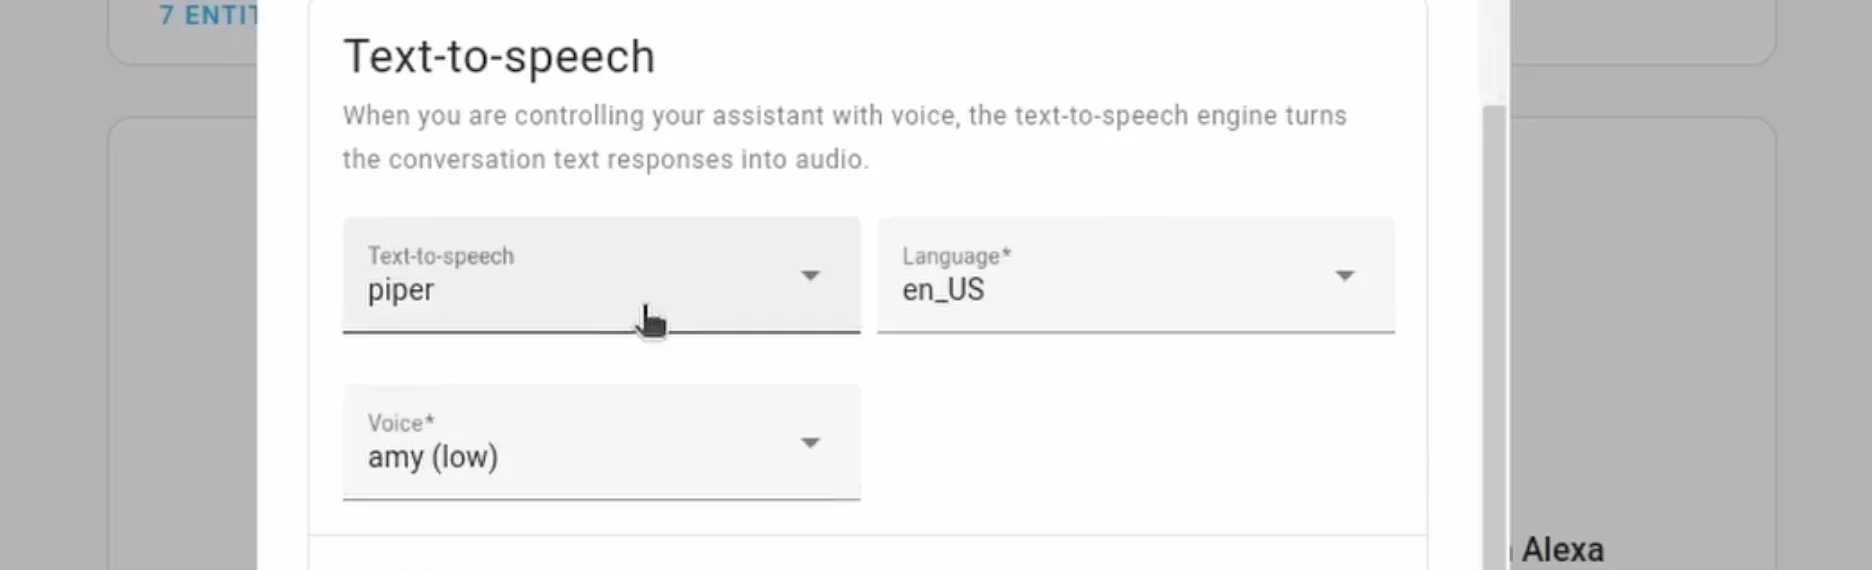
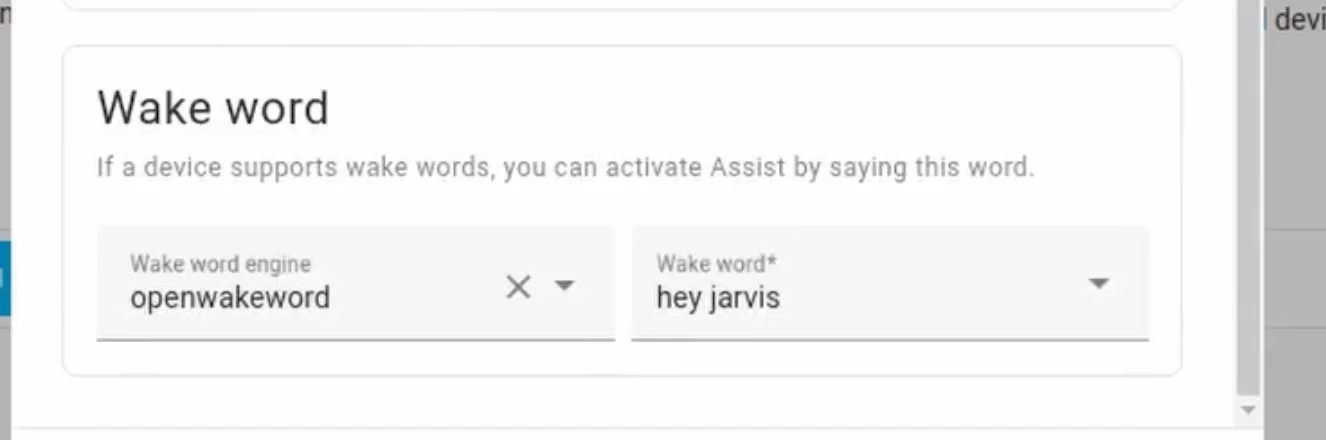
Step 6: Finally set up “Wake Word” and click submit.
With this, we just set up our voice Assist Pipeline.
Now the last piece required is the USB Microphone
Setup USB Microphone In Home Assistant OS
To set up a USB microphone to invoke the Assist Pipeline, you will need to install an “Assist Microphone” addon.
Step 1: Click on Home Assistant settings on the Left panel
Step 2: Click on “Addons”
Step 3: Search and install the “Assist Microphone” addon
Step 4: Click on the configuration tab on the “Assist Microphone” addon page.
Step 5: Create and Set the Home Assistant token. You can generate one from your profile.
Step 6: Scroll down to Audio and select the input. In this case, the microphone you connected to Home Assistant.

Step 7: Make sure to click on save for both the configurations you set in steps 5 and 6.
Step 8: Go to the info tab and start the “Assist Microphone” addon.
With this, you have just configured your USB microphone to be used by the Assist Pipeline.
You can now invoke the Home Assistant using your selected wake word.
If you are interested in exploring more of such easy to follow step by step guides about Home Assistant, then here are a few suggestions
- Setup Zigbee2Mqtt with Home Assistant
- Control LED Strip with Home Assistant Using WLED
- How I Added a Matter Device to Home Assistant