Written by
Featured Video
Table of Contents
A few months ago, I built a Raspberry Pi 5 NAS with RAID 5 using the Penta SATA HAT from Radxa. While it’s been a reliable setup, I wanted to enhance the data reliability. In this guide, I’ll walk you through three backup strategies I’ve implemented for my Raspberry Pi 5 NAS, and I’ll also discuss the energy consumption changes resulting from these updates.
Upgrading the Hardware
Before diving into the strategies, I made some significant hardware upgrades:
-
Added a 120GB SSD for the OS, replacing the SD card on the Pi 5.
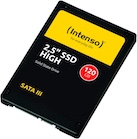
- Amazon EU : https://amzn.to/3VU6T8Q
- Amazon US : https://amzn.to/4gKmeRC -
Installed a 4TB HDD as secondary storage for backups.

- Amazon EU : https://amzn.to/3ZN5To0
- Amazon US : https://amzn.to/3ZXRqFQ -
Organized the components into a compact and efficient rack setup using an Acrylic HDD Mount rack.
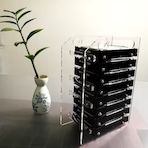
- Amazon EU: https://amzn.to/3BuOMPY
- Amazon US : https://amzn.to/4iFN3rF
- AliExpress : https://s.click.aliexpress.com/e/_olEubxz -
USB to SATA connector
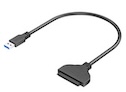
- Amazon EU: https://amzn.to/41ZiW8y
- Amazon US : https://amzn.to/3VS6uDJ
- AliExpress : https://s.click.aliexpress.com/e/_oFQ4SfZ -
eSATA cable for 3.5 inch HDD with 12v pins.

- Amazon EU: https://amzn.to/3Dsq2Z5
- Amazon US : https://amzn.to/41RZWsz
- AliExpress : https://s.click.aliexpress.com/e/_ok7mfCB
Backup Strategy 1: NAS OS Backup To The NAS
First, I configured a system backup to safeguard the NAS OS:
- OMV Backup Plugin:
- Installed the OMV Backup plugin in OpenMediaVault.
- Configured the plugin to:
- Save backups to the RAID 5 shared folder.
- Use the DD command for a full disk backup.
- Retain up to five copies.
- Scheduling:
- Scheduled daily backups at 1:30 AM.
- Restoring the OS:
- Extracted the backup file to a PC.
- Used the DD command to flash the backup onto the SSD.
- Booting From USB Storage
- Mount the USB storage and open the
BootFSpartition - Update the
config.txtfile to enable USB boot by addingusb_max_current_enable=1 - Conenct the SSD to the Pi 5 via the USB-to-SATA connector and turn on the Pi 5.
This strategy ensures I can quickly restore the NAS OS in case of SD card failure.
Backup Strategy 2: NAS Data Backup to Local HDD
Next, I implemented local data backup using the 4TB HDD:
- Drive Setup:
- Formatted the HDD with the EXT4 file system.
- Created and mounted a shared folder named
backupon the HDD.
2. Rsync Configuration:
- Created an Rsync task in OpenMediaVault:
- Source: RAID 5 shared folder.
- Destination: 4TB HDD backup folder.
- Schedule: Daily at 2:00 AM.
- Enabled options to preserve ACLs and synchronize deletions.
This strategy provides an on-site backup of the RAID 5 data.
Backup Strategy 3: Remote Backup to Another NAS
Lastly, I set up remote backups to a second NAS:
- Remote NAS Setup:
- Configured the remote NAS (CM5 NAS) with RAID 5.
- Enabled Rsync server and created a module named
backup.
- Rsync Task on Raspberry Pi 5 NAS:
- Configured an Rsync task:
- Type: Remote (Push).
- Source: RAID 5 shared folder on PiFi NAS.
- Destination:
backupmodule on the remote NAS. - Schedule: Daily at 3:15 AM.
- Enabled options to preserve ACLs and synchronize deletions.
This strategy ensures off-site redundancy, enhancing data security in case of physical damage to the primary NAS.
Conclusion
By implementing these three strategies, I’ve significantly improved the reliability and security of my Raspberry Pi 5 NAS:
- Backups of the OS ensure rapid recovery from system failures.
- Local HDD backups protect against RAID 5 data corruption.
- Remote backups safeguard against physical damage to the primary NAS.
These strategies have provided peace of mind and a robust system for my video editing workflow. If you’re considering similar upgrades or have questions, feel free to reach out!