How I Created My Voice Assistant With On-Device Wake Word Detection On ESP32 Using Micro Wake Word

Written by
Featured Video
In this article, we will look at how I created my voice Assistant with On-Device Wake Word detection on an ESP32 S3 using MicroWake Word to send commands to Home Assistant.
Table of Contents
Requirements
- Home Assistant up and running.
You can check this link to see how you can install it for the first time - ESPHome is setup and running
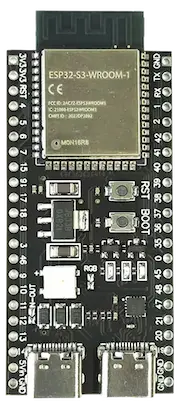
In case you have not set it up, you can look at it here. - ESP32 S3 N8R2 or N16R8 Dev Board
Guide for ordering ESP32 S3 N8R2 or N16R8 Board is here
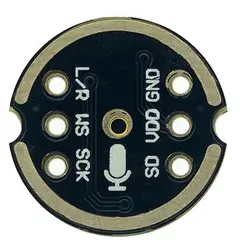
- INMP441 Microphone
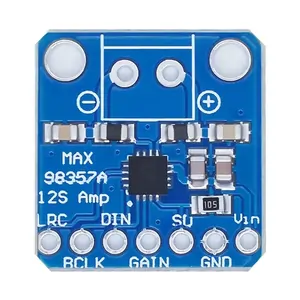
- MAX98357A Audio Amplifier
- 3-watt Speakers (Optional: Only required to listen to the pipeline output)
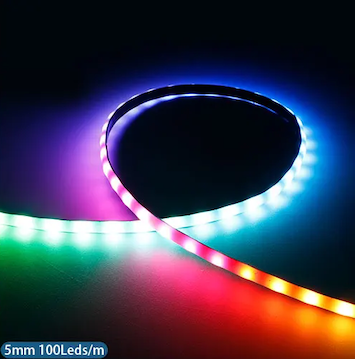
- COB 5mm WS2812B LED Strip
3D Print Template For Voice Assistant Case
You can find the link here to the STL file for 3D printing the case and the cover.
Set up Voice Assist Pipeline
To set up voice assistant, we would need two components to create the Voice Assist pipeline in Home Assistant.
- Whisper: For speech-to-text
- Piper: For text-to-speech
Now, following the below video, you have set up these components in Home Assistant using Addons.
You will get to see how to set up the following components that are required
- Whisper Addon
- Piper Addon
- And finally the entire Voice Assist pipeline.
You don't need to set up the Wake Word addon, as we will use the on-device Wake Word detection with the Micro Wake Word framework
So make sure to watch it and set up the Voice Assist pipeline
Now we will look at how we can prepare our ESP32 S3 with a microphone and 3-watt speakers.
Circuit Diagram for ESP32 S3 With INMP441 Microphone & MAX98357A Audio Amplifier
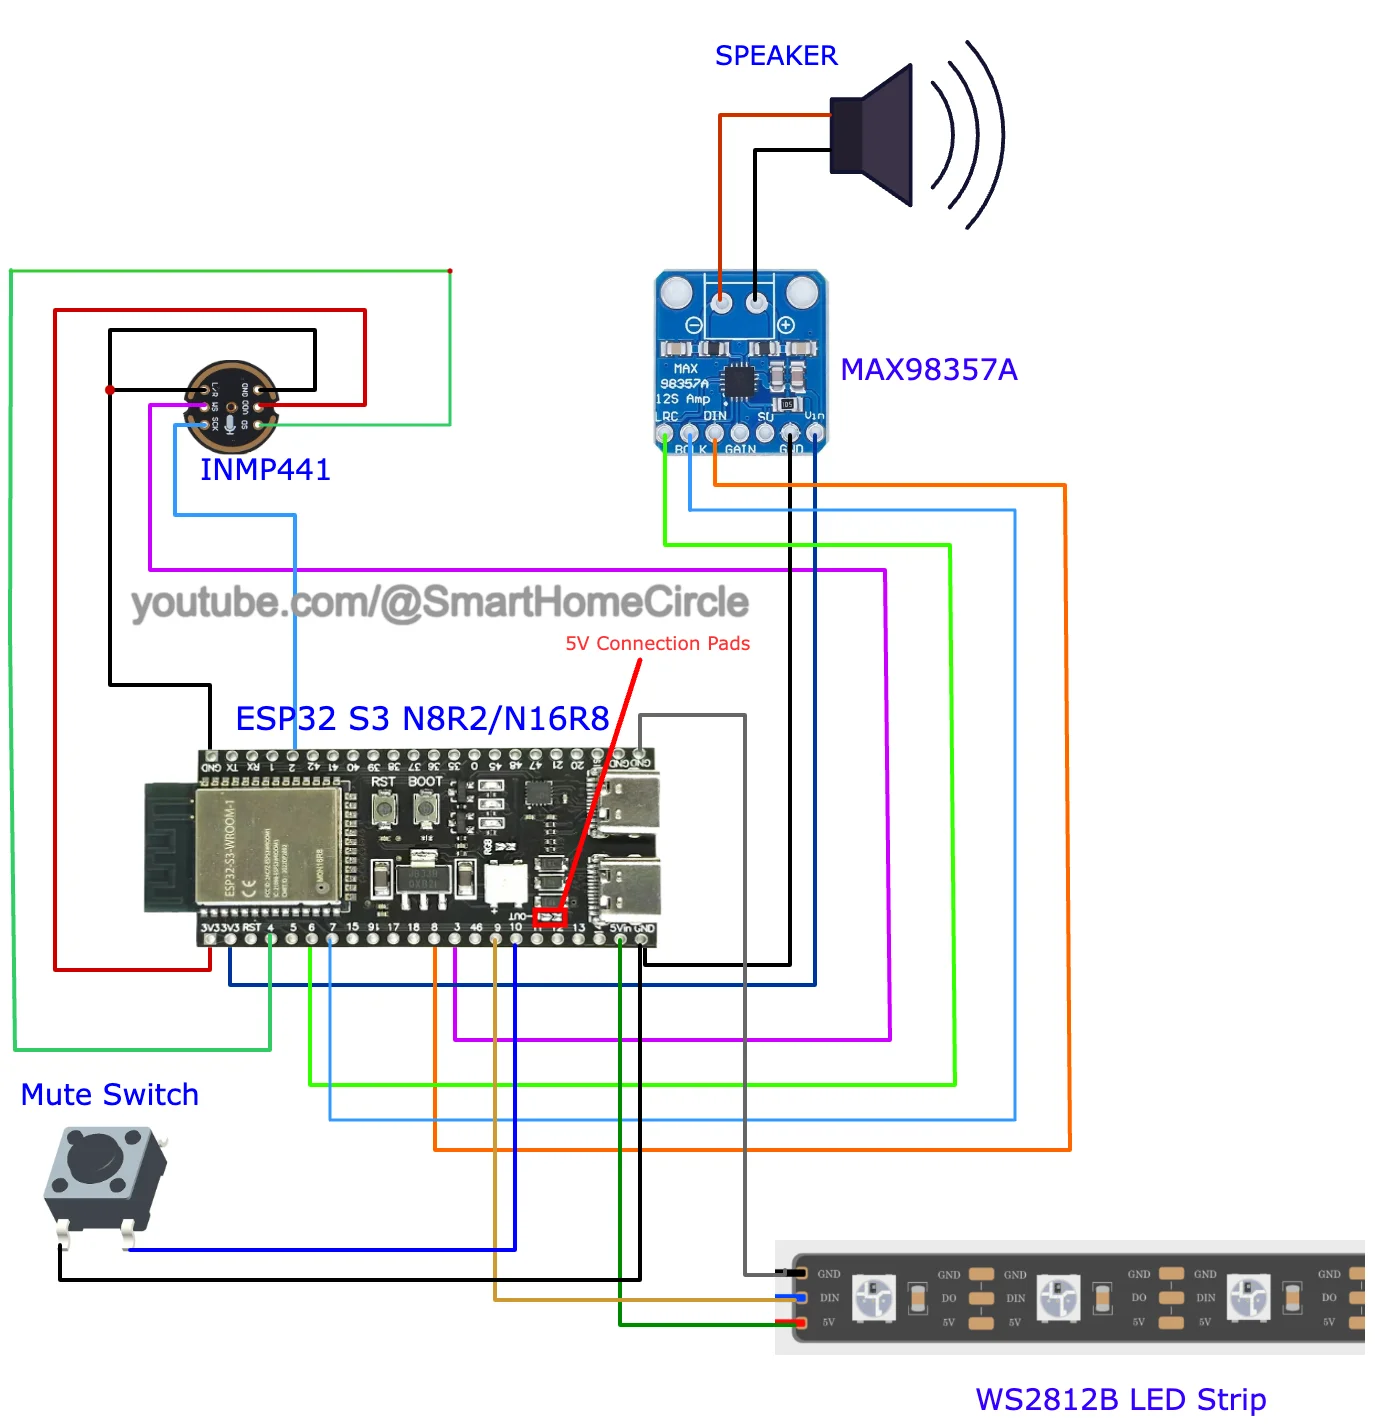
Important: You need to connect the 5v pads as shown in the diagram to enable 5v output on the 5v pin.
Here is the pin mapping table
| ESP32 S3 N8R2 or N16R8 | INMP441 Microphone | Speaker | LED Strip WS2812B | Mute Switch |
|---|---|---|---|---|
| GND | switch pin 1 | |||
| GPIO 10 | switch pin 2 | |||
| GND | Gnd | |||
| GPIO 6 | LRC | |||
| GPIO 7 | BLCK | |||
| GPIO 8 | DIN | |||
| 3v3 | Vin | |||
| GPIO 4 | SD | |||
| GPIO 3 | WS | |||
| GPIO 2 | SCK | |||
| 3v3 | VDD | |||
| GND | GND & L/R | |||
| GND | GND | |||
| GPIO 9 | Din | |||
| Vin (5v) | Vin |
Once you have connected the microphone and the audio amplifier, let’s look at the code we must flash to the ESP32 S3 using ESPHome.
Flashing Code to ESP32 S3 with ESPHome
Note: I faced problems while flashing the ESP32 S3 from an M series Macbook, so I switched to a Windows system.
Now, you can follow these steps to flash the code required to make the ESP32 S3 work with the microphone and speakers.
Step 1: Create a new device in the ESPHome dashboard by clicking on “New Device” in the bottom right-hand corner.
Step 2: Give it a name e.g. “Voice Assistant” and click “Next”.
Step 3: Now select ESP32 S3 from the options
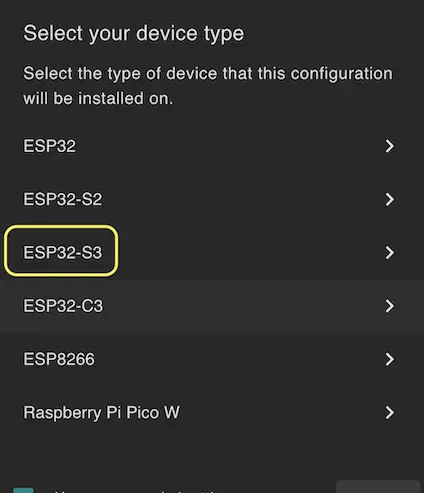
Step 4: Now, click on “Skip” and open the device card again by clicking on the “Edit” option.
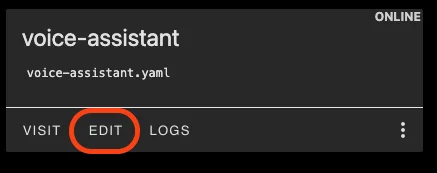
Step 5: Place the following YAML code below.
** Updated for Home Assistant 2025.07 **
substitutions:
# Phases of the Voice Assistant
# The voice assistant is ready to be triggered by a wake word
voice_assist_idle_phase_id: '1'
# The voice assistant is waiting for a voice command (after being triggered by the wake word)
voice_assist_waiting_for_command_phase_id: '2'
# The voice assistant is listening for a voice command
voice_assist_listening_for_command_phase_id: '3'
# The voice assistant is currently processing the command
voice_assist_thinking_phase_id: '4'
# The voice assistant is replying to the command
voice_assist_replying_phase_id: '5'
# The voice assistant is not ready
voice_assist_not_ready_phase_id: '10'
# The voice assistant encountered an error
voice_assist_error_phase_id: '11'
# Change this to true in case you ahve a hidden SSID at home.
hidden_ssid: "false"
no_of_leds: '29'
# Substitutions for audio files
jack_connected_sound_file: https://github.com/esphome/home-assistant-voice-pe/raw/dev/sounds/jack_connected.flac
jack_disconnected_sound_file: https://github.com/esphome/home-assistant-voice-pe/raw/dev/sounds/jack_disconnected.flac
mute_switch_on_sound_file: https://github.com/esphome/home-assistant-voice-pe/raw/dev/sounds/mute_switch_on.flac
mute_switch_off_sound_file: https://github.com/esphome/home-assistant-voice-pe/raw/dev/sounds/mute_switch_off.flac
timer_finished_sound_file: https://github.com/esphome/home-assistant-voice-pe/raw/dev/sounds/timer_finished.flac
wake_word_triggered_sound_file: https://github.com/esphome/home-assistant-voice-pe/raw/dev/sounds/wake_word_triggered.flac
center_button_press_sound_file: https://github.com/esphome/home-assistant-voice-pe/raw/dev/sounds/center_button_press.flac
center_button_double_press_sound_file: https://github.com/esphome/home-assistant-voice-pe/raw/dev/sounds/center_button_double_press.flac
center_button_triple_press_sound_file: https://github.com/esphome/home-assistant-voice-pe/raw/dev/sounds/center_button_triple_press.flac
center_button_long_press_sound_file: https://github.com/esphome/home-assistant-voice-pe/raw/dev/sounds/center_button_long_press.flac
esphome:
name: esp32-s3-ha-pe-update
friendly_name: ESP32 S3 Home Assistant PE Update
name_add_mac_suffix: true
min_version: 2025.9.3
on_boot:
priority: 375
then:
# Run the script to refresh the LED status
- script.execute: control_leds
- delay: 1s
# - switch.turn_on: internal_speaker_amp
# If after 10 minutes, the device is still initializing (It did not yet connect to Home Assistant), turn off the init_in_progress variable and run the script to refresh the LED status
- delay: 10min
- if:
condition:
lambda: return id(init_in_progress);
then:
- lambda: id(init_in_progress) = false;
- script.execute: control_leds
esp32:
board: esp32-s3-devkitc-1
cpu_frequency: 240MHz
variant: esp32s3
flash_size: 8MB
framework:
type: esp-idf
version: recommended
sdkconfig_options:
CONFIG_ESP32S3_DATA_CACHE_64KB: "y"
CONFIG_ESP32S3_DATA_CACHE_LINE_64B: "y"
CONFIG_ESP32S3_INSTRUCTION_CACHE_32KB: "y"
# Moves instructions and read only data from flash into PSRAM on boot.
# Both enabled allows instructions to execute while a flash operation is in progress without needing to be placed in IRAM.
# Considerably speeds up mWW at the cost of using more PSRAM.
CONFIG_SPIRAM_RODATA: "y"
CONFIG_SPIRAM_FETCH_INSTRUCTIONS: "y"
CONFIG_BT_ALLOCATION_FROM_SPIRAM_FIRST: "y"
CONFIG_BT_BLE_DYNAMIC_ENV_MEMORY: "y"
CONFIG_MBEDTLS_EXTERNAL_MEM_ALLOC: "y"
CONFIG_MBEDTLS_SSL_PROTO_TLS1_3: "y" # TLS1.3 support isn't enabled by default in IDF 5.1.5
wifi:
id: wifi_id
ssid: !secret wifi_ssid
password: !secret wifi_password
manual_ip:
static_ip: 192.168.0.114
gateway: 192.168.0.1
subnet: 255.255.255.0
on_connect:
- lambda: id(improv_ble_in_progress) = false;
- script.execute: control_leds
on_disconnect:
- script.execute: control_leds
# Enable fallback hotspot (captive portal) in case wifi connection fails
ap:
ssid: "Esp32-S3-Wake-Word"
password: "LJfUrdJk3svP"
network:
enable_ipv6: true
logger:
level: DEBUG
logs:
sensor: WARN # avoids logging debug sensor updates
api:
id: api_id
encryption:
key: "TFpb+pBAvQIS1MVwaA7EoJ2DkpWE+79UvVro7yMyGdU="
on_client_connected:
- script.execute: control_leds
on_client_disconnected:
- script.execute: control_leds
# encryption: # Uses key set by Home Assistant
ota:
- platform: esphome
password: "1245211a05eef56614a2ef5a3f3e971c"
psram:
mode: octal
speed: 80MHz
globals:
# Global index for our LEDs. So that switching between different animation does not lead to unwanted effects.
- id: global_led_animation_index
type: int
restore_value: no
initial_value: '0'
# Global initialization variable. Initialized to true and set to false once everything is connected. Only used to have a smooth "plugging" experience
- id: init_in_progress
type: bool
restore_value: no
initial_value: 'true'
# Global variable storing the state of ImprovBLE. Used to draw different LED animations
- id: improv_ble_in_progress
type: bool
restore_value: no
initial_value: 'false'
# Global variable tracking the phase of the voice assistant (defined above). Initialized to not_ready
- id: voice_assistant_phase
type: int
restore_value: no
initial_value: ${voice_assist_not_ready_phase_id}
# Global variable tracking if the dial was recently touched.
- id: dial_touched
type: bool
restore_value: no
initial_value: 'false'
# Global variable tracking if the LED color was recently changed.
- id: color_changed
type: bool
restore_value: no
initial_value: 'false'
# Global variable tracking if the jack has been plugged touched.
- id: jack_plugged_recently
type: bool
restore_value: no
initial_value: 'false'
# Global variable tracking if the jack has been unplugged touched.
- id: jack_unplugged_recently
type: bool
restore_value: no
initial_value: 'false'
# Global variable storing the first active timer
- id: first_active_timer
type: voice_assistant::Timer
restore_value: false
# Global variable storing if a timer is active
- id: is_timer_active
type: bool
restore_value: false
# Global variable storing if a factory reset was requested. If it is set to true, the device will factory reset once the center button is released
- id: factory_reset_requested
type: bool
restore_value: no
initial_value: 'false'
switch:
# This is the master mute switch. It is exposed to Home Assistant. The user can only turn it on and off if the hardware switch is off. (The hardware switch overrides the software one)
- platform: template
id: master_mute_switch
restore_mode: RESTORE_DEFAULT_OFF
icon: "mdi:microphone-off"
name: Mute
entity_category: config
optimistic: True
lambda: |-
// Muted either if the hardware mute switch is on or the microphone's software mute switch is enabled
if (id(i2s_mics).get_mute_state()) {
return true;
} else {
return false;
}
turn_on_action:
# - if:
# condition:
# binary_sensor.is_off: hardware_mute_switch
# then:
- microphone.mute:
turn_off_action:
# - if:
# condition:
# binary_sensor.is_off: hardware_mute_switch
# then:
- microphone.unmute:
on_turn_on:
- script.execute: control_leds
on_turn_off:
- script.execute: control_leds
# Wake Word Sound Switch.
- platform: template
id: wake_sound
name: Wake sound
icon: "mdi:bullhorn"
entity_category: config
optimistic: true
restore_mode: RESTORE_DEFAULT_ON
# Internal switch to track when a timer is ringing on the device.
- platform: template
id: timer_ringing
optimistic: true
internal: true
restore_mode: ALWAYS_OFF
on_turn_off:
# Disable stop wake word
- micro_wake_word.disable_model: stop
- script.execute: disable_repeat
# Stop any current annoucement (ie: stop the timer ring mid playback)
- if:
condition:
media_player.is_announcing:
then:
media_player.stop:
announcement: true
# Set back ducking ratio to zero
- mixer_speaker.apply_ducking:
id: media_mixing_input
decibel_reduction: 0
duration: 1.0s
# Refresh the LED ring
- script.execute: control_leds
on_turn_on:
# Duck audio
- mixer_speaker.apply_ducking:
id: media_mixing_input
decibel_reduction: 20
duration: 0.0s
# Enable stop wake word
- micro_wake_word.enable_model: stop
# Ring timer
- script.execute: ring_timer
# Refresh LED
- script.execute: control_leds
# If 15 minutes have passed and the timer is still ringing, stop it.
- delay: 15min
- switch.turn_off: timer_ringing
binary_sensor:
# Center Button. Used for many things (See on_multi_click)
- platform: gpio
id: center_button #mute
pin:
number: GPIO10
inverted: true
mode:
input: True
pullup: True
on_press:
- script.execute: control_leds
on_release:
- script.execute: control_leds
# If a factory reset is requested, factory reset on release
- if:
condition:
lambda: return id(factory_reset_requested);
then:
- button.press: factory_reset_button
on_multi_click:
# Simple Click:
# - Abort "things" in order
# - Timer
# - Announcements
# - Voice Assistant Pipeline run
# - Music
# - Starts the voice assistant if it is not yet running and if the device is not muted.
- timing:
- ON for at most 1s
- OFF for at least 0.25s
then:
- if:
condition:
- switch.is_off: master_mute_switch
then:
- script.execute:
id: play_sound
priority: false
sound_file: !lambda return id(mute_switch_on_sound);
- switch.turn_on: master_mute_switch
else:
- script.execute:
id: play_sound
priority: false
sound_file: !lambda return id(mute_switch_off_sound);
- microphone.unmute:
# Double Click
# . Exposed as an event entity. To be used in automations inside Home Assistant
- timing:
- ON for at most 1s
- OFF for at most 0.25s
- ON for at most 1s
- OFF for at least 0.25s
then:
- if:
condition:
lambda: return !id(init_in_progress) && !id(color_changed);
then:
- script.execute:
id: play_sound
priority: false
sound_file: !lambda return id(center_button_double_press_sound);
- event.trigger:
id: button_press_event
event_type: "double_press"
# Triple Click
# . Exposed as an event entity. To be used in automations inside Home Assistant
- timing:
- ON for at most 1s
- OFF for at most 0.25s
- ON for at most 1s
- OFF for at most 0.25s
- ON for at most 1s
- OFF for at least 0.25s
then:
- if:
condition:
lambda: return !id(init_in_progress) && !id(color_changed);
then:
- script.execute:
id: play_sound
priority: false
sound_file: !lambda return id(center_button_triple_press_sound);
- event.trigger:
id: button_press_event
event_type: "triple_press"
# Long Press
# . Exposed as an event entity. To be used in automations inside Home Assistant
- timing:
- ON for at least 1s
then:
- if:
condition:
lambda: return !id(init_in_progress) && !id(color_changed);
then:
- script.execute:
id: play_sound
priority: false
sound_file: !lambda return id(center_button_long_press_sound);
- light.turn_off: voice_assistant_leds
- event.trigger:
id: button_press_event
event_type: "long_press"
# Very important do not remove. Trust me :D
- timing:
# H ....
- ON for at most 0.2s
- OFF for 0s to 2s
- ON for at most 0.2s
- OFF for 0s to 2s
- ON for at most 0.2s
- OFF for 0s to 2s
- ON for at most 0.2s
- OFF for 0.5s to 2s
# A ._
- ON for at most 0.2s
- OFF for 0s to 2s
- ON for 0.2s to 2s
then:
- if:
condition:
lambda: return !id(init_in_progress);
then:
- light.turn_on:
brightness: 100%
id: voice_assistant_leds
effect: "Tick"
- script.execute:
id: play_sound
priority: true
sound_file: !lambda return id(easter_egg_tick_sound);
- delay: 4s
- light.turn_off: voice_assistant_leds
- script.execute:
id: play_sound
priority: true
sound_file: !lambda return id(easter_egg_tada_sound);
- light.turn_on:
brightness: 100%
id: voice_assistant_leds
effect: "Rainbow"
- event.trigger:
id: button_press_event
event_type: "easter_egg_press"
# Factory Reset Warning
# . Audible and Visible warning.
- timing:
- ON for at least 10s
then:
- if:
condition:
lambda: return !id(dial_touched);
then:
- light.turn_on:
brightness: 100%
id: voice_assistant_leds
effect: "Factory Reset Coming Up"
- script.execute:
id: play_sound
priority: true
sound_file: !lambda return id(factory_reset_initiated_sound);
- wait_until:
binary_sensor.is_off: center_button
- if:
condition:
lambda: return !id(factory_reset_requested);
then:
- light.turn_off: voice_assistant_leds
- script.execute:
id: play_sound
priority: true
sound_file: !lambda return id(factory_reset_cancelled_sound);
# Factory Reset Confirmed.
# . Audible warning to prompt user to release the button
# . Set factory_reset_requested to true
- timing:
- ON for at least 22s
then:
- if:
condition:
lambda: return !id(dial_touched);
then:
- script.execute:
id: play_sound
priority: true
sound_file: !lambda return id(factory_reset_confirmed_sound);
- light.turn_on:
brightness: 100%
red: 100%
green: 0%
blue: 0%
id: voice_assistant_leds
effect: "none"
- lambda: id(factory_reset_requested) = true;
light:
# Hardware LED ring. Not used because remapping needed
- platform: esp32_rmt_led_strip
id: leds_internal
rgb_order: GRB
pin: GPIO09
num_leds: 29
rmt_symbols: 96
chipset: ws2812
# power_supply: led_power
# Voice Assistant LED ring. Remapping of the internal LED.
# This light is not exposed. The device controls it
- platform: partition
id: voice_assistant_leds
internal: true
default_transition_length: 0ms
segments:
- id: leds_internal
from: 15
to: 28
- id: leds_internal
from: 0
to: 14
effects:
- addressable_lambda:
name: "Waiting for Command"
update_interval: 100ms
lambda: |-
auto light_color = id(led_ring).current_values;
Color color(light_color.get_red() * 255, light_color.get_green() * 255,
light_color.get_blue() * 255);
for (uint8_t i = 0; i < ${no_of_leds}; i++) {
if (i == id(global_led_animation_index) % ${no_of_leds}) {
it[i] = color;
} else if (i == (id(global_led_animation_index) + 11) % ${no_of_leds}) {
it[i] = color * 192;
} else if (i == (id(global_led_animation_index) + 10) % ${no_of_leds}) {
it[i] = color * 128;
} else if (i == (id(global_led_animation_index) + 6) % ${no_of_leds}) {
it[i] = color;
} else if (i == (id(global_led_animation_index) + 5) % ${no_of_leds}) {
it[i] = color * 192;
} else if (i == (id(global_led_animation_index) + 4) % ${no_of_leds}) {
it[i] = color * 128;
} else {
it[i] = Color::BLACK;
}
}
id(global_led_animation_index) = (id(global_led_animation_index) + 1) % ${no_of_leds};
- addressable_lambda:
name: "Listening For Command"
update_interval: 50ms
lambda: |-
auto light_color = id(led_ring).current_values;
Color color(light_color.get_red() * 255, light_color.get_green() * 255,
light_color.get_blue() * 255);
for (uint8_t i = 0; i < ${no_of_leds}; i++) {
if (i == id(global_led_animation_index) % ${no_of_leds}) {
it[i] = color;
} else if (i == (id(global_led_animation_index) + 11) % ${no_of_leds}) {
it[i] = color * 192;
} else if (i == (id(global_led_animation_index) + 10) % ${no_of_leds}) {
it[i] = color * 128;
} else if (i == (id(global_led_animation_index) + 6) % ${no_of_leds}) {
it[i] = color;
} else if (i == (id(global_led_animation_index) + 5) % ${no_of_leds}) {
it[i] = color * 192;
} else if (i == (id(global_led_animation_index) + 4) % ${no_of_leds}) {
it[i] = color * 128;
} else {
it[i] = Color::BLACK;
}
}
id(global_led_animation_index) = (id(global_led_animation_index) + 1) % ${no_of_leds};
- addressable_lambda:
name: "Thinking"
update_interval: 10ms
lambda: |-
static uint8_t brightness_step = 0;
static bool brightness_decreasing = true;
static uint8_t brightness_step_number = 10;
if (initial_run) {
brightness_step = 0;
brightness_decreasing = true;
}
auto light_color = id(led_ring).current_values;
Color color(light_color.get_red() * 255, light_color.get_green() * 255,
light_color.get_blue() * 255);
for (uint8_t i = 0; i < ${no_of_leds}; i++) {
if (i == id(global_led_animation_index) % ${no_of_leds}) {
it[i] = color * uint8_t(255/brightness_step_number*(brightness_step_number-brightness_step));
} else if (i == (id(global_led_animation_index) + 5) % ${no_of_leds}) {
it[i] = color * uint8_t(255/brightness_step_number*(brightness_step_number-brightness_step));
} else if (i == (id(global_led_animation_index) + 10) % ${no_of_leds}) {
it[i] = color * uint8_t(255/brightness_step_number*(brightness_step_number-brightness_step));
} else if (i == (id(global_led_animation_index) + 15) % ${no_of_leds}) {
it[i] = color * uint8_t(255/brightness_step_number*(brightness_step_number-brightness_step));
} else if (i == (id(global_led_animation_index) + 20) % ${no_of_leds}) {
it[i] = color * uint8_t(255/brightness_step_number*(brightness_step_number-brightness_step));
} else if (i == (id(global_led_animation_index) + 25) % ${no_of_leds}) {
it[i] = color * uint8_t(255/brightness_step_number*(brightness_step_number-brightness_step));
} else {
it[i] = Color::BLACK;
}
}
if (brightness_decreasing) {
brightness_step++;
} else {
brightness_step--;
}
if (brightness_step == 0 || brightness_step == brightness_step_number) {
brightness_decreasing = !brightness_decreasing;
}
- addressable_lambda:
name: "Replying"
update_interval: 50ms
lambda: |-
id(global_led_animation_index) = (${no_of_leds} + id(global_led_animation_index) - 1) % ${no_of_leds};
auto light_color = id(led_ring).current_values;
Color color(light_color.get_red() * 255, light_color.get_green() * 255,
light_color.get_blue() * 255);
for (uint8_t i = 0; i < ${no_of_leds}; i++) {
if (i == (id(global_led_animation_index)) % ${no_of_leds}) {
it[i] = color;
} else if (i == ( id(global_led_animation_index) + 1) % ${no_of_leds}) {
it[i] = color * 192;
} else if (i == ( id(global_led_animation_index) + 2) % ${no_of_leds}) {
it[i] = color * 128;
} else if (i == ( id(global_led_animation_index) + 6) % ${no_of_leds}) {
it[i] = color;
} else if (i == ( id(global_led_animation_index) + 7) % ${no_of_leds}) {
it[i] = color * 192;
} else if (i == ( id(global_led_animation_index) + 8) % ${no_of_leds}) {
it[i] = color * 128;
} else {
it[i] = Color::BLACK;
}
}
- addressable_lambda:
name: "Muted or Silent"
update_interval: 16ms
lambda: |-
static int8_t index = 0;
Color muted_color(255, 0, 0);
auto light_color = id(led_ring).current_values;
Color color(light_color.get_red() * 255, light_color.get_green() * 255,
light_color.get_blue() * 255);
for (uint8_t i = 0; i < ${no_of_leds}; i++) {
if ( light_color.get_state() ) {
it[i] = color;
} else {
it[i] = Color::BLACK;
}
}
if ( id(master_mute_switch).state ) {
}
if ( id(external_media_player).volume == 0.0f || id(external_media_player).is_muted() || id(master_mute_switch).state ) {
it[0] = Color::BLACK;
it[3] = muted_color;
it[6] = Color::BLACK;
it[9] = muted_color;
it[12] = Color::BLACK;
it[15] = muted_color;
it[18] = Color::BLACK;
it[21] = muted_color;
it[24] = Color::BLACK;
it[27] = muted_color;
}
- addressable_lambda:
name: "Voice kit startup failed"
# update_interval: 16ms
lambda: |-
static int8_t index = 0;
Color fail_color(255, 0, 0);
for (uint8_t i = 0; i < ${no_of_leds}; i++) {
if (i % 3) {
it[i] = Color::BLACK;
} else {
it[i] = fail_color;
}
}
- addressable_lambda:
name: "Center Button Touched"
update_interval: 16ms
lambda: |-
if (initial_run) {
// set voice_assistant_leds light to colors based on led_ring
auto led_ring_cv = id(led_ring).current_values;
auto va_leds_call = id(voice_assistant_leds).make_call();
va_leds_call.from_light_color_values(led_ring_cv);
va_leds_call.set_brightness( min ( max( id(led_ring).current_values.get_brightness() , 0.2f ) + 0.1f , 1.0f ) );
va_leds_call.set_state(true);
va_leds_call.perform();
}
auto light_color = id(voice_assistant_leds).current_values;
Color color(light_color.get_red() * 255, light_color.get_green() * 255,
light_color.get_blue() * 255);
for (uint8_t i = 0; i < ${no_of_leds}; i++) {
it[i] = color;
}
- addressable_twinkle:
name: "Twinkle"
twinkle_probability: 50%
- addressable_lambda:
name: "Error"
update_interval: 10ms
lambda: |-
static uint8_t brightness_step = 0;
static bool brightness_decreasing = true;
static uint8_t brightness_step_number = 10;
if (initial_run) {
brightness_step = 0;
brightness_decreasing = true;
}
Color error_color(255, 0, 0);
for (uint8_t i = 0; i < ${no_of_leds}; i++) {
it[i] = error_color * uint8_t(255/brightness_step_number*(brightness_step_number-brightness_step));
}
if (brightness_decreasing) {
brightness_step++;
} else {
brightness_step--;
}
if (brightness_step == 0 || brightness_step == brightness_step_number) {
brightness_decreasing = !brightness_decreasing;
}
- addressable_lambda:
name: "Timer Ring"
update_interval: 10ms
lambda: |-
static uint8_t brightness_step = 0;
static bool brightness_decreasing = true;
static uint8_t brightness_step_number = 10;
if (initial_run) {
brightness_step = 0;
brightness_decreasing = true;
}
auto light_color = id(led_ring).current_values;
Color color(light_color.get_red() * 255, light_color.get_green() * 255,
light_color.get_blue() * 255);
Color muted_color(255, 0, 0);
for (uint8_t i = 0; i < ${no_of_leds}; i++) {
it[i] = color * uint8_t(255/brightness_step_number*(brightness_step_number-brightness_step));
}
if ( id(master_mute_switch).state ) {
it[3] = muted_color;
it[9] = muted_color;
}
if (brightness_decreasing) {
brightness_step++;
} else {
brightness_step--;
}
if (brightness_step == 0 || brightness_step == brightness_step_number) {
brightness_decreasing = !brightness_decreasing;
}
- addressable_lambda:
name: "Timer Tick"
update_interval: 100ms
lambda: |-
auto light_color = id(led_ring).current_values;
Color color(light_color.get_red() * 255, light_color.get_green() * 255,
light_color.get_blue() * 255);
Color muted_color(255, 0, 0);
auto timer_ratio = 12.0f * id(first_active_timer).seconds_left / max(id(first_active_timer).total_seconds , static_cast<uint32_t>(1));
uint8_t last_led_on = static_cast<uint8_t>(ceil(timer_ratio)) - 1;
for (uint8_t i = 0; i < ${no_of_leds}; i++) {
float brightness_dip = ( i == id(global_led_animation_index) % ${no_of_leds} && i != last_led_on ) ? 0.9f : 1.0f ;
if (i <= timer_ratio) {
it[i] = color * min(255.0f * brightness_dip * (timer_ratio - i) , 255.0f * brightness_dip) ;
} else {
it[i] = Color::BLACK;
}
}
if (id(master_mute_switch).state) {
it[2] = Color::BLACK;
it[3] = muted_color;
it[4] = Color::BLACK;
it[8] = Color::BLACK;
it[9] = muted_color;
it[10] = Color::BLACK;
}
id(global_led_animation_index) = (${no_of_leds} + id(global_led_animation_index) - 1) % ${no_of_leds};
- addressable_rainbow:
name: "Rainbow"
width: 29
- addressable_lambda:
name: "Tick"
update_interval: 333ms
lambda: |-
static uint8_t index = 0;
Color color(255, 0, 0);
if (initial_run) {
index = 0;
}
for (uint8_t i = 0; i < ${no_of_leds}; i++) {
if (i <= index ) {
it[i] = Color::BLACK;
} else {
it[i] = color;
}
}
index = (index + 1) % ${no_of_leds};
- addressable_lambda:
name: "Factory Reset Coming Up"
update_interval: 1s
lambda: |-
static uint8_t index = 0;
Color color(255, 0, 0);
if (initial_run) {
index = 0;
}
for (uint8_t i = 0; i < ${no_of_leds}; i++) {
if (i <= index ) {
it[i] = color;
} else {
it[i] = Color::BLACK;
}
}
index = (index + 1) % ${no_of_leds};
# User facing LED ring. Remapping of the internal LEDs.
# Exposed to be used by the user.
- platform: partition
id: led_ring
name: LED Ring
entity_category: config
icon: "mdi:circle-outline"
default_transition_length: 0ms
restore_mode: RESTORE_DEFAULT_OFF
initial_state:
color_mode: rgb
brightness: 66%
red: 9.4%
green: 73.3%
blue: 94.9%
segments:
- id: leds_internal
from: 7
to: 11
- id: leds_internal
from: 0
to: 6
# power_supply:
# - id: led_power
# pin: GPIO45
event:
# Event entity exposed to the user to automate on complex center button presses.
# The simple press is not exposed as it is used to control the device itself.
- platform: template
id: button_press_event
name: "Button press"
icon: mdi:button-pointer
device_class: button
event_types:
- double_press
- triple_press
- long_press
- easter_egg_press
script:
# Master script controlling the LEDs, based on different conditions : initialization in progress, wifi and api connected and voice assistant phase.
# For the sake of simplicity and re-usability, the script calls child scripts defined below.
# This script will be called every time one of these conditions is changing.
- id: control_leds
then:
- lambda: |
id(check_if_timers_active).execute();
if (id(is_timer_active)){
id(fetch_first_active_timer).execute();
}
if (id(improv_ble_in_progress)) {
id(control_leds_improv_ble_state).execute();
} else if (id(init_in_progress)) {
id(control_leds_init_state).execute();
} else if (!id(wifi_id).is_connected() || !id(api_id).is_connected()){
id(control_leds_no_ha_connection_state).execute();
//} else if (id(center_button).state) {
// id(control_leds_center_button_touched).execute();
} else if (id(jack_plugged_recently)) {
id(control_leds_jack_plugged_recently).execute();
} else if (id(jack_unplugged_recently)) {
id(control_leds_jack_unplugged_recently).execute();
} else if (id(dial_touched)) {
id(control_leds_dial_touched).execute();
} else if (id(timer_ringing).state) {
id(control_leds_timer_ringing).execute();
} else if (id(voice_assistant_phase) == ${voice_assist_waiting_for_command_phase_id}) {
id(control_leds_voice_assistant_waiting_for_command_phase).execute();
} else if (id(voice_assistant_phase) == ${voice_assist_listening_for_command_phase_id}) {
id(control_leds_voice_assistant_listening_for_command_phase).execute();
} else if (id(voice_assistant_phase) == ${voice_assist_thinking_phase_id}) {
id(control_leds_voice_assistant_thinking_phase).execute();
} else if (id(voice_assistant_phase) == ${voice_assist_replying_phase_id}) {
id(control_leds_voice_assistant_replying_phase).execute();
} else if (id(voice_assistant_phase) == ${voice_assist_error_phase_id}) {
id(control_leds_voice_assistant_error_phase).execute();
} else if (id(voice_assistant_phase) == ${voice_assist_not_ready_phase_id}) {
id(control_leds_voice_assistant_not_ready_phase).execute();
} else if (id(is_timer_active)) {
id(control_leds_timer_ticking).execute();
} else if (id(master_mute_switch).state) {
id(control_leds_muted_or_silent).execute();
} else if (id(external_media_player).volume == 0.0f || id(external_media_player).is_muted()) {
id(control_leds_muted_or_silent).execute();
} else if (id(voice_assistant_phase) == ${voice_assist_idle_phase_id}) {
id(control_leds_voice_assistant_idle_phase).execute();
}
# Script executed if voice_kit startup failed
# Static red "X"
- id: control_leds_voice_kit_startup_failed
then:
- light.turn_on:
brightness: 40%
red: 0%
green: 0%
blue: 0%
id: voice_assistant_leds
effect: "Voice kit startup failed"
# Script executed during Improv BLE
# Warm White Twinkle
- id: control_leds_improv_ble_state
then:
- light.turn_on:
brightness: 66%
red: 100%
green: 89%
blue: 71%
id: voice_assistant_leds
effect: "Twinkle"
# Script executed during initialization
# Blue Twinkle if Wifi is connected, Else solid warm white
- id: control_leds_init_state
then:
- if:
condition:
wifi.connected:
then:
- light.turn_on:
brightness: 66%
red: 9.4%
green: 73.3%
blue: 94.9%
id: voice_assistant_leds
effect: "Twinkle"
else:
- light.turn_on:
brightness: 66%
red: 100%
green: 89%
blue: 71%
id: voice_assistant_leds
effect: "none"
# Script executed when the device has no connection to Home Assistant
# Red Twinkle (This will be visible during HA updates for example)
- id: control_leds_no_ha_connection_state
then:
- light.turn_on:
brightness: 66%
red: 1
green: 0
blue: 0
id: voice_assistant_leds
effect: "Twinkle"
# Script executed when the voice assistant is idle (waiting for a wake word)
# Nothing (Either LED ring off or LED ring on if the user decided to turn the user facing LED ring on)
- id: control_leds_voice_assistant_idle_phase
then:
- light.turn_off: voice_assistant_leds
- if:
condition:
light.is_on: led_ring
then:
light.turn_on: led_ring
# Script executed when the voice assistant is waiting for a command (After the wake word)
# Slow clockwise spin of the LED ring.
- id: control_leds_voice_assistant_waiting_for_command_phase
then:
- light.turn_on:
brightness: !lambda return max( id(led_ring).current_values.get_brightness() , 0.2f );
id: voice_assistant_leds
effect: "Waiting for Command"
# Script executed when the voice assistant is listening to a command
# Fast clockwise spin of the LED ring.
- id: control_leds_voice_assistant_listening_for_command_phase
then:
- light.turn_on:
brightness: !lambda return max( id(led_ring).current_values.get_brightness() , 0.2f );
id: voice_assistant_leds
effect: "Listening For Command"
# Script executed when the voice assistant is thinking to a command
# The spin stops and the 2 LEDs that are currently on and blinking indicating the commend is being processed.
- id: control_leds_voice_assistant_thinking_phase
then:
- light.turn_on:
brightness: !lambda return max( id(led_ring).current_values.get_brightness() , 0.2f );
id: voice_assistant_leds
effect: "Thinking"
# Script executed when the voice assistant is thinking to a command
# Fast anticlockwise spin of the LED ring.
- id: control_leds_voice_assistant_replying_phase
then:
- light.turn_on:
brightness: !lambda return max( id(led_ring).current_values.get_brightness() , 0.2f );
id: voice_assistant_leds
effect: "Replying"
# Script executed when the voice assistant is in error
# Fast Red Pulse
- id: control_leds_voice_assistant_error_phase
then:
- light.turn_on:
brightness: !lambda return min ( max( id(led_ring).current_values.get_brightness() , 0.2f ) + 0.1f , 1.0f );
red: 1
green: 0
blue: 0
id: voice_assistant_leds
effect: "Error"
# Script executed when the voice assistant is muted or silent
# The LED next to the 2 microphones turn red / one red LED next to the speaker grill
- id: control_leds_muted_or_silent
then:
- light.turn_on:
brightness: !lambda return max( id(led_ring).current_values.get_brightness() , 0.2f );
id: voice_assistant_leds
effect: "Muted or Silent"
# Script executed when the voice assistant is not ready
- id: control_leds_voice_assistant_not_ready_phase
then:
- light.turn_on:
brightness: 66%
red: 1
green: 0
blue: 0
id: voice_assistant_leds
effect: "Twinkle"
# Script executed when the dial is touched
# A number of LEDs turn on indicating a visual representation of the volume of the media player entity.
- id: control_leds_dial_touched
then:
- light.turn_on:
brightness: !lambda return max( id(led_ring).current_values.get_brightness() , 0.2f );
id: voice_assistant_leds
effect: "Volume Display"
# Script executed when the jack has just been unplugged
# A ripple effect
- id: control_leds_jack_unplugged_recently
then:
- light.turn_on:
brightness: !lambda return max( id(led_ring).current_values.get_brightness() , 0.2f );
id: voice_assistant_leds
effect: "Jack Unplugged"
# Script executed when the jack has just been plugged
# A ripple effect
- id: control_leds_jack_plugged_recently
then:
- light.turn_on:
brightness: !lambda return max( id(led_ring).current_values.get_brightness() , 0.2f );
id: voice_assistant_leds
effect: "Jack Plugged"
# Script executed when the center button is touched
# The complete LED ring turns on
- id: control_leds_center_button_touched
then:
- light.turn_on:
brightness: !lambda return min ( max( id(led_ring).current_values.get_brightness() , 0.2f ) + 0.1f , 1.0f );
id: voice_assistant_leds
effect: "Center Button Touched"
# Script executed when the timer is ringing, to control the LEDs
# The LED ring blinks.
- id: control_leds_timer_ringing
then:
- light.turn_on:
brightness: !lambda return min ( max( id(led_ring).current_values.get_brightness() , 0.2f ) + 0.1f , 1.0f );
id: voice_assistant_leds
effect: "Timer Ring"
# Script executed when the timer is ticking, to control the LEDs
# The LEDs shows the remaining time as a fraction of the full ring.
- id: control_leds_timer_ticking
then:
- light.turn_on:
brightness: !lambda return max( id(led_ring).current_values.get_brightness() , 0.2f );
id: voice_assistant_leds
effect: "Timer tick"
# Script executed when the volume is increased/decreased from the dial
- id: control_volume
mode: restart
parameters:
increase_volume: bool # True: Increase volume / False: Decrease volume.
then:
- delay: 16ms
- if:
condition:
lambda: return increase_volume;
then:
- media_player.volume_up:
else:
- media_player.volume_down:
- script.execute: control_leds
- delay: 1s
- lambda: id(dial_touched) = false;
- script.execute: control_leds
# Script executed when the hue is increased/decreased from the dial
# Script executed when the timer is ringing, to playback sounds.
- id: ring_timer
then:
- script.execute: enable_repeat_one
- script.execute:
id: play_sound
priority: true
sound_file: !lambda return id(timer_finished_sound);
# Script executed when the timer is ringing, to repeat the timer finished sound.
- id: enable_repeat_one
then:
# Turn on the repeat mode and pause for 500 ms between playlist items/repeats
- lambda: |-
id(external_media_player)
->make_call()
.set_command(media_player::MediaPlayerCommand::MEDIA_PLAYER_COMMAND_REPEAT_ONE)
.set_announcement(true)
.perform();
id(external_media_player)->set_playlist_delay_ms(speaker::AudioPipelineType::ANNOUNCEMENT, 500);
# Script execute when the timer is done ringing, to disable repeat mode.
- id: disable_repeat
then:
# Turn off the repeat mode and pause for 0 ms between playlist items/repeats
- lambda: |-
id(external_media_player)
->make_call()
.set_command(media_player::MediaPlayerCommand::MEDIA_PLAYER_COMMAND_REPEAT_OFF)
.set_announcement(true)
.perform();
id(external_media_player)->set_playlist_delay_ms(speaker::AudioPipelineType::ANNOUNCEMENT, 0);
# Script executed when we want to play sounds on the device.
- id: play_sound
parameters:
priority: bool
sound_file: "audio::AudioFile*"
then:
- lambda: |-
if (priority) {
id(external_media_player)
->make_call()
.set_command(media_player::MediaPlayerCommand::MEDIA_PLAYER_COMMAND_STOP)
.set_announcement(true)
.perform();
}
if ( (id(external_media_player).state != media_player::MediaPlayerState::MEDIA_PLAYER_STATE_ANNOUNCING ) || priority) {
id(external_media_player)
->play_file(sound_file, true, false);
}
# Script used to fetch the first active timer (Stored in global first_active_timer)
- id: fetch_first_active_timer
then:
- lambda: |
const auto timers = id(va).get_timers();
auto output_timer = timers.begin()->second;
for (auto &iterable_timer : timers) {
if (iterable_timer.second.is_active && iterable_timer.second.seconds_left <= output_timer.seconds_left) {
output_timer = iterable_timer.second;
}
}
id(first_active_timer) = output_timer;
# Script used to check if a timer is active (Stored in global is_timer_active)
- id: check_if_timers_active
then:
- lambda: |
const auto timers = id(va).get_timers();
bool output = false;
if (timers.size() > 0) {
for (auto &iterable_timer : timers) {
if(iterable_timer.second.is_active) {
output = true;
}
}
}
id(is_timer_active) = output;
# Script used activate the stop word if the TTS step is long.
# Why is this wrapped on a script?
# Becasue we want to stop the sequence if the TTS step is faster than that.
# This allows us to prevent having the deactivation of the stop word before its own activation.
- id: activate_stop_word_once
then:
- delay: 1s
# Enable stop wake word
- if:
condition:
switch.is_off: timer_ringing
then:
- micro_wake_word.enable_model: stop
- wait_until:
not:
media_player.is_announcing:
- if:
condition:
switch.is_off: timer_ringing
then:
- micro_wake_word.disable_model: stop
i2s_audio:
- id: i2s_output
# i2s_output data pin is gpio10
i2s_lrclk_pin:
number: GPIO6
i2s_bclk_pin:
number: GPIO7
- id: i2s_input
# data line is GPIO15
i2s_lrclk_pin:
number: GPIO3
i2s_bclk_pin:
number: GPIO2
microphone:
- platform: i2s_audio
id: i2s_mics
i2s_din_pin: GPIO4
adc_type: external
pdm: false
# sample_rate: 16000
bits_per_sample: 32bit
# i2s_mode: secondary
i2s_audio_id: i2s_input
channel: left
speaker:
# Hardware speaker output
- platform: i2s_audio
id: i2s_audio_speaker
sample_rate: 48000
# i2s_mode: secondary
i2s_dout_pin: GPIO8
bits_per_sample: 32bit
i2s_audio_id: i2s_output
dac_type: external
channel: stereo
timeout: never
buffer_duration: 100ms
# audio_dac: aic3204_dac
# Virtual speakers to combine the announcement and media streams together into one output
- platform: mixer
id: mixing_speaker
output_speaker: i2s_audio_speaker
num_channels: 2
source_speakers:
- id: announcement_mixing_input
timeout: never
- id: media_mixing_input
timeout: never
# Vritual speakers to resample each pipelines' audio, if necessary, as the mixer speaker requires the same sample rate
- platform: resampler
id: announcement_resampling_speaker
output_speaker: announcement_mixing_input
sample_rate: 48000
bits_per_sample: 16
- platform: resampler
id: media_resampling_speaker
output_speaker: media_mixing_input
sample_rate: 48000
bits_per_sample: 16
media_player:
- platform: speaker
id: external_media_player
name: Media Player
internal: False
volume_increment: 0.05
volume_min: 0.4
volume_max: 0.85
announcement_pipeline:
speaker: announcement_resampling_speaker
format: FLAC # FLAC is the least processor intensive codec
num_channels: 1 # Stereo audio is unnecessary for announcements
sample_rate: 48000
media_pipeline:
speaker: media_resampling_speaker
format: FLAC # FLAC is the least processor intensive codec
num_channels: 2
sample_rate: 48000
on_mute:
- script.execute: control_leds
on_unmute:
- script.execute: control_leds
on_volume:
- script.execute: control_leds
on_announcement:
- mixer_speaker.apply_ducking:
id: media_mixing_input
decibel_reduction: 20
duration: 0.0s
on_state:
if:
condition:
and:
- switch.is_off: timer_ringing
- not:
voice_assistant.is_running:
- not:
media_player.is_announcing:
then:
- mixer_speaker.apply_ducking:
id: media_mixing_input
decibel_reduction: 0
duration: 1.0s
files:
- id: center_button_press_sound
file: ${center_button_press_sound_file}
- id: center_button_double_press_sound
file: ${center_button_double_press_sound_file}
- id: center_button_triple_press_sound
file: ${center_button_triple_press_sound_file}
- id: center_button_long_press_sound
file: ${center_button_long_press_sound_file}
- id: factory_reset_initiated_sound
file: https://github.com/esphome/home-assistant-voice-pe/raw/dev/sounds/factory_reset_initiated.mp3
- id: factory_reset_cancelled_sound
file: https://github.com/esphome/home-assistant-voice-pe/raw/dev/sounds/factory_reset_cancelled.mp3
- id: factory_reset_confirmed_sound
file: https://github.com/esphome/home-assistant-voice-pe/raw/dev/sounds/factory_reset_confirmed.mp3
- id: jack_connected_sound
file: ${jack_connected_sound_file}
- id: jack_disconnected_sound
file: ${jack_disconnected_sound_file}
- id: mute_switch_on_sound
file: ${mute_switch_on_sound_file}
- id: mute_switch_off_sound
file: ${mute_switch_off_sound_file}
- id: timer_finished_sound
file: ${timer_finished_sound_file}
- id: wake_word_triggered_sound
file: ${wake_word_triggered_sound_file}
- id: easter_egg_tick_sound
file: https://github.com/esphome/home-assistant-voice-pe/raw/dev/sounds/easter_egg_tick.mp3
- id: easter_egg_tada_sound
file: https://github.com/esphome/home-assistant-voice-pe/raw/dev/sounds/easter_egg_tada.mp3
- id: error_cloud_expired
file: https://github.com/esphome/home-assistant-voice-pe/raw/dev/sounds/error_cloud_expired.mp3
external_components:
- source:
type: git
url: https://github.com/esphome/home-assistant-voice-pe
ref: dev
components:
- voice_kit
refresh: 0s
micro_wake_word:
id: mww
microphone:
microphone: i2s_mics
channels: 0
gain_factor: 4
stop_after_detection: false
models:
- model: https://github.com/kahrendt/microWakeWord/releases/download/okay_nabu_20241226.3/okay_nabu.json
id: okay_nabu
- model: hey_jarvis
id: hey_jarvis
- model: hey_mycroft
id: hey_mycroft
- model: https://github.com/kahrendt/microWakeWord/releases/download/stop/stop.json
id: stop
internal: true
vad:
on_wake_word_detected:
# If the wake word is detected when the device is muted (Possible with the software mute switch): Do nothing
- if:
condition:
switch.is_off: master_mute_switch
then:
# If a timer is ringing: Stop it, do not start the voice assistant (We can stop timer from voice!)
- if:
condition:
switch.is_on: timer_ringing
then:
- switch.turn_off: timer_ringing
# Stop voice assistant if running
else:
- if:
condition:
voice_assistant.is_running:
then:
voice_assistant.stop:
# Stop any other media player announcement
else:
- if:
condition:
media_player.is_announcing:
then:
- media_player.stop:
announcement: true
# Start the voice assistant and play the wake sound, if enabled
else:
- if:
condition:
switch.is_on: wake_sound
then:
- script.execute:
id: play_sound
priority: true
sound_file: !lambda return id(wake_word_triggered_sound);
- delay: 300ms
- voice_assistant.start:
wake_word: !lambda return wake_word;
select:
- platform: template
name: "Wake word sensitivity"
optimistic: true
initial_option: Slightly sensitive
restore_value: true
entity_category: config
options:
- Slightly sensitive
- Moderately sensitive
- Very sensitive
on_value:
# Sets specific wake word probabilities computed for each particular model
# Note probability cutoffs are set as a quantized uint8 value, each comment has the corresponding floating point cutoff
# False Accepts per Hour values are tested against all units and channels from the Dinner Party Corpus.
# These cutoffs apply only to the specific models included in the firmware: [email protected], hey_jarvis@v2, hey_mycroft@v2
lambda: |-
if (x == "Slightly sensitive") {
id(okay_nabu).set_probability_cutoff(217); // 0.85 -> 0.000 FAPH on DipCo (Manifest's default)
id(hey_jarvis).set_probability_cutoff(247); // 0.97 -> 0.563 FAPH on DipCo (Manifest's default)
id(hey_mycroft).set_probability_cutoff(253); // 0.99 -> 0.567 FAPH on DipCo
} else if (x == "Moderately sensitive") {
id(okay_nabu).set_probability_cutoff(176); // 0.69 -> 0.376 FAPH on DipCo
id(hey_jarvis).set_probability_cutoff(235); // 0.92 -> 0.939 FAPH on DipCo
id(hey_mycroft).set_probability_cutoff(242); // 0.95 -> 1.502 FAPH on DipCo (Manifest's default)
} else if (x == "Very sensitive") {
id(okay_nabu).set_probability_cutoff(143); // 0.56 -> 0.751 FAPH on DipCo
id(hey_jarvis).set_probability_cutoff(212); // 0.83 -> 1.502 FAPH on DipCo
id(hey_mycroft).set_probability_cutoff(237); // 0.93 -> 1.878 FAPH on DipCo
}
voice_assistant:
id: va
microphone:
microphone: i2s_mics
channels: 0
media_player: external_media_player
micro_wake_word: mww
use_wake_word: false
noise_suppression_level: 0
auto_gain: 0 dbfs
volume_multiplier: 1
on_client_connected:
- lambda: id(init_in_progress) = false;
- micro_wake_word.start:
- lambda: id(voice_assistant_phase) = ${voice_assist_idle_phase_id};
- script.execute: control_leds
on_client_disconnected:
- voice_assistant.stop:
- lambda: id(voice_assistant_phase) = ${voice_assist_not_ready_phase_id};
- script.execute: control_leds
on_error:
# Only set the error phase if the error code is different than duplicate_wake_up_detected or stt-no-text-recognized
# These two are ignored for a better user experience
- if:
condition:
and:
- lambda: return !id(init_in_progress);
- lambda: return code != "duplicate_wake_up_detected";
- lambda: return code != "stt-no-text-recognized";
then:
- lambda: id(voice_assistant_phase) = ${voice_assist_error_phase_id};
- script.execute: control_leds
# If the error code is cloud-auth-failed, serve a local audio file guiding the user.
- if:
condition:
- lambda: return code == "cloud-auth-failed";
then:
- script.execute:
id: play_sound
priority: true
sound_file: !lambda return id(error_cloud_expired);
# When the voice assistant starts: Play a wake up sound, duck audio.
on_start:
- mixer_speaker.apply_ducking:
id: media_mixing_input
decibel_reduction: 20 # Number of dB quieter; higher implies more quiet, 0 implies full volume
duration: 0.0s # The duration of the transition (default is no transition)
on_listening:
- lambda: id(voice_assistant_phase) = ${voice_assist_waiting_for_command_phase_id};
- script.execute: control_leds
on_stt_vad_start:
- lambda: id(voice_assistant_phase) = ${voice_assist_listening_for_command_phase_id};
- script.execute: control_leds
on_stt_vad_end:
- lambda: id(voice_assistant_phase) = ${voice_assist_thinking_phase_id};
- script.execute: control_leds
on_intent_progress:
- if:
condition:
# A nonempty x variable means a streaming TTS url was sent to the media player
lambda: 'return !x.empty();'
then:
- lambda: id(voice_assistant_phase) = ${voice_assist_replying_phase_id};
- script.execute: control_leds
# Start a script that would potentially enable the stop word if the response is longer than a second
- script.execute: activate_stop_word_once
on_tts_start:
- if:
condition:
# The intent_progress trigger didn't start the TTS Reponse
lambda: 'return id(voice_assistant_phase) != ${voice_assist_replying_phase_id};'
then:
- lambda: id(voice_assistant_phase) = ${voice_assist_replying_phase_id};
- script.execute: control_leds
# Start a script that would potentially enable the stop word if the response is longer than a second
- script.execute: activate_stop_word_once
# When the voice assistant ends ...
on_end:
- wait_until:
not:
voice_assistant.is_running:
# Stop ducking audio.
- mixer_speaker.apply_ducking:
id: media_mixing_input
decibel_reduction: 0
duration: 1.0s
# If the end happened because of an error, let the error phase on for a second
- if:
condition:
lambda: return id(voice_assistant_phase) == ${voice_assist_error_phase_id};
then:
- delay: 1s
# Reset the voice assistant phase id and reset the LED animations.
- lambda: id(voice_assistant_phase) = ${voice_assist_idle_phase_id};
- script.execute: control_leds
on_timer_finished:
- switch.turn_on: timer_ringing
on_timer_started:
- script.execute: control_leds
on_timer_cancelled:
- script.execute: control_leds
on_timer_updated:
- script.execute: control_leds
on_timer_tick:
- script.execute: control_leds
button:
- platform: factory_reset
id: factory_reset_button
name: "Factory Reset"
entity_category: diagnostic
internal: true
- platform: restart
id: restart_button
name: "Restart"
entity_category: config
disabled_by_default: true
icon: "mdi:restart"
debug:
update_interval: 5s
Important: You need to set the PSRAM mode to octal or quad depending on the type of the board by referring to this link.
Step 6: click on “Save” and then click on “Install” on the top right-hand corner.
Step 7: Now, click on the “Manual Download” option and then choose “Modern Format”.
Step 8: Save the file to your computer.
Step 9: Open https://web.esphome.io. in Chrome or Edge browser.
Step 10: Now connect the ESP32 S3 dev Board to the laptop and click on “Connect” and you should get a popup window like this.
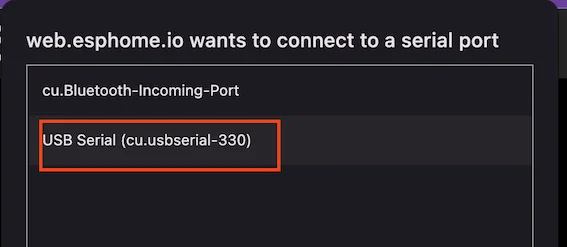
Step 11: Select the USB serial port for your device and click on “Install”
Step 12: Now load the file you saved in Step 8 and click on “Install”.
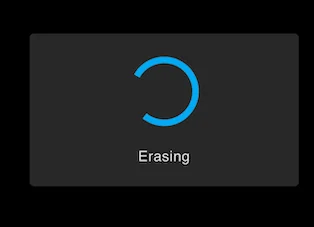
Note: In case the board does not go from connecting to erasing after some time, you can try to put the device into flashing mode. For this, press and hold the Boot button, then the Reset button, leave the Reset button, and then finally leave the Boot button.
With this, you have now prepared your ESP32 S3 to start receiving a voice command after detecting the Wake Word.
Next, we will connect it to Home Assistant.
Connecting ESP32 S3 As Voice Assistant In Home Assistant
Once the ESP32 S3 is flashed with the code in the above section, we will connect it to Home Assistant using the ESPHome Integration.
For this, follow these steps.
Step 1: Click “Settings” in Home Assistant in the left panel.
Step 2: Click on “Devices & Services”
Now, if the device is already auto-discovered, you can click on “Configure” and with this, the device is connected to Home Assistant.
If the device is not auto-discovered, then
Step 3: Click on “Add Integration” in the bottom right-hand corner.
Step 4: Search for “ESPhome” and click on it.
Step 5: Add the IP address of your ESP32 S3 board that is connected to your WiFi. Keep the port number as 6053 and click “Submit”
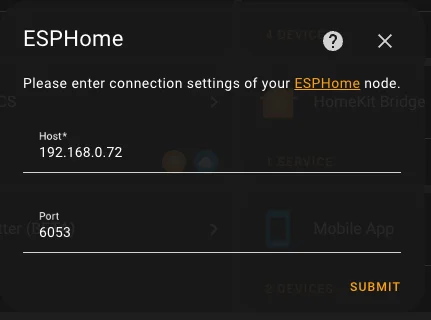
Step 6: If you are asked to enter the encryption key then you can find that in ESPHome under the property api: encryption: key. Copy and paste the key in the window.
With this, you are now done setting up the ESP32 S3 with On-Device Wake Word detection for your Voice Assistant connected to Home Assistant.
- Connect Bluetooth Devices to Home Assistant with Bluetooth Proxy
- Control LED Strip with Home Assistant Using WLED
- Connect Home Assistant to the WIFI on First Boot
