Setup Home Assistant Connect ZBT-2 With Home Assistant Container And Zigbee2MQTT Container — Step By Step Guide
Written by
Featured Video
Table of Contents

I run home assistant using docker and I want to share with you how we can use the new Home Assistant Connect ZBT-2 with Home Assistant running as a docker container. We will also look at using the ZBT-2 with Zigbee2MQTT running as docker container.
Install Zigbee Firmware
Firstly, we have to install the Zigbee firmware on the Home Assistant Connect ZBT-2.
-
Open this link to flash the Zigbee firmware.
-
Connect you ZBT-2 to your comupter and click on install firmware
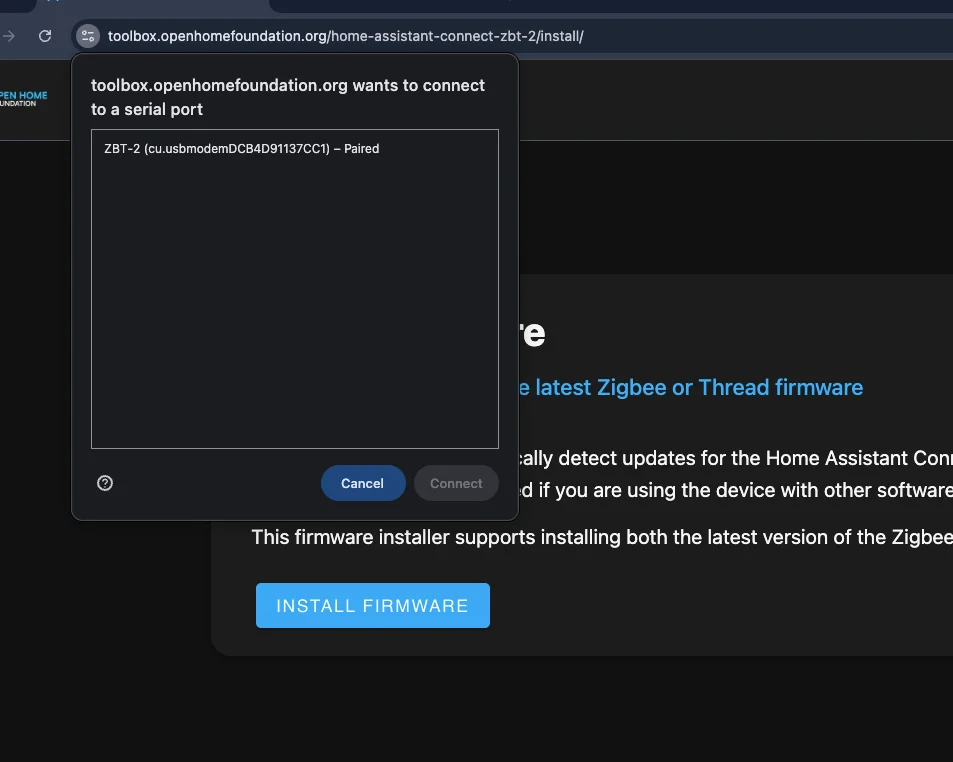
- Select the ZBT-2 and wait till it shows this screen.
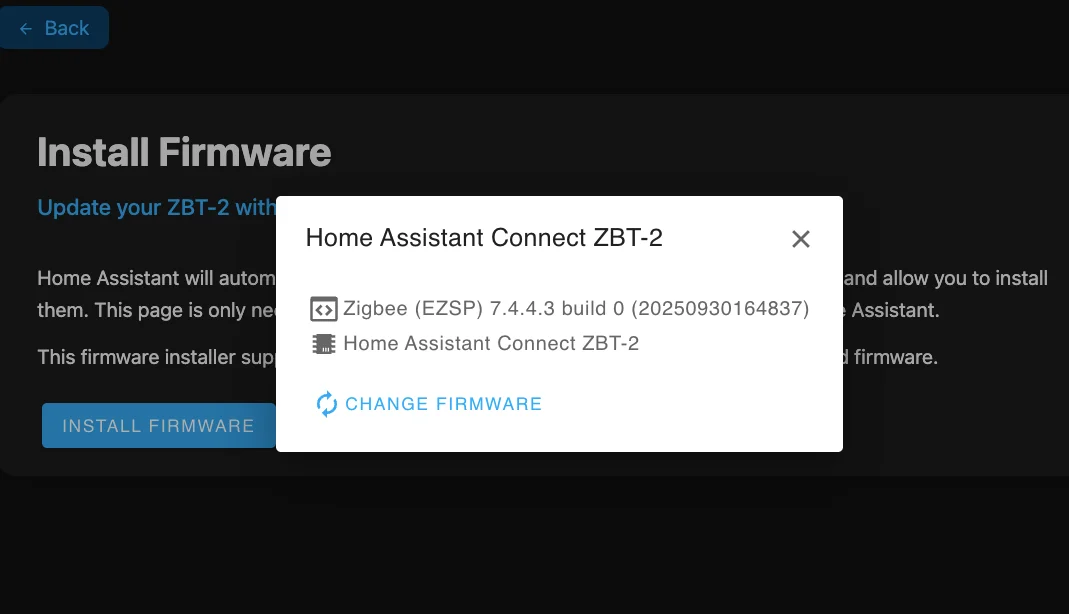
- Click on change firmware and select the Zigbee option and click on install.
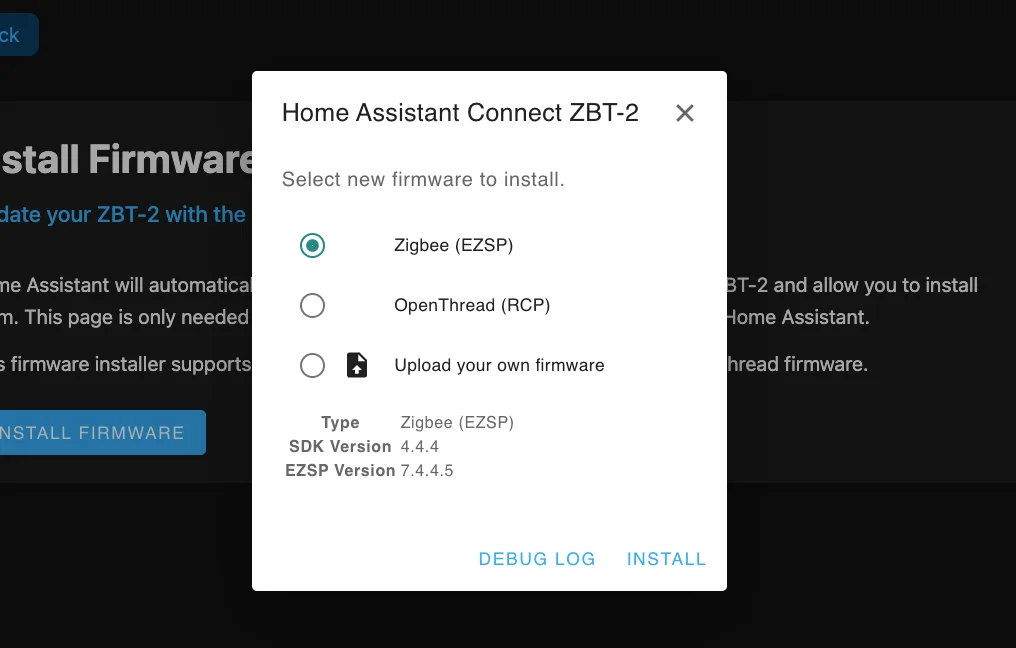
With this the Zigbee firmware will be installed on the Home Assistant Connect ZBT-2.
Setup Home Assistant Connect ZBT-2 With Home Assistant Docker Container.
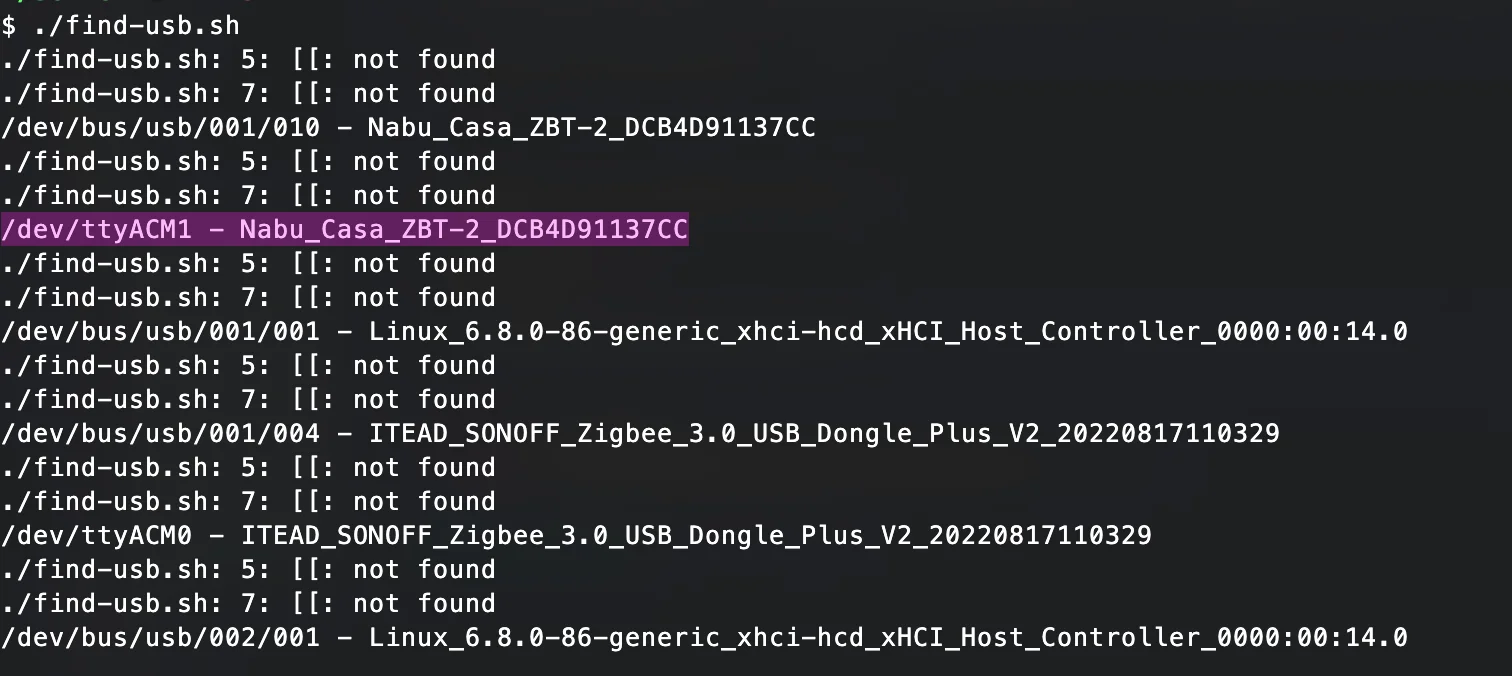
Once you connect the ZBT-2 to the machine running Home Assistant as a docker container, we need to find the device path of the ZBT-2.
- Create the following script as
find-usb.sh.
for sysdevpath in $(find /sys/bus/usb/devices/usb*/ -name dev); do
    (
        syspath="${sysdevpath%/dev}"
        devname="$(udevadm info -q name -p $syspath)"
        [[ "$devname" == "bus/"* ]] && exit
        eval "$(udevadm info -q property --export -p $syspath)"
        [[ -z "$ID_SERIAL" ]] && exit
        echo "/dev/$devname - $ID_SERIAL"
    )
done
- Make the script executable and execute it.
chmod +x find-usb.sh
./find-usb.sh
- You should see the device path the ZBT-2. e.g in this case it is
/dev/ttyACM1
- Update the docker compose file of your Home Assistant to include the device path under the devices section.
services:
  home-assistant:
    image: ghcr.io/home-assistant/home-assistant:stable
    pull_policy: always
    volumes:
      - /dev:/dev
      - ./config/:/config/
    devices:
      - /dev/ttyACM1:/dev/ttyACM1  #this is the place where you need to specify the device path.
    container_name: assistant
    network_mode: host
    restart: always
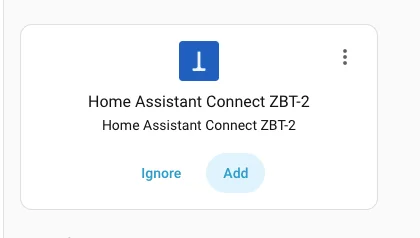
- Save the docker compose file and restart Home Assistant. You should be able to see the device pop up in the devices section in Home Assistant.
Setup Home Assistant Connect ZBT-2 with Zigbee2MQTT Docker Container
-
Find the device path using the
find-usb.shscript specified above. -
Update Zigbee2MQTT docker compose file to include the path under the devices section.
services:
  zigbee2mqtt:
    container_name: zigbee2mqtt
    restart: unless-stopped
    devices:
      - /dev/ttyACM1:/dev/ttyACM1
    ports:
      - "8080:8080"
    volumes:
      - ./data:/app/data
      - /run/udev:/run/udev:ro
    environment:
      - TZ=Europe/Amsterdam
    image: ghcr.io/koenkk/zigbee2mqtt
Pay attension to the volumes section, where we are mounting a local directory. We will create a configuration.yaml file in this directory for Zigbee2MQTT to use it.
- Create a file with the name
configuration.yamlunder thedatafolder in the current directory and add the path as shown below.
mqtt:
  server: mqtt://192.168.0.43:1883 # these should be your mqtt url
  serial:
    port: /dev/ttyACM1  # specify the path here
frontend:
  enabled: true
advanced: {}
homeassistant:
  enabled: true
serial:
  adapter: ember
  port: /dev/ttyACM1  # specify the path here
  baudrate: 460800
- Restart your Zigbee2MQTT container and it should start using the new Home Assistant Connect ZBT-2.