Written by
Featured Video
Table of Contents
- Step 1: Install Tuya Local via HACS
- Step 2: Create a Tuya Developer Account
- Step 3: Link Your Smart Life App
- Step 4: Get Your Device ID, IP Address, and Local Key
- Step 5: Add the Device to Home Assistant
- Step 6: Create a Power Consumption Sensor
- Step 7: Add to Your Energy Dashboard
- Fix: Extend Tuya Developer Trail Period
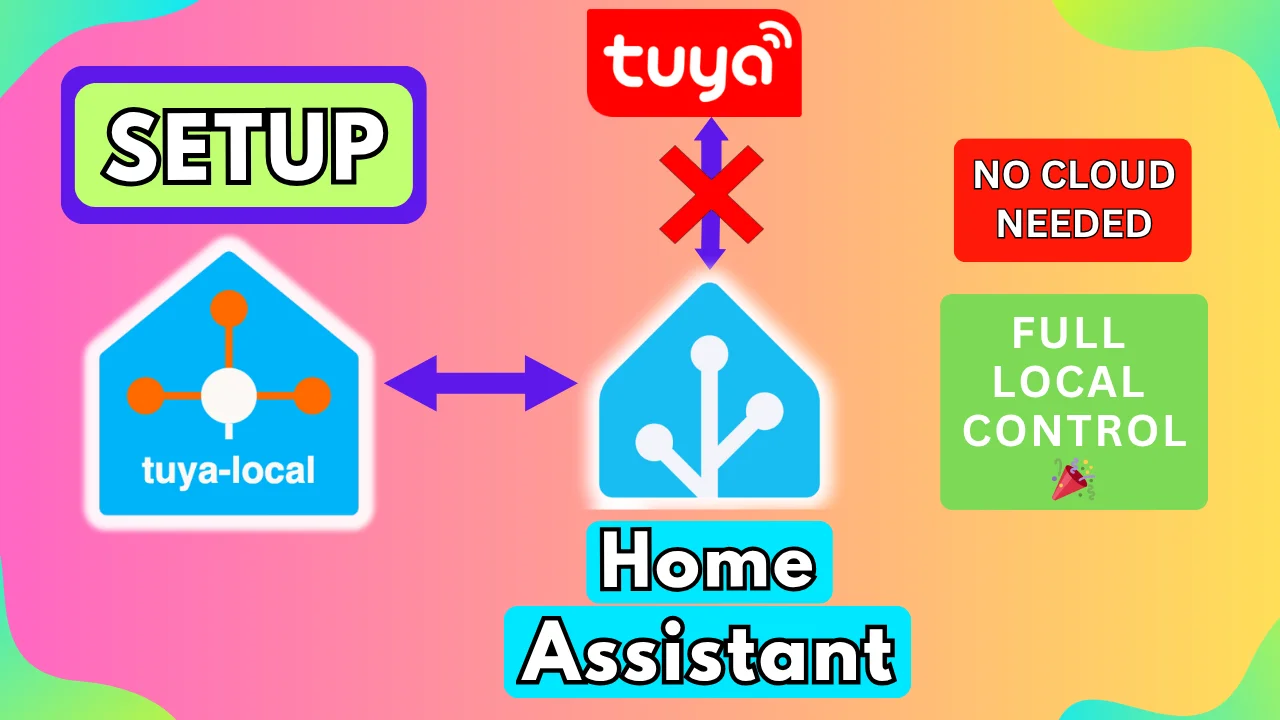
If you have Tuya or Smart Life devices, you probably want to control them locally. Relying on the cloud can cause delays, and internet outages shouldn't stop your smart home from working.
Today, I’ll show you exactly how to set up the Tuya Local integration in Home Assistant. This allows you to control your Tuya-based devices entirely on your local network. Let's get started.

Buy Tuya Wifi Smart Plug:
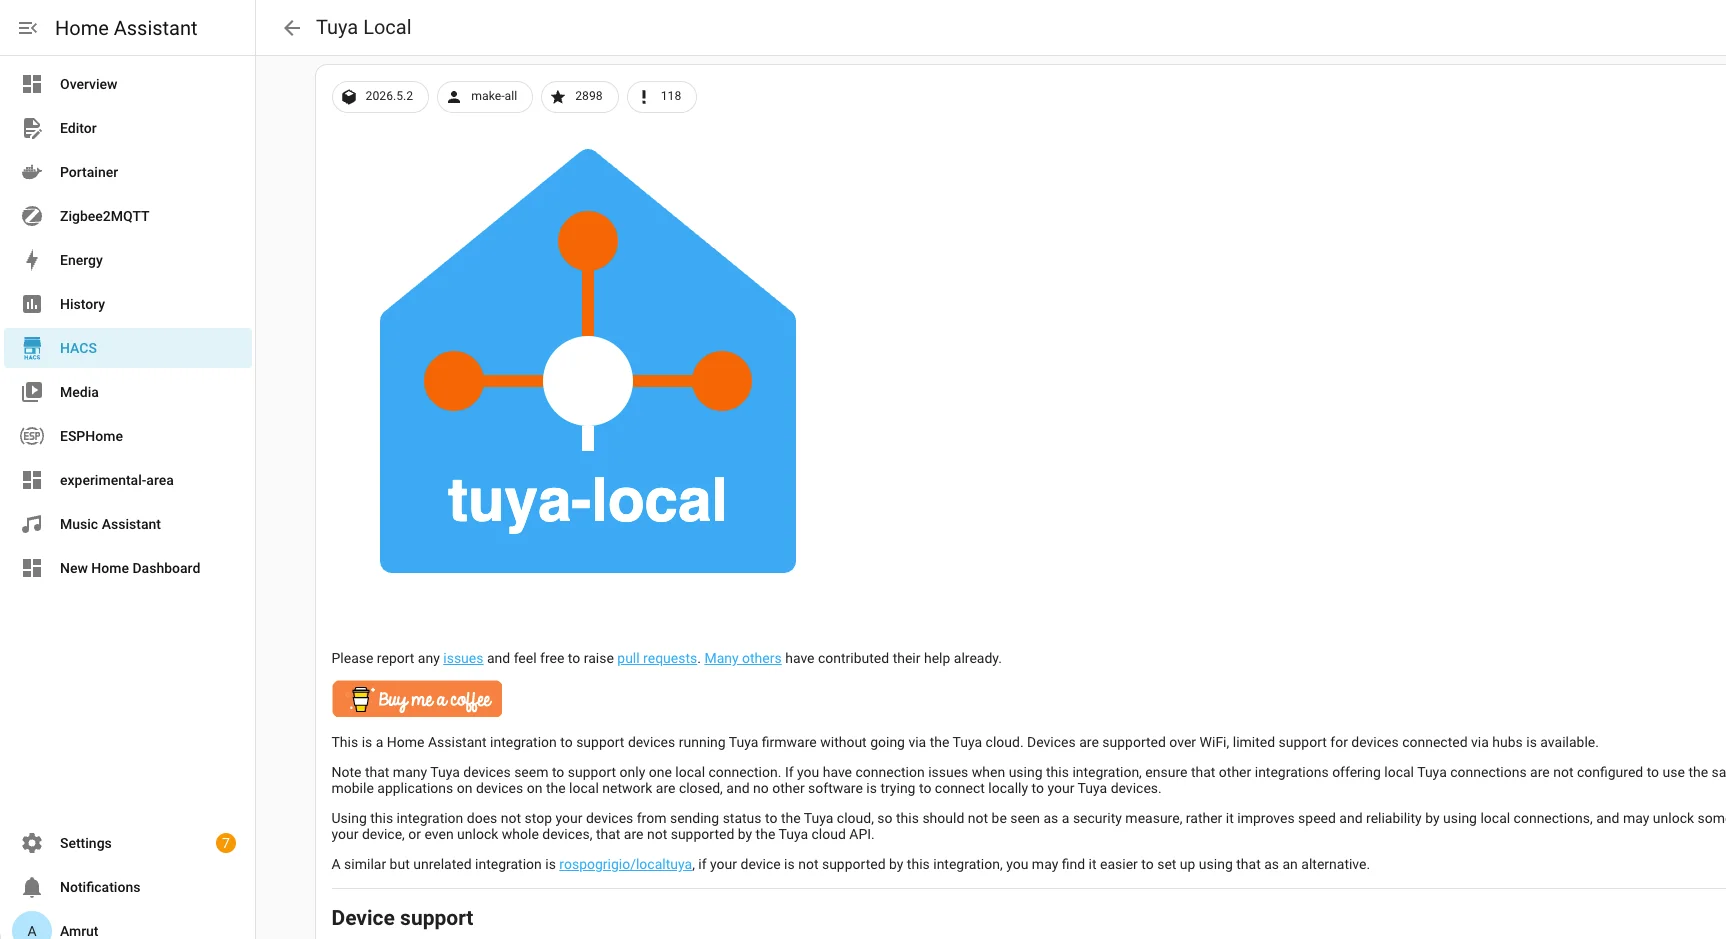
Step 1: Install Tuya Local via HACS
First, we need to install the Tuya Local app using HACS (Home Assistant Community Store).
-
Go to HACS in Home Assistant.
-
Click on the three dots and select Custom Repositories.
-
Paste the repository URL ("https://github.com/make-all/tuya-local") for Tuya Local and select Integration as the category.
-
Click Add.
-
Once added, search for Tuya Local in HACS, click on it, and hit Download.
Step 2: Create a Tuya Developer Account
To control devices locally, we need to extract their unique identifiers from Tuya's backend.
-
Go to developer.tuya.com and sign up for a free account.
-
Once logged in, go to Cloud from the left menu and click Project Management.
-
Click Create Cloud Project.
-
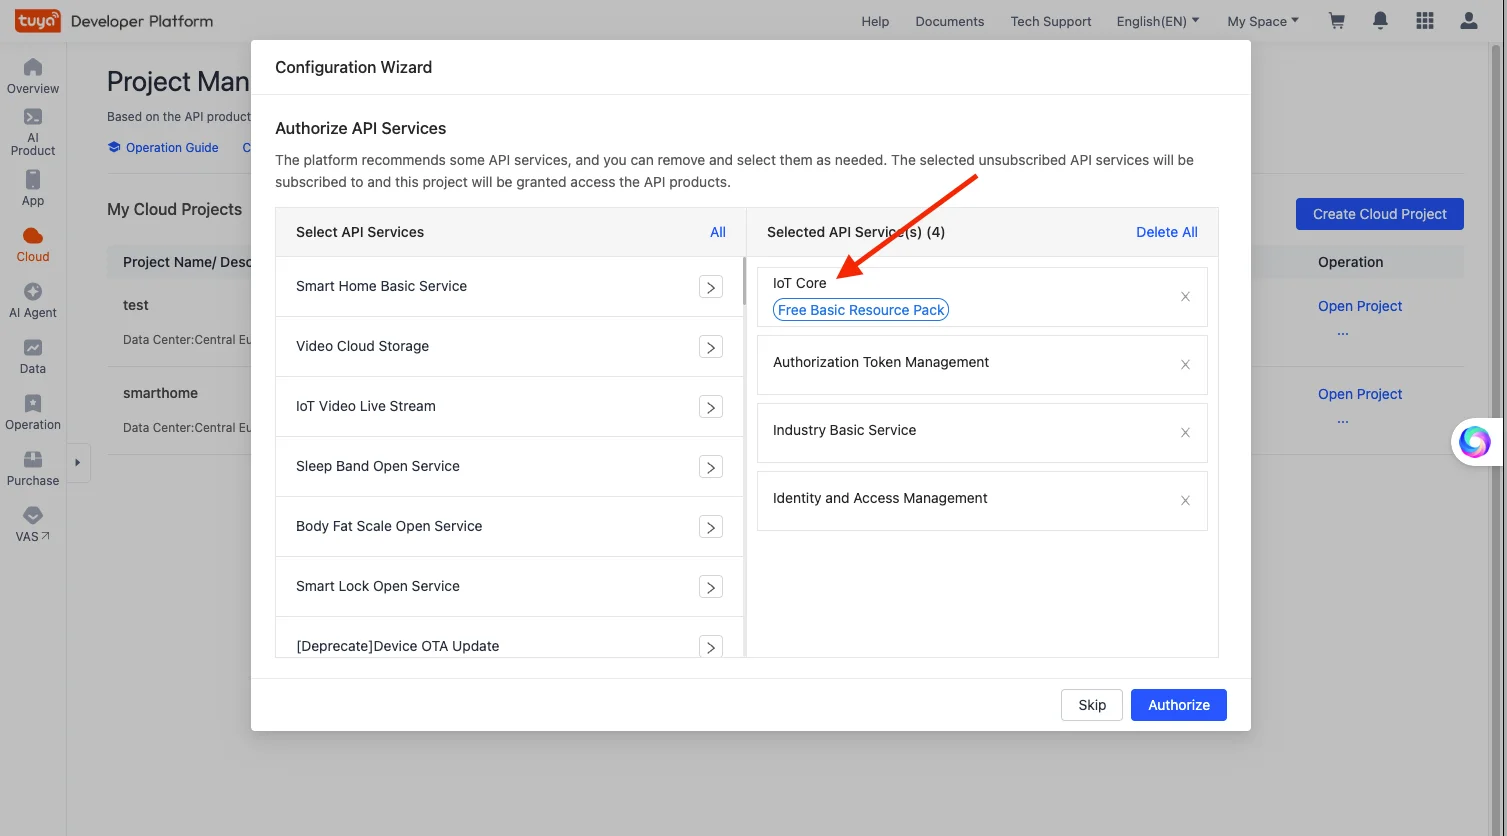
Name it (e.g., "Smart Home"), select "Smart Home" for the industry, and pick your local Data Center.
-
Click Create. Make sure the IoT Core service is added and click Authorize.
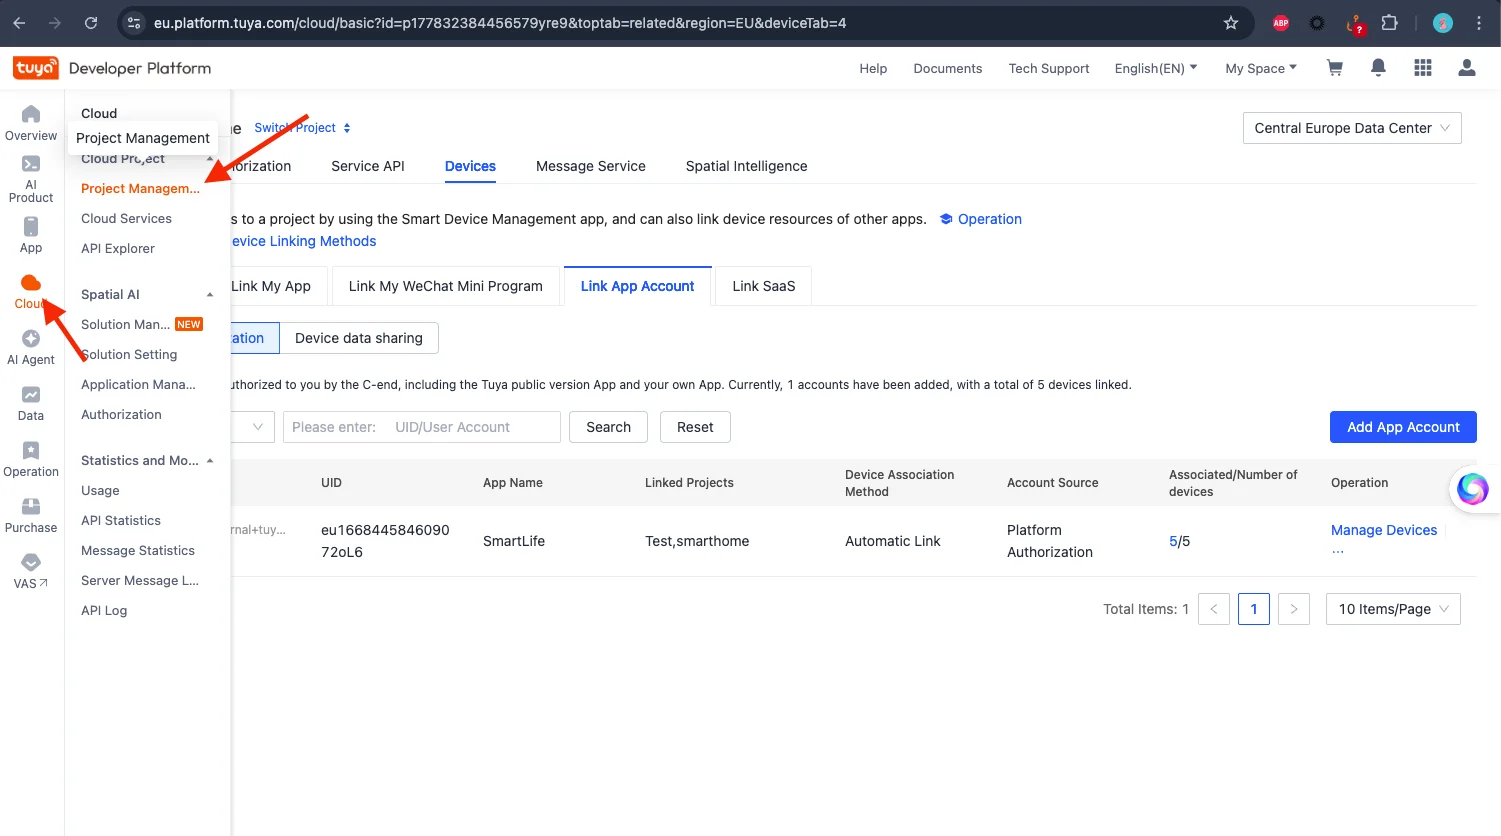
Step 3: Link Your Smart Life App
Now, let's link your mobile app to your developer project.
-
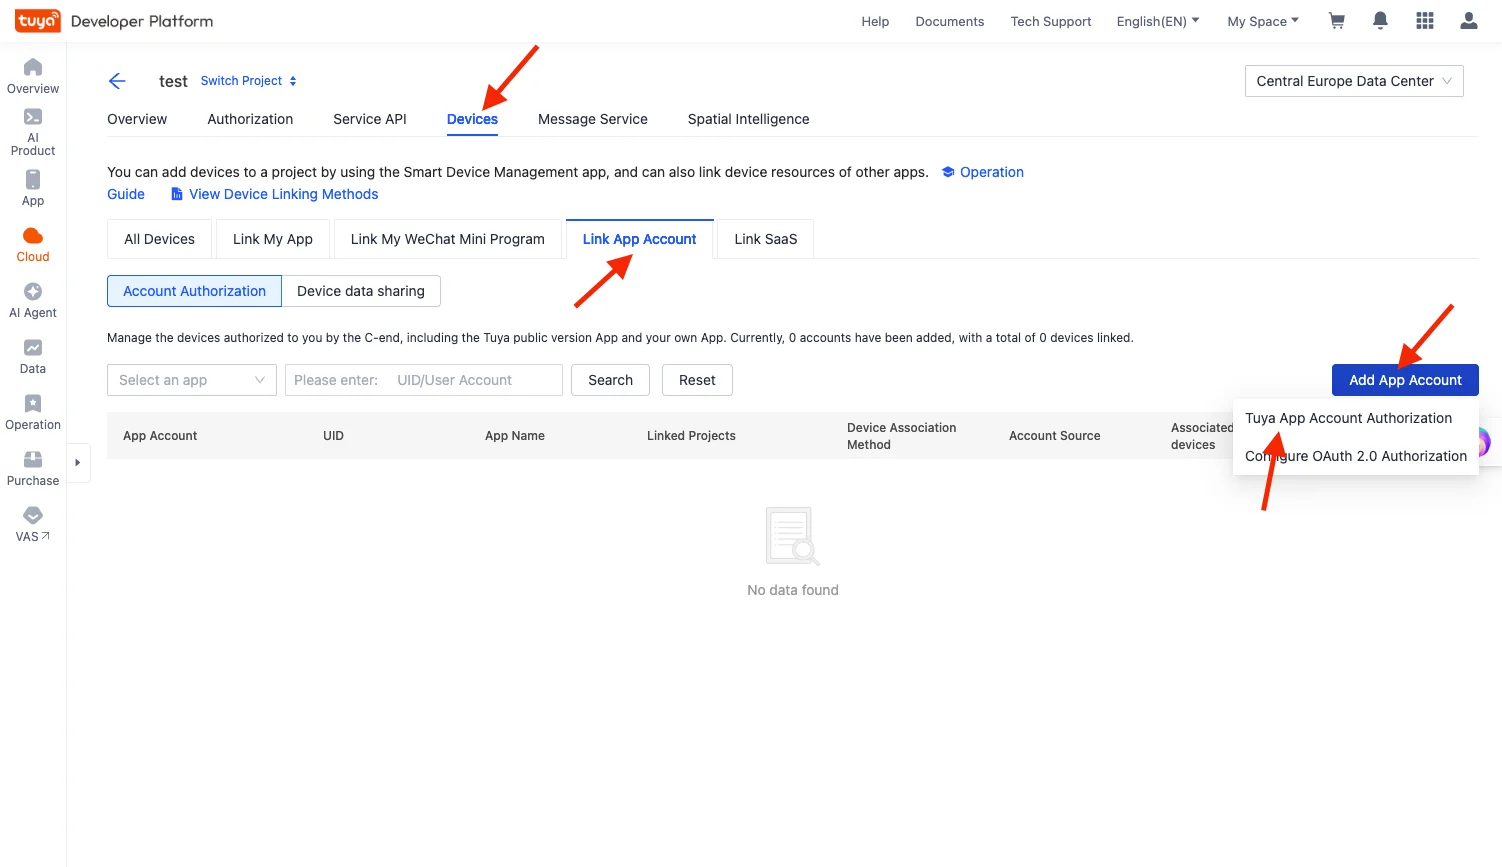
Open your newly created project and go to the Devices tab.
-
Click Link App Account, then Add App Account.
-
Select Tuya App Account Authorization. A QR code will appear.
-
Open your Smart Life app on your phone. Tap Add (+) and select the scanner icon.
-
Scan the QR code on your computer screen and confirm the login on your app.
-
Back on your PC, select Automatic Link and click OK.
Your Tuya devices will now populate in the developer portal!

Step 4: Get Your Device ID, IP Address, and Local Key
To connect the device to Home Assistant, we need three pieces of information.
1. Device ID:
- In the Tuya Developer Portal (under your linked devices), copy the Device ID for the smart plug you want to add.
2. IP Address:
-
Log into your home router's admin page.
-
Find your smart plug in the connected devices list and copy its local IP address.
3. Local Key:
- Back in the Tuya Developer portal, click on Cloud > API Explorer.
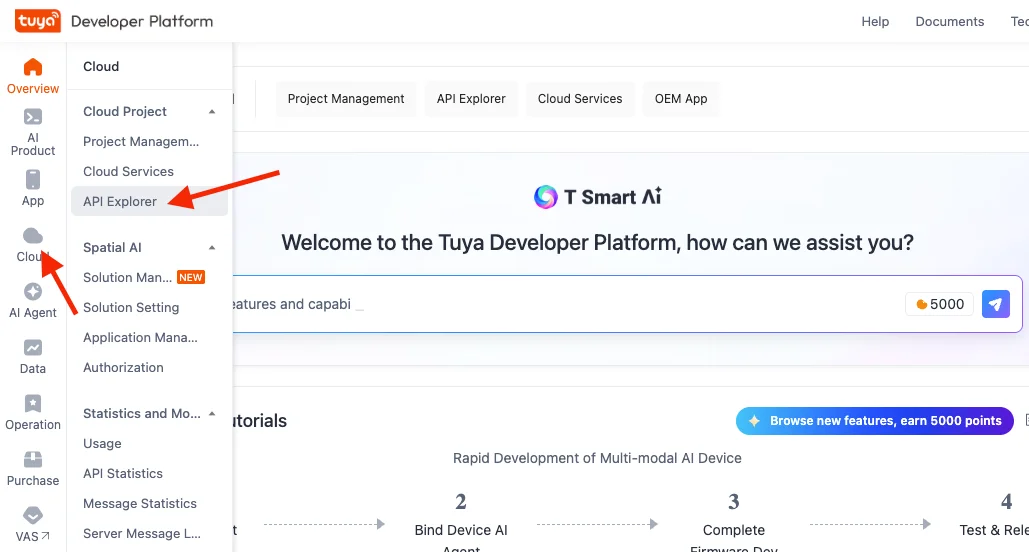
-
Go to Device Management and scroll down to Query device details.
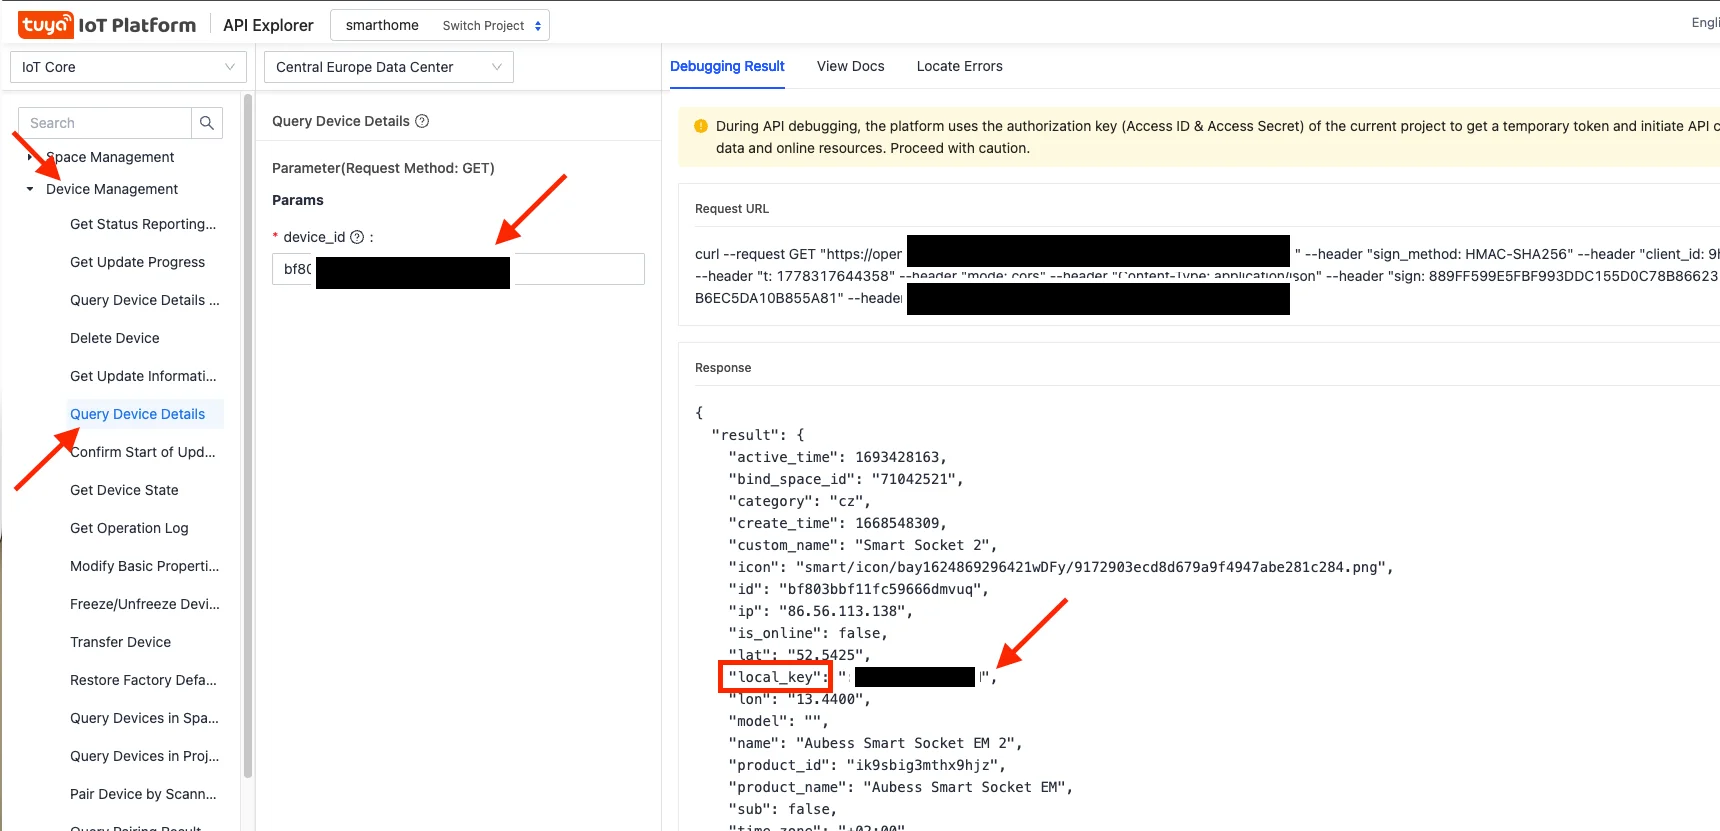
-
Paste your Device ID and click Submit Request.
-
Look at the response output on the right side. Find and copy the local_key.
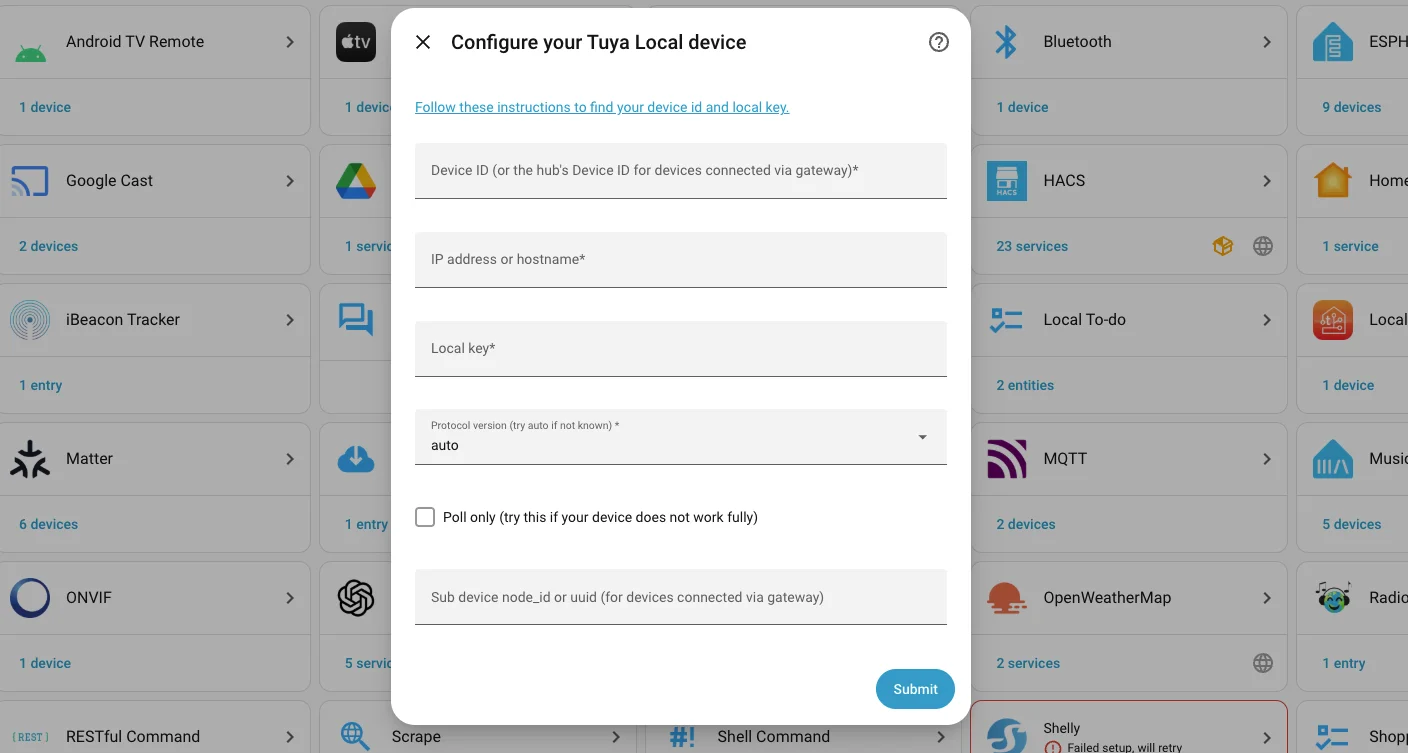
Step 5: Add the Device to Home Assistant
Now we bring it all together in Home Assistant.
-
Go to Settings > Devices & Services > Add Integration.
-
Search for Tuya Local.
-
Select Manually Provide Device Connection Information. Click Next.
-
Paste your Device ID, IP Address, and Local Key.
-
Set the Protocol to Auto and click Submit.
-
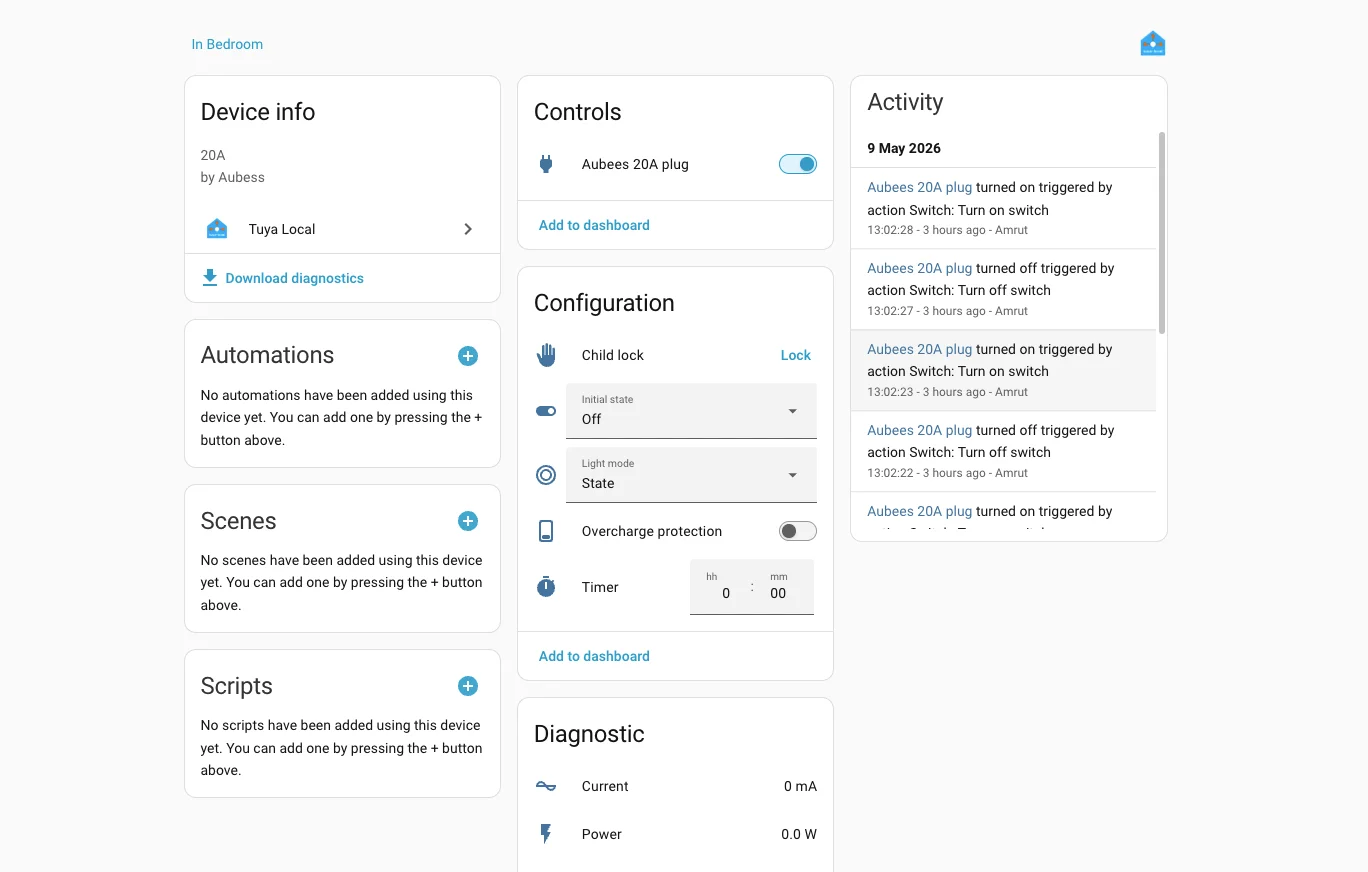
Select your specific device type from the dropdown (e.g., Aubess 20A Plug).
-
Name your device, assign it to an area, and click Submit.
You can now toggle your device instantly over your local network!
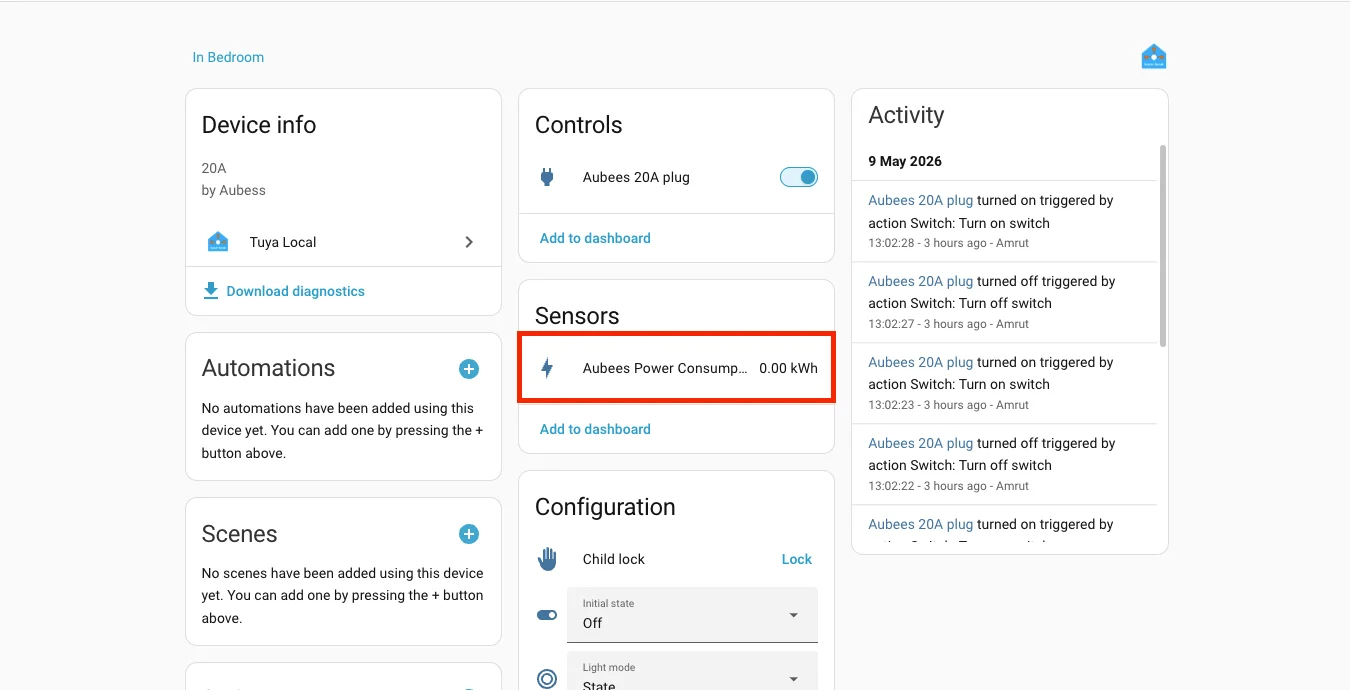
Step 6: Create a Power Consumption Sensor
If you are using a smart plug with energy monitoring, you will notice it provides power (Watts), voltage, and current, but not total power consumption (kWh) out of the box. Let's fix that.
-
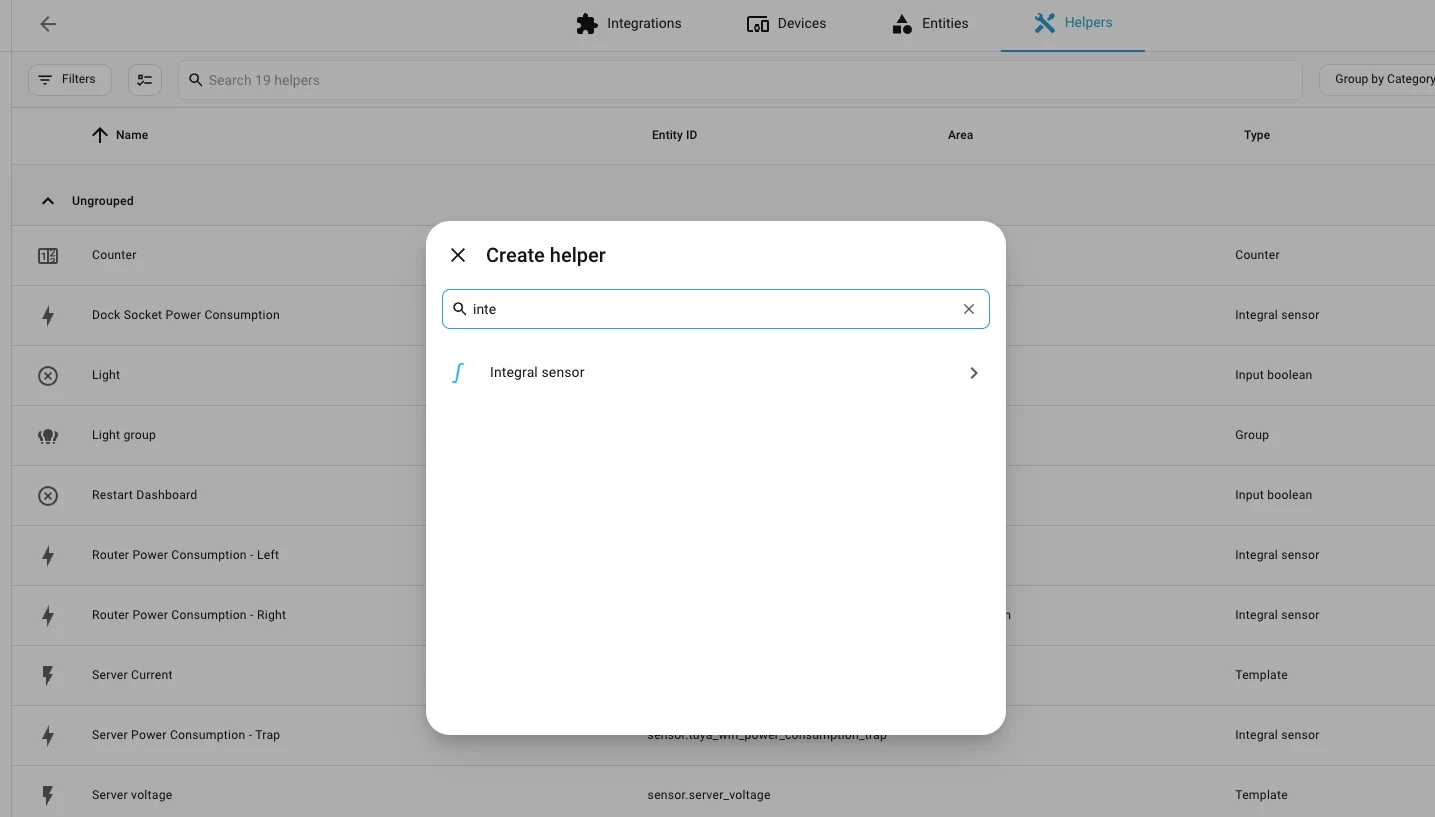
Go to Settings > Devices & Services > Helpers.
-
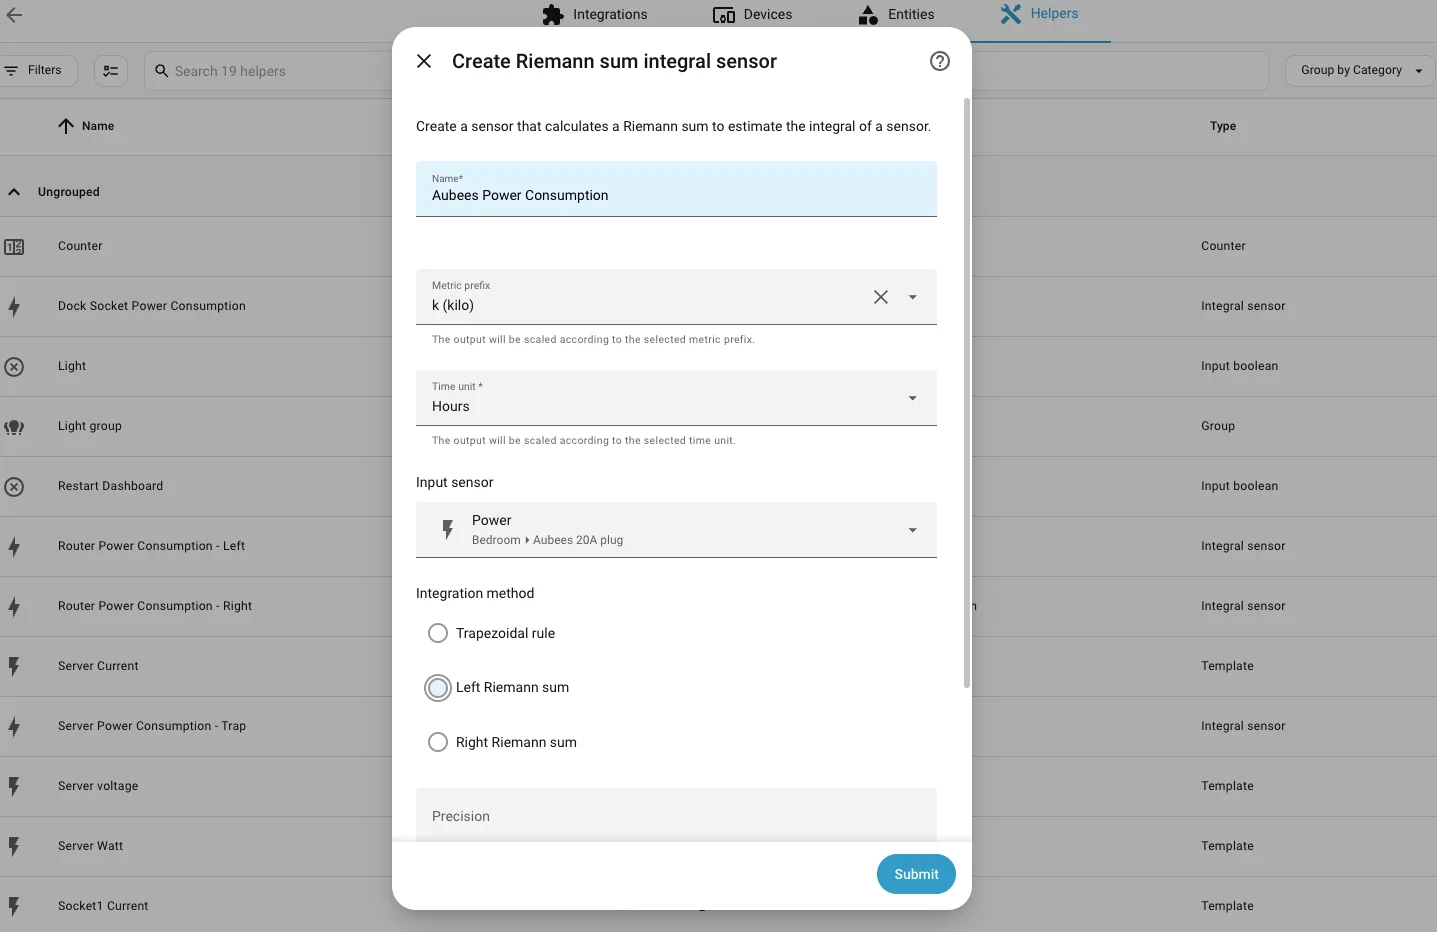
Click Create Helper and search for Integration - Riemann sum integral sensor.
-
Name your sensor (e.g., "Smart Plug Power Consumption").
-
Select your plug's power entity as the Input sensor.
-
Set the Integration method to Left Riemann sum.
-
Set the Metric prefix to kilo and the Time unit to hours.
-
Click Submit.
Step 7: Add to Your Energy Dashboard
Finally, let's track this data.
-
Go to your Energy Dashboard.
-
Click Edit.
-
Under Individual Devices, click Add Device.
-
Select the new power consumption entity you just created.
-
Click Save.
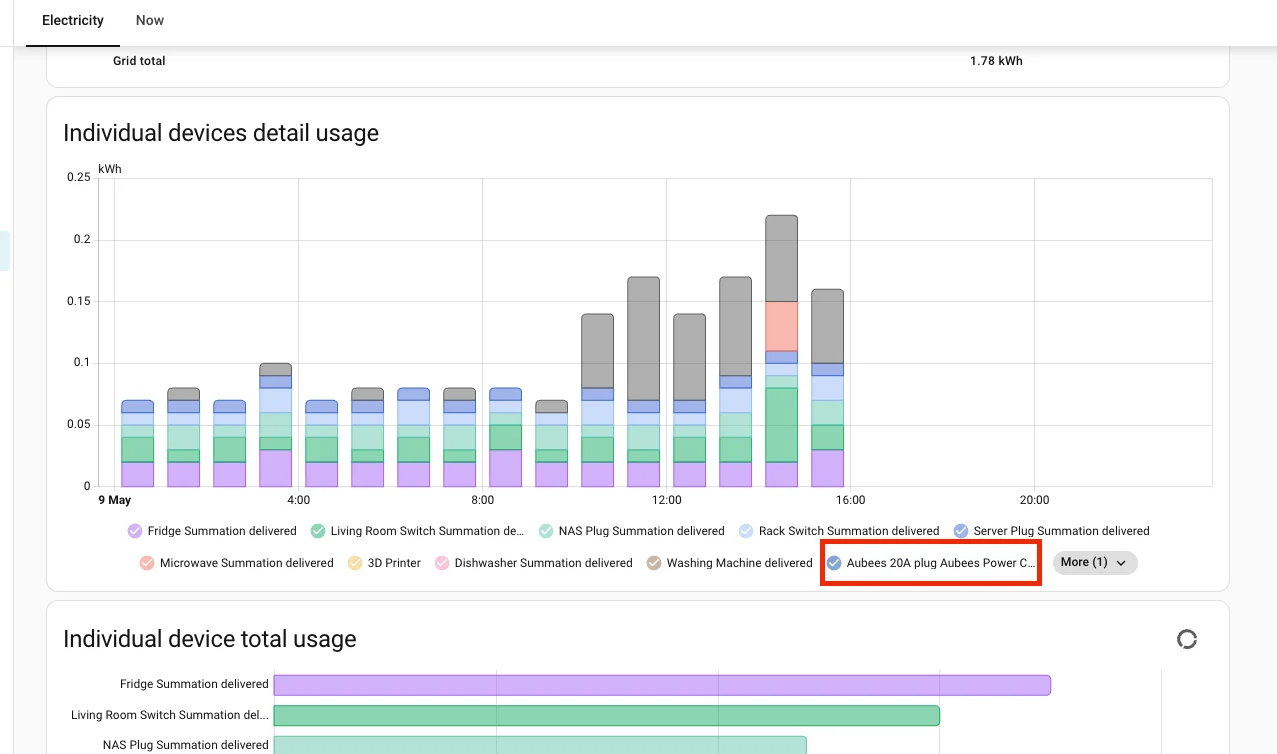
That’s it! You have successfully bypassed the cloud and set up local control and local energy monitoring for your Tuya devices.
Buy Tuya Wifi Smart Plug:
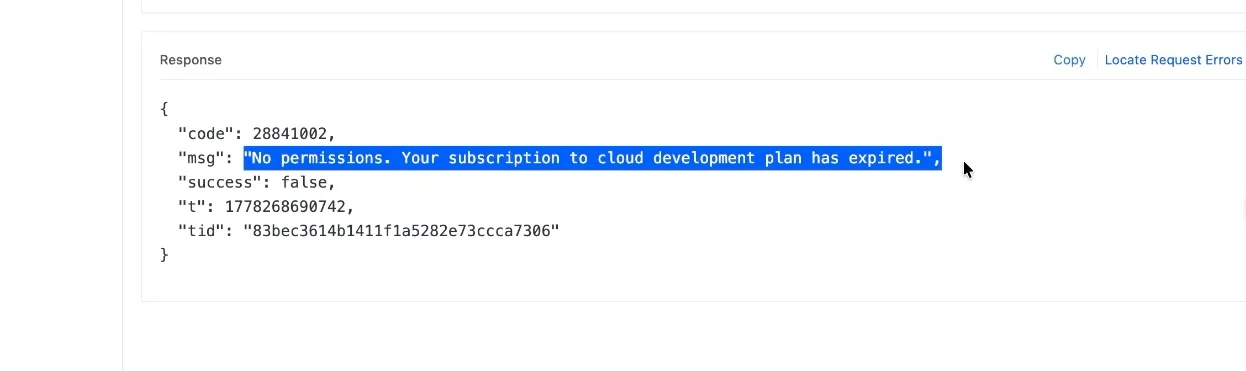
Fix: Extend Tuya Developer Trail Period
In case you are facing an error as shown below while fetching the local key for your Tuya device, then you can visit this guide to extend your IoT core service trail period